Making your first knife : a utility knife 26 July 2021
You have decided to start making knives ! Here is a step-by-step guide to making your first knife. This article shows in detail all the steps to take with some details on the methods used, the practical side, the tips and the mistakes not to be made !
This article is aimed at beginners who want to make their first knife. The material used in this example is common and can be found in any DIY workshop.
The design : sole plate
As a beginner, it is necessary to start with a simple design in order to have to carry out simple operations and thus rather easy to master and not requiring complex tools !
Here is what the structure of such a knife looks like :

Some important terms
|
Bevel : this is the bevelled part that starts at the back of the knife and tapers to form the cutting edge. Ricasso : it is the flat part between the blade and the front of the handle. |
 |
Before you start
The materials
Here's what you need to get started :
- An XC75 steel plate (ideally of section 3x30 and length 200 to 250 mm depending on the size of the knife).
- Two wooden plates (minimum size 30x110 thickness 5 to 7 mm).
- 3 nails (steel or brass rod, diameter 2 to 3 mm).
|
Materials.
|

Tools and consumables
Here are some tools to gather :
- Drill press and drill set.
- Steel cutting equipment (hacksaw, grinder).
- Wood cutting equipment (hand saw, scroll saw, bocfil).
- Metal sanding equipment (disc or belt sander, sanding block).
- Wood sanding equipment (disc or belt sander, sanding block).
- A good flat file with a smooth edge.
- A good half round file.
- Set of small clamps or spring clamps.
And consumables :
- Dry abrasive paper (80, 120, 240, 320 grit).
- Sanding paper for bodywork (80, 120, 240 grit), but everything can be done with dry paper.
- Steel wool 5/0.
- Epoxy glue (Araldite slow type)
- Alcohol.
- Paper towels.
- Disposable gloves.
Template
Here is a proposal for a template. Approximate dimensions :
- Blade 28 mm high and 100 mm long.
- Handle 110 mm long.
Its ergonomic shape makes it easy to grip. According to your wishes, it is easy to customize or modify the scale.
|
Template
|

Security and protection
As with all work, remember to protect yourself :
- Cutting : glasses and gloves (and fix the piece).
- Drilling : glasses (and fix the part).
- Sanding : suitable dust mask.
- Gluing : disposable gloves and ventilated area.
Preparation of materials
Steel
Your steel bar is raw ! You have to prepare it a little.
- If the bar is slightly bent (which can happen when cutting), gently straighten it by checking for straightness with a straightedge. Use leather- or wood-covered chucks to avoid marking the steel with the vice jaws. Proceed very gradually, checking each time.
- File the edges to have a correct surface condition and bring it to approximately the right width, here 28 mm.
- Clean the surface with a sander or with coarse sandpaper (80 or 120) on a sanding block or with a sander, making sure to respect the flatness.
|
Cleaning and sanding of the metal plate.
|

|
Straighten the bar if necessary
|

|
The steel bar cleaned and ready for use
|

Plates
It is necessary to:
- Check the thickness of the two inserts to be sure of the symmetry. If necessary, sand the thicker insert with a coarse paper (40 to 80) to reduce its thickness.
- Correct the flatness by sanding them on a marble (a sheet of abrasive on a glass or wood plate). You can mark the surface with pencil lines to make sure you are sanding all over.
- Grind the surface of the side that will be visible on the knife (mark the inner side).
- In the example in this article, cut this large wafer into two wafers !
|
Sanding and flattening of the inserts (120 grain abrasive). ") |
After a little dust  |
|
The wafers are ready to be used.  |
Cutting of the blade and the sole
Transfer of the template
Print the template and check that it is to scale. To make it easier to transfer to the steel, glue it to a piece of cardboard and cut it out. Transfer the template to the metal plate with an indelible marker.
|
The template ready to be transferred.  |
|
Ready for the next step.  |
Steel cutting - the hollows
The concave parts are the most difficult to cut without special equipment (backstand wheels for example)... With a reduced tooling, you can use one of the following methods :
-
The postage stamp: a series of holes are drilled to be able to "tear" the metal like on the old postage stamps. Draw a line 2 mm from the cut. Place marks every 4 mm. Mark them with a punch. Drill all the marked places with a 3 mm diameter drill bit. There is about 1 mm of metal between each hole. Re-drill with a 4 mm drill bit. There is almost no metal left and the excess can be easily removed (you can use the disc machine if there is still a little too much metal in some places). The finishing is done with a file, then with sandpaper.
-
The comb : with the diskuse, we make fine grooves starting from the edge which come to tangent the limit of the cutting. Once the shape has been sketched, the teeth are cut at an angle. The finishing is done with a file, then with sandpaper.
- The bocfil : it is the saw of jeweller. It requires patience but the cuts are precise.
|
The first drillings for postage stamp cutting.  |
|
The series of 3 mm holes.  |
|
And here is the cutting, after the drilling at 4 mm.  |
|
The comb.  |
Finishing of recesses
The final shape of the recesses is made with a half round file. For finishing, use sandpaper on a support.
|
Shaping with a half round file for the small hollow.  |
|
With a good file, you get a lot of work and filings done !  |
|
Finishing with the file as a support for the abrasive paper.  |
|
The sanding block with the sanding paper on top that allows to take advantage of the good diameter rounding. 
Any other support with the right diameter can be used (200 mm on the template in example) |
|
The wedge at work.  |
|
Here are the two hollows completed.  |
Steel cutting - the contour
It is time to finish the overall shape of the knife by cutting away the excess metal. You can use a hacksaw or a disc machine. Finishing is done with a file, then with sandpaper.
Be careful not to make the tip too thin. You must leave a little material (0.5 to 1 mm) above. This excess will eventually be removed during the finishing touches if the tip is not sharp enough. Indeed, the point, which has a very small cross-section, can easily be damaged during heat treatments or during the finishing of the cutting edge.
|
Rough cut with the disc machine.  |
|
The final shape.  |
Coarse sewing
Guiding device
To do the grinding, it is interesting to use a device that allows a clean transition between the ricasso and the grinding. It allows to guide the file to ensure alignment and symmetry.
|
Guide to emouture.  |
This very practical device can easily be replaced by two metal plates, drilled (with precision) and tightened by bolts. One of the edges will be levelled and sanded to serve as a guide.
File virtuosos may be able to do without guidance, but such a device helps to avoid clumsiness.
Preparation
In order to have the right markers, you must draw :
- The future edge of the blade, centered on the thickness. Use a fine indelible marker or a scribe (possibly with marking ink beforehand).
- The line between the emouture and the ricasso.
- The bevelled area that will need to be removed. To do this, draw a line parallel to the edge about 20 mm from the edge. To be effective in terms of cutting, the bevel should not be too low !
|
The line of the future thread.  |
|
The hatched area is what needs to be removed...  |
Roughing
Trimming requires removing a lot of material. This work can be done entirely with a file but it is tedious. This work can be made easier by removing some of the material with a disc cutter beforehand :
- In order to be accurate, a small (125 mm) disc cutter is less painful to handle.
- Use a thin disc instead of a deburring disc: it is not very conform to the rules, but the work will be all the better in terms of precision.
- However, be careful not to press too hard because this kind of thin disk (often 1.6 mm) remains fragile.
- Use the set at a low angle so as not to create "holes".
- Never stay in one place for a long time (yet another way to make "holes").
- Be very careful around the point because there is little material.
- Keep a careful distance (2 mm) from the future ricasso.
- Secure the blade with a sturdy clamp.
- Alternate the work on both sides (to avoid dissymmetries).
- Leave a little less than 1 mm on the cutting edge.
|
Roughing in progress.  |
|
And that's it! The draft of the emouture is finished.   |
Base of the emouture
Now the final shape of the seam must be given. The guiding device is wedged on the ricasso and well tightened. It is necessary to work with the file :
- You guide yourself laterally by pressing the smooth edge of the file against the guide.
- On the flat, we tangent the line drawn at 20mm from the wire.
- At the cutting edge, we make sure to leave about 0.5mm.
- We alternate the faces in order to have a correct symmetry.
- You can use a marker to see exactly where the file removes material.
Unless you are a virtuoso with the file (or use a system that allows you to precisely control the angle of the file), the resulting grind will be slightly convex. This is a profile that is quite suitable for many purposes.
This base will serve as a starting point for the rest of the blade.
|
The guiding device in place.  |
|
The beginning of the work with the file.  |
|
The result.  |
Finalization of the sewing process
To finish the seam, you can use different tools :
- Flat file.
- Sanding block with coarse paper.
- Belt sander.
- Drill with a sanding disc.
Using the seam base as a guide and/or reference point, the seam is created up to the tip :
- Flattening of the bevel.
- Work alternately on both sides.
- You can mark the areas where the yarn is too thick with a marker to know where to remove material.
- Make sure to have a constant wire thickness of about 0.5 mm.
|
The drill equipped with a sanding disc.  |
|
Work with a sanding disc.  |
|
Use of the marker to visualize overthicknesses of the wire.  |
Finalization of the surface finish
To refine the work, we will make a sanding of the worked surfaces with a paper of average grain (120) in order to have a correct surface state. For this, we will use a sandpaper (dry or wet) held on a hard support (a file for example).
Note for all sanding Always use a sanding pad. Indeed, if the surface is not perfect, with hollows and bumps, sanding with the hand held abrasive will give nice hollows and bumps! With a block or a support, the abrasive will show the high points and we will manage to eliminate them progressively until we obtain a good flatness. For a better visibility, you can use an indelible marker.
|
Finalization of the grinding. Abrasive 120 grit with a file as a support.  |
|
The emouture is finished.  |
|
The ricasso/blade thread junction.  |
Drip stop
Last little detail (optional) to finish the blade: the drip stop.
The drip stop is a small hollow located between the ricasso and the beginning of the thread. As its name indicates, it is used to stop a drop that would ooze along the wire. But its main purpose is to facilitate sharpening by separating the wire from the ricasso. The beginning of the wire is therefore easily accessible with a stone. It is done with a round needle file. It is necessary to take care to align it well with the ricasso.
|
Creation of the stop-drop (we wedge the file with the nail). ") |
Drilling of the sole
It is now necessary to drill the sole. Transfer the location of the nails on the sole, point and drill. Ideally, use a drill bit one tenth of a millimeter larger than the diameter of the nails. This will prevent the wood from splitting during assembly by forcing the nails in...
|
The holes for the nails.   |
Optionally, to make the final knife less heavy in the hand, we can lighten the sole by drilling multiple holes. Near the junction ricasso/handle, we will make small diameter holes (3 mm) in order not to weaken this zone which is the one where the mechanical constraints are the strongest. We can increase the diameter as we get closer to the heel of the knife.
|
The finished sole.  |
Finalization
Once the holes are drilled, a general cleanup is done :
- The edge of the blade is sanded (medium grain 120).
- The sole is sanded with a coarse grain (50 or 80), we will take care to remove the burrs of drilling.
- The blade and ricasso are sanded with medium (120) and fine (240) grit.
The blade is ready for heat treatment.
|
The blade is ready for heat treatment.  |
Heat treatments
Heat treatments are intended to give the blade its cutting qualities and resilience. This step is very important because most of the quality of a blade is based on the heat treatments (the rest is the design and the choice of steel).
Here is the sequence of heat treatments:
- Normalizations : the purpose of normalizations is to reduce the grain of the steel. In general, three heating/cooling cycles are performed. With our XC75, normalizations are not required, the grain being already fine.
- Hardening : this is the step that will give the blade its hardness. The blade is heated to tempering temperature (between 790°C and 810°C - see our technical data sheet) and cooled quickly in oil.
- Tempering : after tempering, the blade is very hard but brittle. This brittleness is due to the internal stresses generated during the tempering process. Tempering will eliminate a large part of these stresses. The blade is maintained at 220°C for 1 hour. Thus, we gain a lot in resilience and we lose a little in hardness.
In the case of a first knife and if you do not have the required equipment, we strongly advise you to entrust us with the heat treatment of your blade.
After hardening, the blade must be cleaned :
- If there is scale (a black and very hard oxide layer), one night in a white vinegar bath is enough to remove it.
- A sanding allows to have clean surfaces. The sole will be coarsely sanded (80 grit), the scratches facilitating the adhesion of the glue. The blade will be sanded with a medium grain (120).
- During the hardening process, the steel may undergo a slight surface decarburization. In order to have a wire with the best qualities, a thin layer of steel must be removed from the wire. It then appears clean and shiny.
|
The blade after a hardening.  |
Final sewing
With an edge of 0.5 mm thick, the blade will not cut! You will have to refine the edge to about 0.1 mm thick. It is a job of patience, because now that the edge is hardened, the material is much more difficult to remove !
To finish the seam, you can use different tools :
- Sanding block (or file) as support with coarse paper.
- Belt sander.
- Drill with a sanding disc.
- Guide for sewing to protect the ricasso (replace it carefully in the same place as before).
Here are the points to consider for this step :
- Work alternately on both sides of the seam.
- Check regularly the thickness of the wire and its straightness.
- You can mark the places where there is too much material with a marker for a precise work.
- If a sander is used, absolutely avoid overheating which will soak the blade! Proceed in small increments, allowing the steel to cool.
- Lower the wire to a thickness of 0.1 mm.
|
Ready for sharpening.  |
Finish
Among the many finishing options, two are particularly accessible and easy to implement :
- Drawn lengthwise : the blade is sanded lengthwise. First the ricasso is sanded, then the blade. This can be done with a medium (120) to fine (320 or 400) grit.
- Matte : we sand the blade to a fine grain (400) and leave it overnight in white vinegar. It will come out matte gray.
For lengthwise pulling, abrasive strips can be attached to a file with clamps.
|
The abrasive attached to the file.  |
|
The movement of the long shot.  |
Platelet preparation
It is now time to take care of the plates. We will keep the most beautiful of the faces for the visible part. A mark on the inside will serve as a marker.
Drilling
We position on a drilling support :
- A martyr (which avoids splintering the wood of the insert when the drill comes out).
- One of the plates.
- The blade
The whole is solidly fixed by clamps.
The holes for the cross nails can then be drilled.
Before disassembling, the outline of the sole should be transferred to the plate to guide the cutting. Draw a line parallel to the edge of the ricasso to shape the front of the handle.
|
The drilling device.  |
|
Drilling.  |
|
The contour of the sole is transferred to the plate.  |
|
The wafers are drilled and ready for cutting.  |
Rough cut
Using the previously drawn outlines as a guide, roughly cut the wafers with a small margin. Any cutting method can be used, for example :
- Small wood saw.
- Bocfil.
- Scroll saw.
|
The insert and the scroll saw.  |
|
The cut plates.  |
Shaping of the front of the plates
Before the final assembly of the knife, it is necessary to work on the front of the handle because once the plates are glued, this area will no longer be accessible !
Check by blank assembly that the front of the plates is parallel to the edge of the ricasso and that the distance between this edge and the front of the handle is not too small.
In order to have a good symmetry of the plates, they are joined by the through nails. We start by sanding the front of the plates along a line parallel to the edge of the ricasso. In a second step, we make the release at 45° at the top of the handle. Be sure to be perpendicular to the face of the inserts. This will establish the final contour of the front of the handle.
|
Blank assembly.  |
|
The plates solidified, with the front sanded (the two plates are perfectly aligned). ") |
Go up to the blank to trace the small bevel at 45°. Then sand to remove excess material.
|
Drawing of the 45° bevel at the top of the handle.  |
|
Checking the alignment.  |
Now we have to round off this part of the handle. To do this :
- We break the angle by creating a 45° bevel (sanding block or sander with 80 grain).
- Then we break again the two angles thus created.
- The two plates are fixed in a vice (with clamps to avoid marking the wood).
- Then we round the whole with alternating movements with a strip of sandpaper (120 grain).
- We then refine with a 240 grain, then 320.
- To finish, we pass the steel wool 5/0.
|
Principle of breaking angles.  |
|
First bevel.  |
|
After the other two bevels, almost a rounding.  |
|
The plates in the vice.  |
|
We round off this shape.  |
|
The front finished.  |
Gluing of the plates
Material for gluing
Gluing the pads to the base is the simplest method of assembly. Epoxy glue is ideal for this purpose. There are several types or brands. Araldite has proven itself. A slow setting glue allows (besides its solidity) to assemble the knife without the stress of time.
For this operation, you will need to gather some material :
- Glue (two tubes or a double syringe).
- Alcohol is the solvent for cleaning (before setting).
- A spatula to spread the glue.
- A needle or small paper clip to put glue in the nail holes.
- Disposable gloves for handling.
- Clamps or spring clamps to hold the assembly together while the glue is curing.
- Paper towels for cleaning...
|
The collage material.  |
Attention : Araldite does not like too much heat! The specifications give a limit of use of +80°C. Beyond that, the adhesive starts to soften! So imperatively be sure to limit heating when using mechanical sanding. Do the operations in small steps with rest times to allow the material to cool.
Preparation
It is necessary to make sure that the faces to be stuck of the plates are clean, without dust. We can pass them with alcohol to make sure. Wait for the alcohol to evaporate completely before gluing. The sole must be degreased. Pass it also with alcohol.
The degreased or cleaned parts must not be touched with the fingers.
Prepare the glue by placing the two components of the glue in equal parts by volume on a cardboard or wooden board. Mix thoroughly with a spatula for at least 30 seconds.
The quantity is to be estimated to allow the gluing of both sides of the plates, both sides of the sole and the filling of the holes of the sole. In this example, count about 6 grams of glue.
|
Preparation of the glue.   |
 |
The assembly
Here is the sequence of the different operations :
- Glue a plate, including the holes.
- Glue one end of the nails.
- Insert it in the holes of the plate.
|
The first glued plate.  |
|
The nails in place on the first plate.  |
- Glue the corresponding side of the sole.
- Put it on the nails.
- Lower it to the level of the plate.
|
The glued sole.  |
|
The sole on the first plate.  |
- Glue the remaining face of the sole, including all holes.
- Glue the second plate.
- Put it on the nails.
- Lower it to the level of the sole.
|
The second side of the sole glued.  |
|
The second side of the sole glued.  |
- Push the nails into the holes to center them.
- Compress the assembly with the clamps.
|
The nails are refocused.  |
|
Assembly with clamps.  |
- Clean the handle/blade junction before the glue solidifies. Wipe several times with a paper towel containing alcohol. Change each time the paper towel to avoid leaving marks on the blade.
- Place the unit in a vertical position (blade up) for a minimum of 14 hours to allow the glue to solidify. The vertical position (blade up) avoids that a possible glue burr runs on the blade.
|
The big bead of glue on the ricasso after tightening.  |
|
The same area cleaned.  |
Finish of the handle
Here is the knife assembled, but not very presentable or functional: nails sticking out, adhesive residues, glue burrs...
|
The "raw" handle !  |
For later operations, it is wise to protect the blade, a scratch when sanding the handle is quick. A rough cardboard and adhesive envelope will do the trick. The adhesive will be applied at 1 or 2 mm from the junction of the handle and the ricasso.
Sanding of the sides
First, the nails must be cut, then levelled as close as possible to the surface of the inserts. Then we go over the sides with "marble", 120 grit, then 240 and 320...
The area at the front of the handle will be taken up with the finest abrasive to remove glue residue.
|
The nails cut (and the blade packed). ") |
|
Shaved nails.  |
|
Ready for flat ("marble") sanding ") |
|
Finished sanding the sides !  |
|
The rounded area is delicately reworked to ensure continuity of form and appearance.  |
Sanding of the perimeter
Now, we'll trim the handle back to the level of the sole. Before sanding, the coarsest burrs of glue can be removed with a cutter or knife, being careful not to damage the pads. Then we will use sanding to finish.
|
The back after leveling  |
|
The two concavities.  |
Breaking of the corners
In order to have a handle allowing a pleasant grip, we will again break all the angles and round all the edges, in the same way as what was done for the front of the handle.
To round the corners of concavities, it's easiest to use a thin sanding belt on cloth backing (much softer and stretchier than paper).
|
First corner break.  |
|
We round the back of the handle.  |
|
Ditto for the hollows with the soft abrasive.  |
|
This is what it looks like.  |
To finish, we iron a fine paper (320 grain) then the steel straw 5/0 on the whole knife for an impeccable finish.
|
The finalized handle.  |
Handle protection
In order to improve the finish of the handle and to protect it, it can be brushed with a mixture of linseed oil and turpentine (50/50). Wipe off the excess, let it dry for a few hours and pass it on with 5/0 steel wool.
|
The knife ready for sharpening !  |
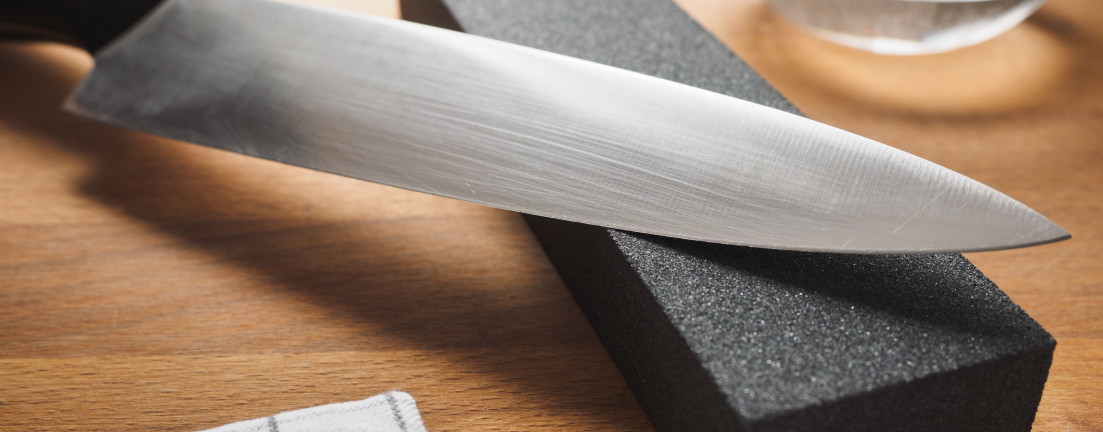
Sharpening
To finalize this knife, there remains the sharpening. The ideal is to have a set of three stones: coarse, fine and extra-fine. Natural, synthetic or diamond stones can be used.
We start with a coarse stone to create the edge. We will give more bite to the blade with the fine stone then extra-fine.
|
Sharpening on a diamond stone (blue DMT = large). ") |
|
Detail of the wire.  |
C’est fini !
This is a quality utility knife, simply made.
|
The finished knife !  |


Comments