
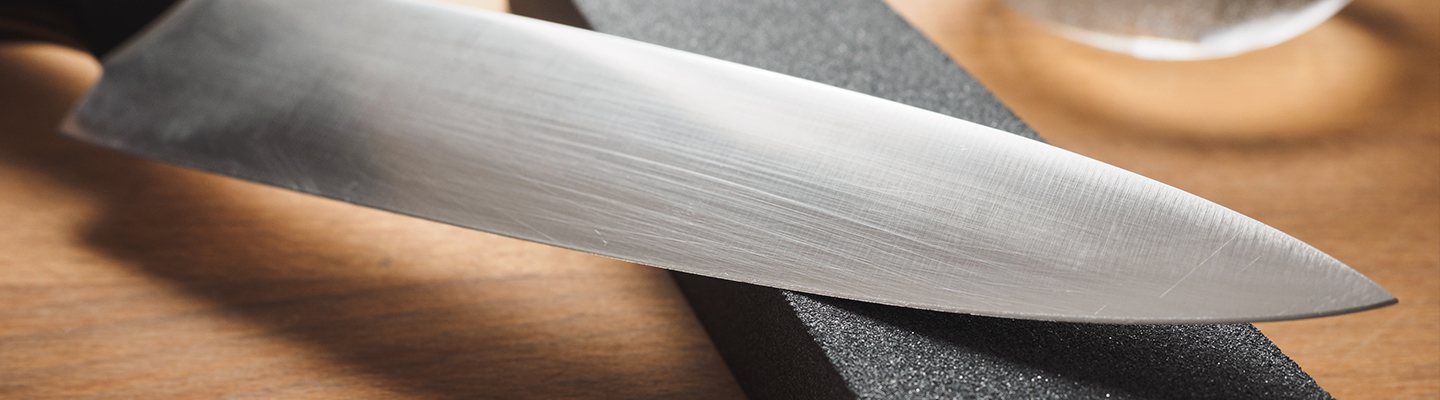
You have decided to start in cutlery! Here is a step-by step to make your first knife. This article shows in detail all the steps to achieve with some details on the methods used, the practical side, tricks and errors not to commit!
This article is oriented for beginners wanting to realize their first knife, the material used for this example remains common and present in any handyman's workshop.
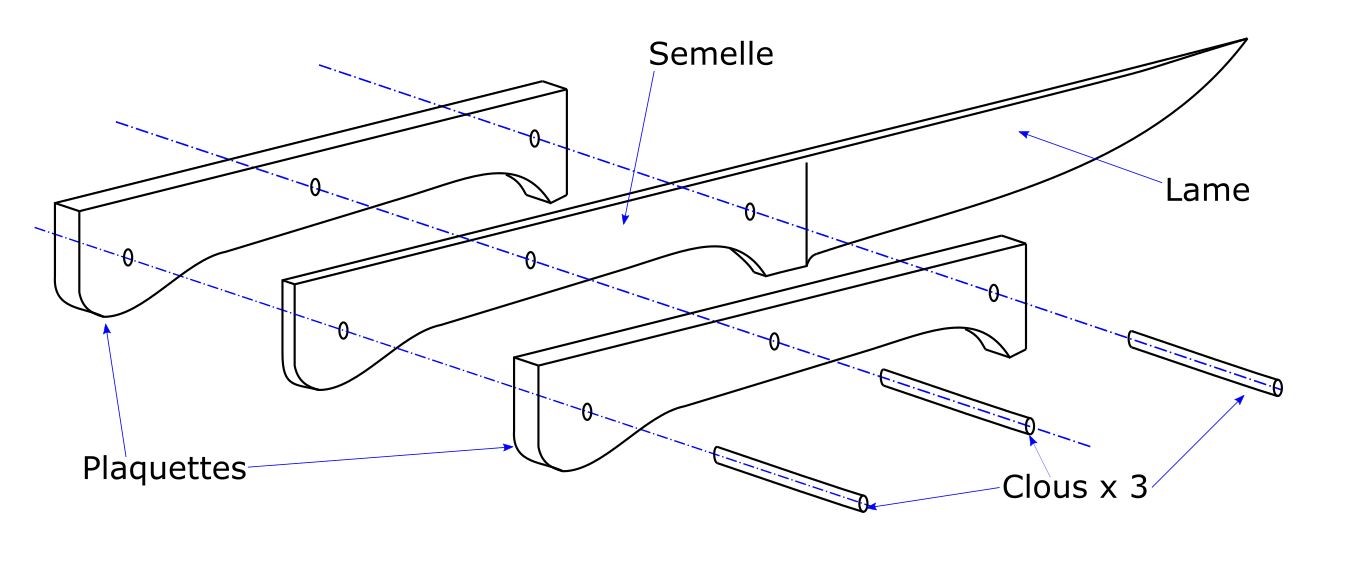
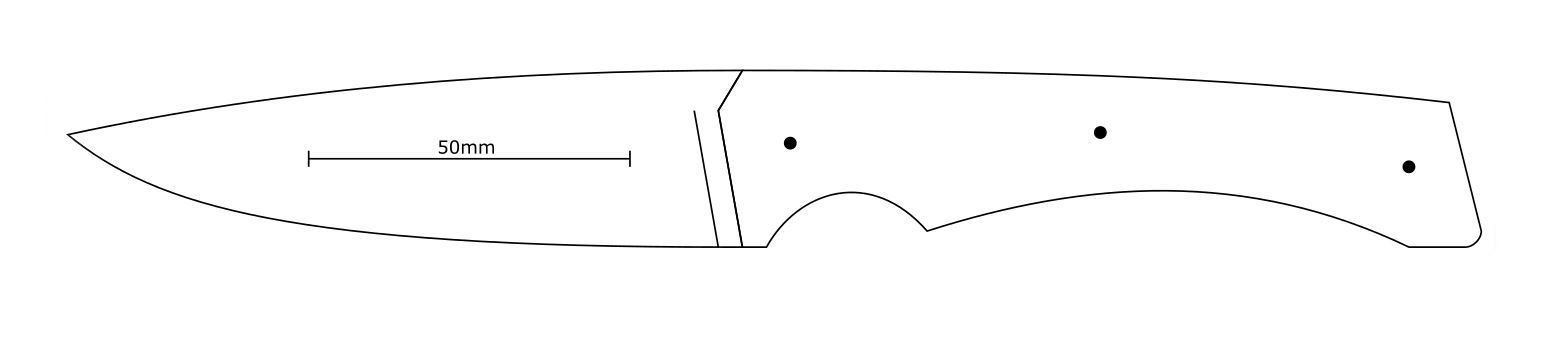
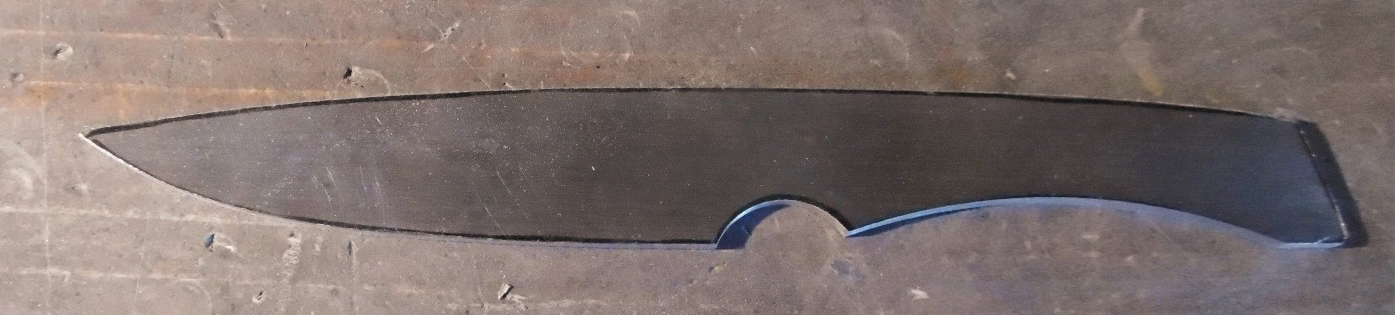
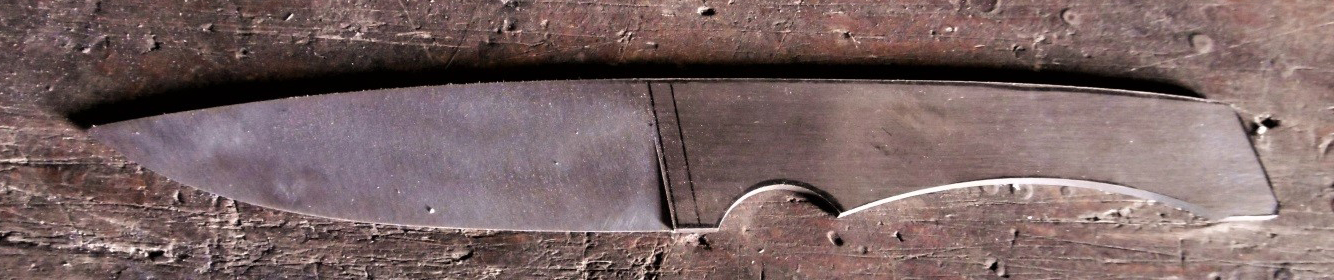
The design: a knife in sole platform
As a beginner, you have to go on a simple design in order to have to perform simple operations and therefore enough to master and does not require complex tools!
That's what the structure of such a knife is like:
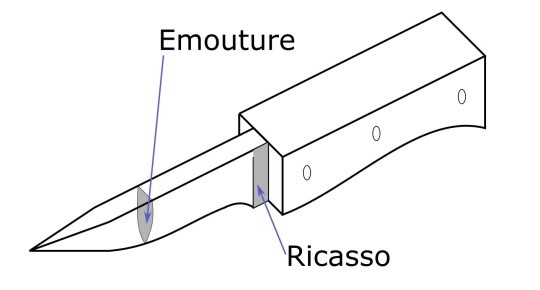
Some important terms
Emouture: This is the bevel-shaped part of the back of the knife and which can be fine to form the edge.
Ricasso : it's the flat part between the blade and the front of the handle.
Before starting the manufacture of the knife ...
The materials
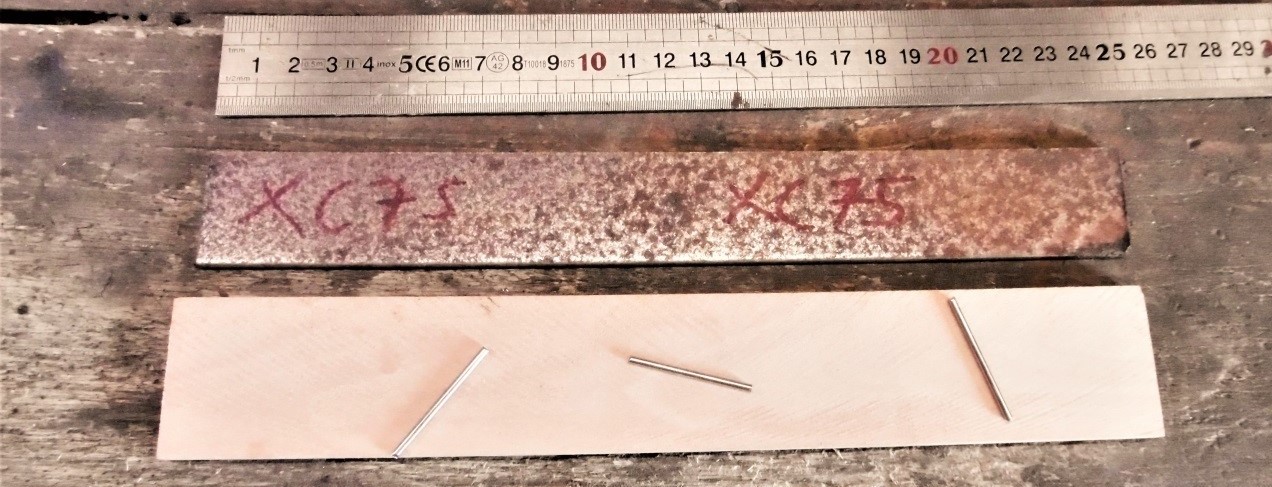
That's what you need to get to start:
- An XC75 steel dish (ideally section 3x30 and length 200 to 250 mm depending on the size of the knife).
- Two wooden plates (mini size 30x110 thickness 5 to 7 mm).
- 3 nails (steel or brass stem in diameter 2 to 3 mm).
Tools and consumables
Coutellerie tools
Consumables
- Drill on column and drill play.
- What to cut steel (metal saw, stiffer).
- Enough to cut wood (hand saw, saw saw, blockfil).
- Enough to sand the metal (disk sander or tape, sandblask)
- What sand the wood (disc or tape sander, sanding bump).
- A good flat file with a smooth edge.
- A good half round lime.
- Game of small seal or tongs spring.
- Dry abrasive paper (grains 80, 120, 240, 320).
- Abrasive body paper (grains 80, 120, 240), however, one can do everything at dry paper.
- Steel wool 5/0.
- Epoxy glue (slow Araldite type).
- Alcohol.
- Paper towel.
- Disposable gloves.
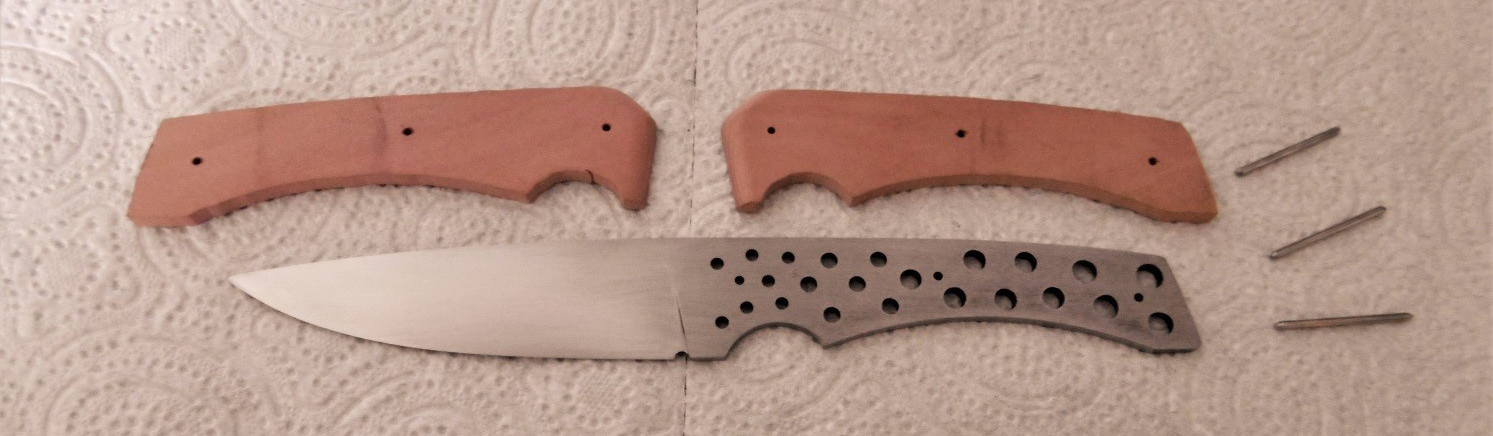
Knife
Here is a proposal for template. Approximate dimension:
- Blade 28 mm high and 100 mm long.
- Handle 110 mm long.
Its ergonomic form facilitates gripping. Depending on your wishes, it is easy to customize or change the scale.
Security and protection
As for all work, consider protecting you:
- Cut: glasses and gloves (and fix the room).
- Drilling: glasses (and fix the room).
- Sanding: adapted dust mask.
- Collage: Disposable gloves and aerated or ventilated place.
Material preparation
Cutlery steel
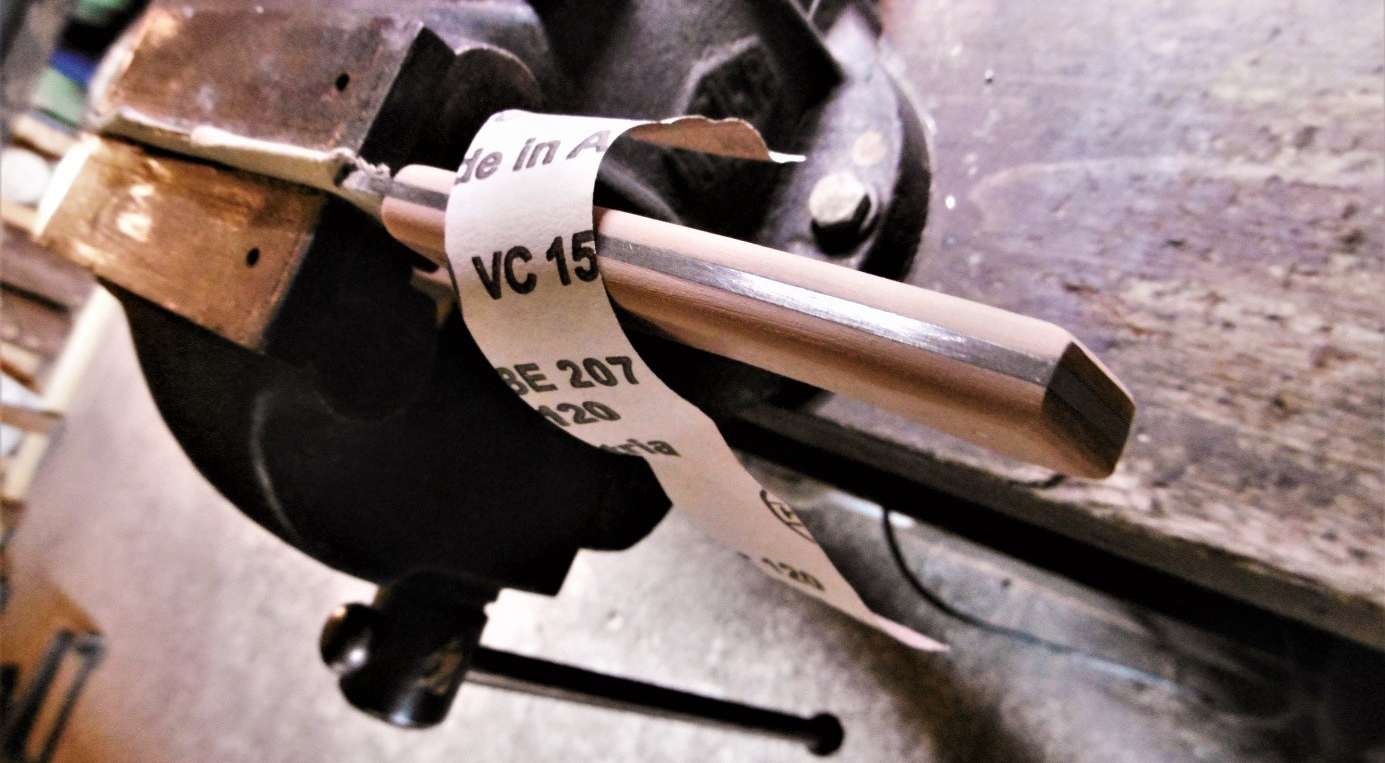
Your steel bar is gross! You have to prepare it a little.
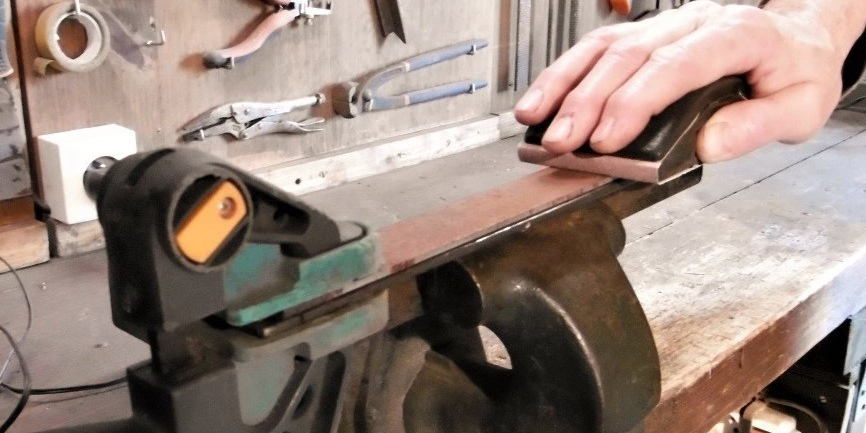
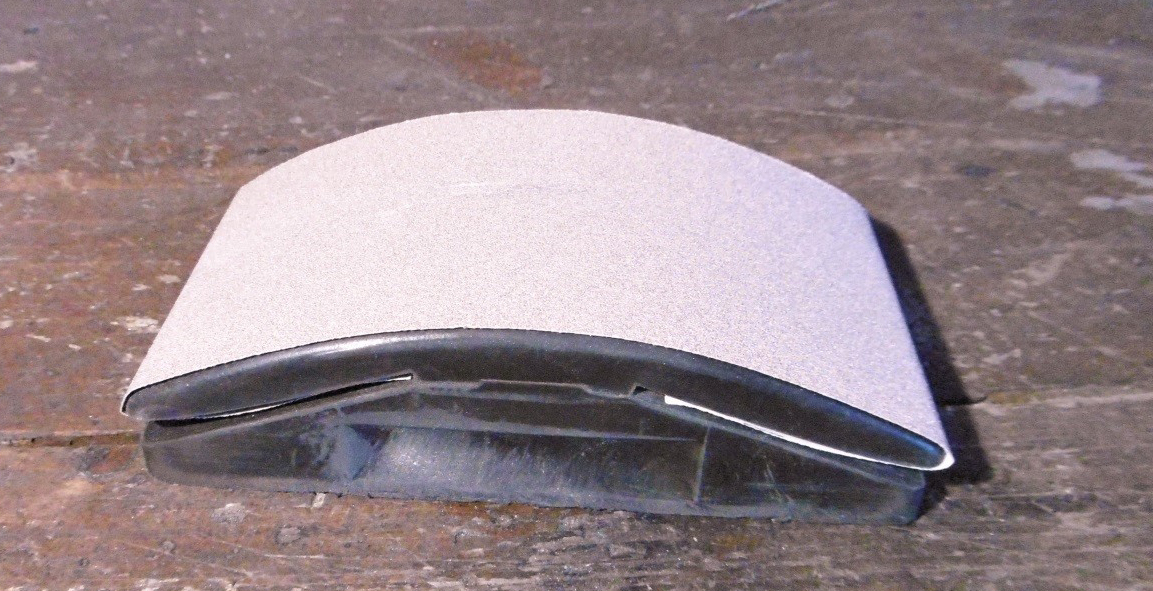
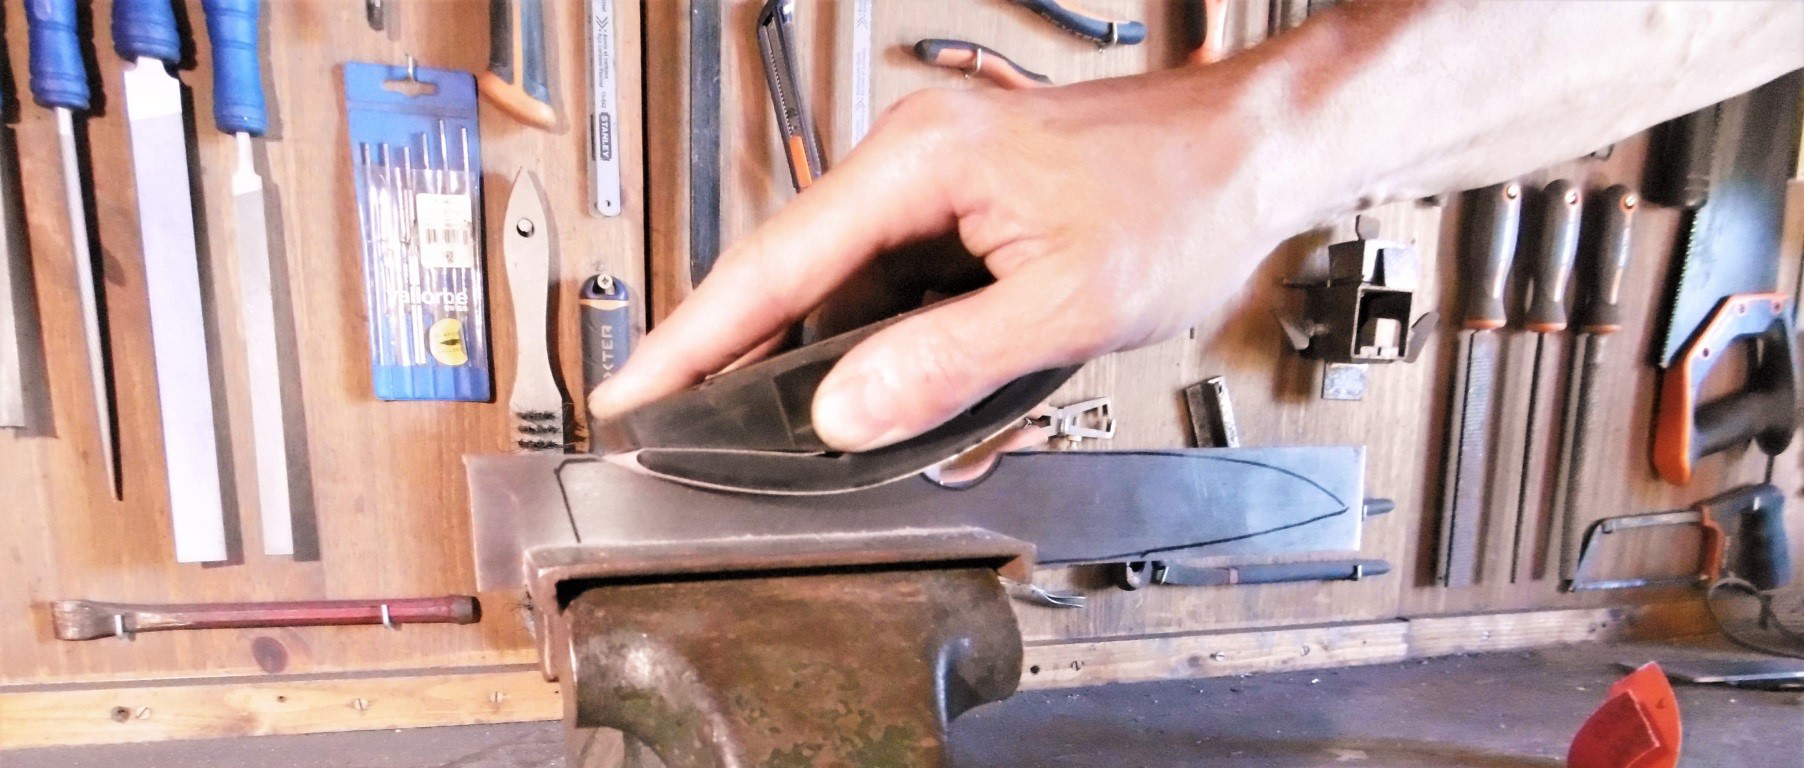
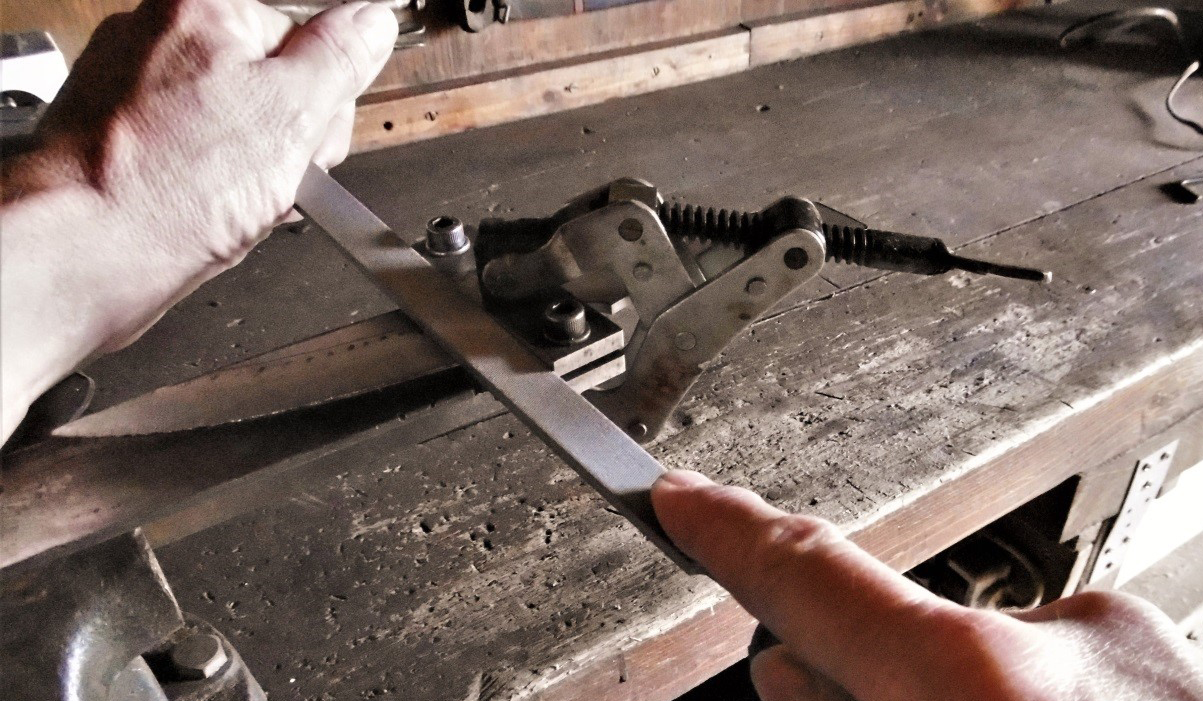
If the bar is slightly curved (which can happen to cut), straightening it gently by checking the straightness with a regret. Use mordaches with leather or wood flooring to not mark steel with the jaws of the vise. Proceed very gradually by checking each time.
Lime the edges to have a correct surface condition and bring it approximately to the good width, here 28 mm.
Clean the surface with the sander or with abrasive body paper coarse (80 or 120) on a sanding shim or sander making sure the flatness obeys.

For platelets of handle knife
It is necessary to:
- Check the thickness of the two platelets to be certain of symmetry. If necessary, sand the scale the thicker with a big grain paper (40 to 80) to reduce the thickness.
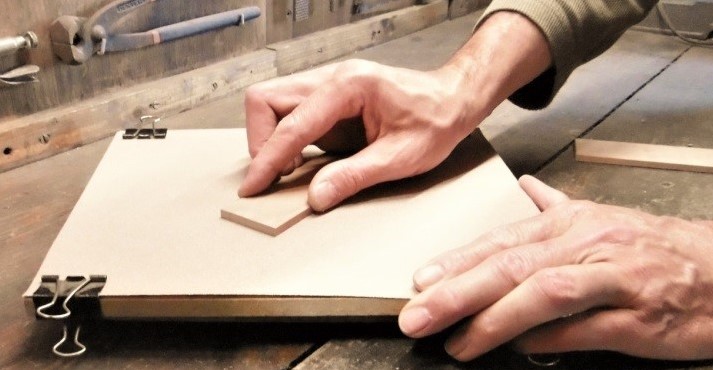
- Rectify the flatness by sanding them on a marble (an abrasive sheet on a sheet glass or wood). You can mark the surface with traits of paper pencils to make sure that we are pumped well everywhere.
- Rectify the surface state on the side that will be visible on the knife (mark the inner side).
- In the example of this article, cut this great scale in two platelets!

Cutting the blade and sole
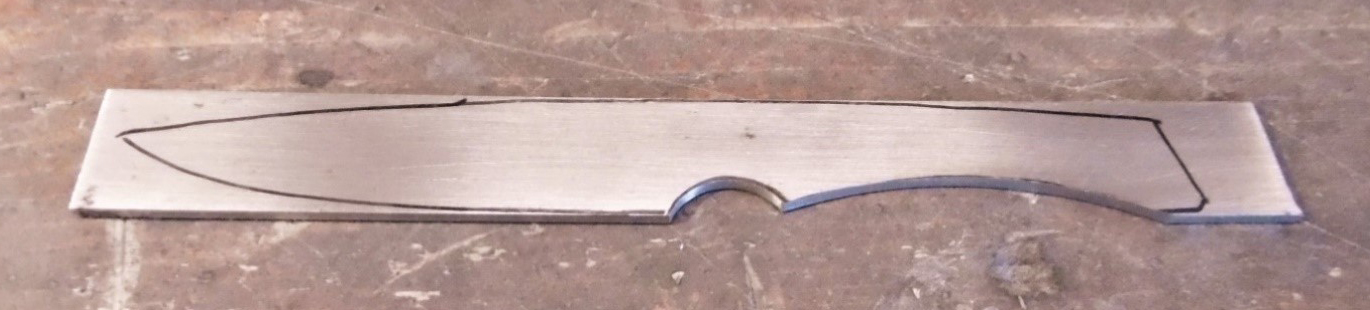
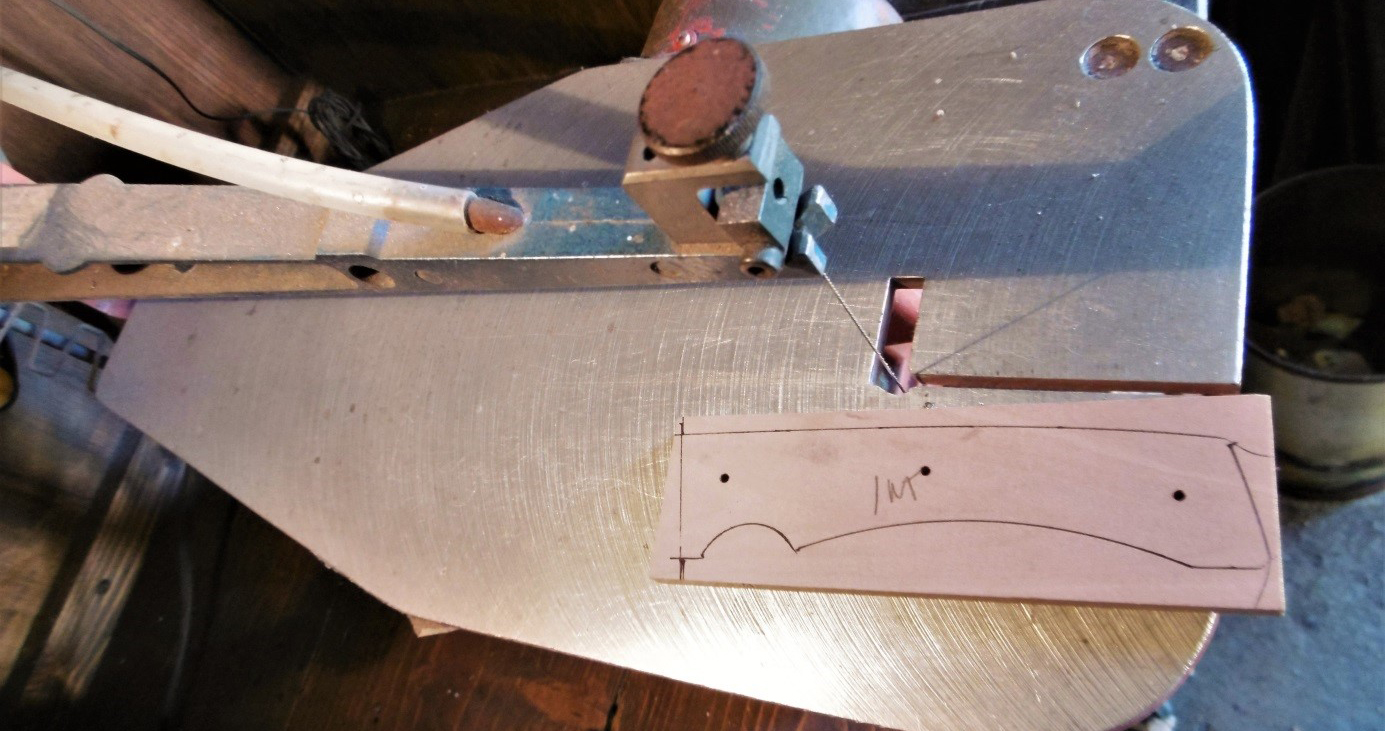
Postponement of the template
Print the template and check that it is at the right ladder. For it to be easier to transfer to steel, paste it on a piece of cardboard and cut. Report the template on the metal dish with an indelible marker.

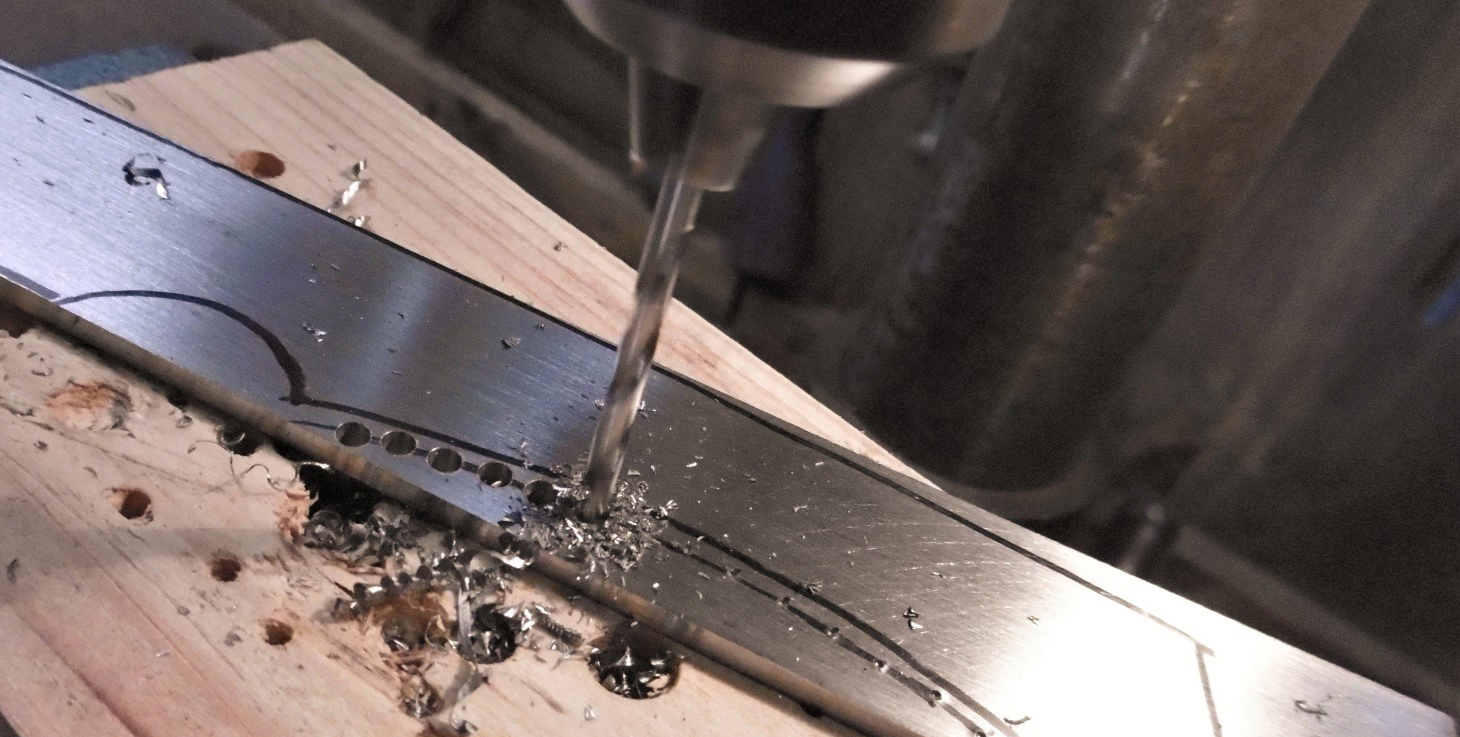
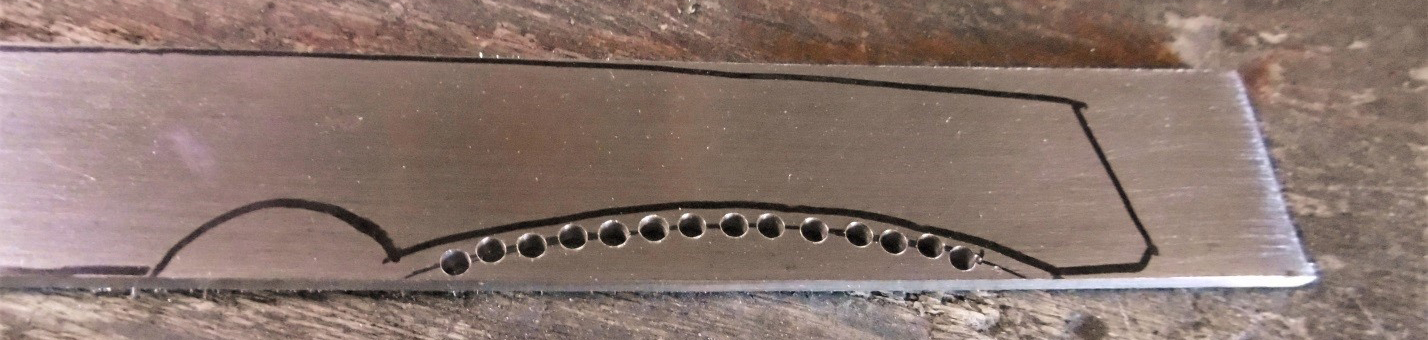
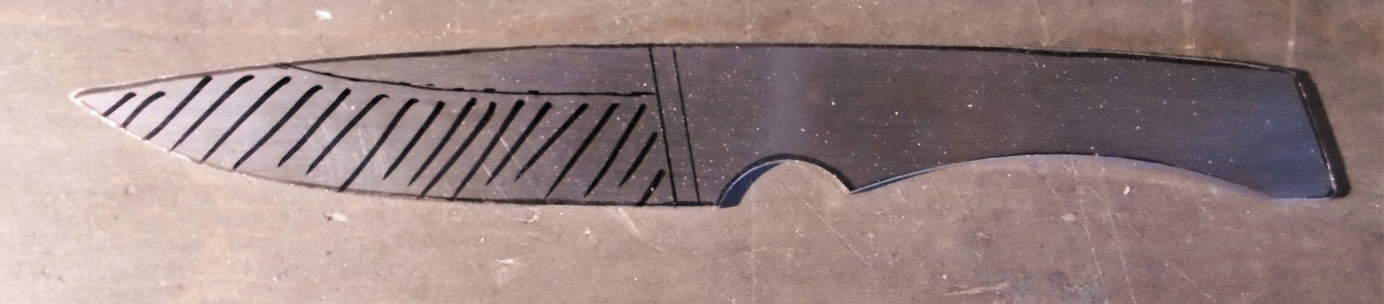
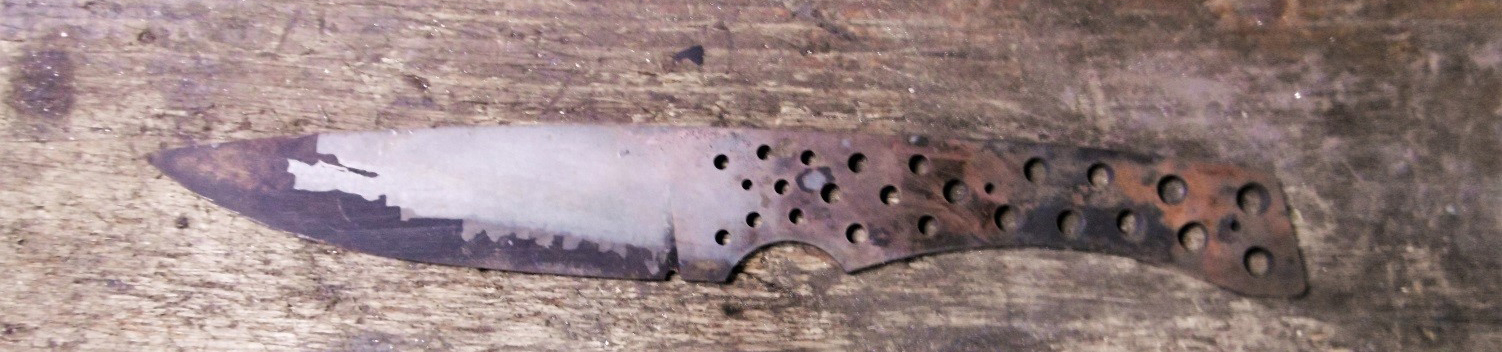
Steel cutting: the hollows
Concave parts are the most difficult to cut without particular material (backstand wheels for example).. With reduced tools, one of the following methods can be used:
The post office: a series of holes are drilled so that the metal can be "tore" as on old postage stamps. Draw a 2 line mm from the cut. Place markers there every 4 mm. Mark them with a dot. Drill all pointed locations with a 3 drill mm diameter. There is about 1 left mm of metal between each hole. Repeat with a 4 mm drill. There is then almost no metal left and it is easy to detach the excess (possibly one can help the disc machine if there is still a little too much metal in some places). The finish is made with lime, then with abrasive paper.
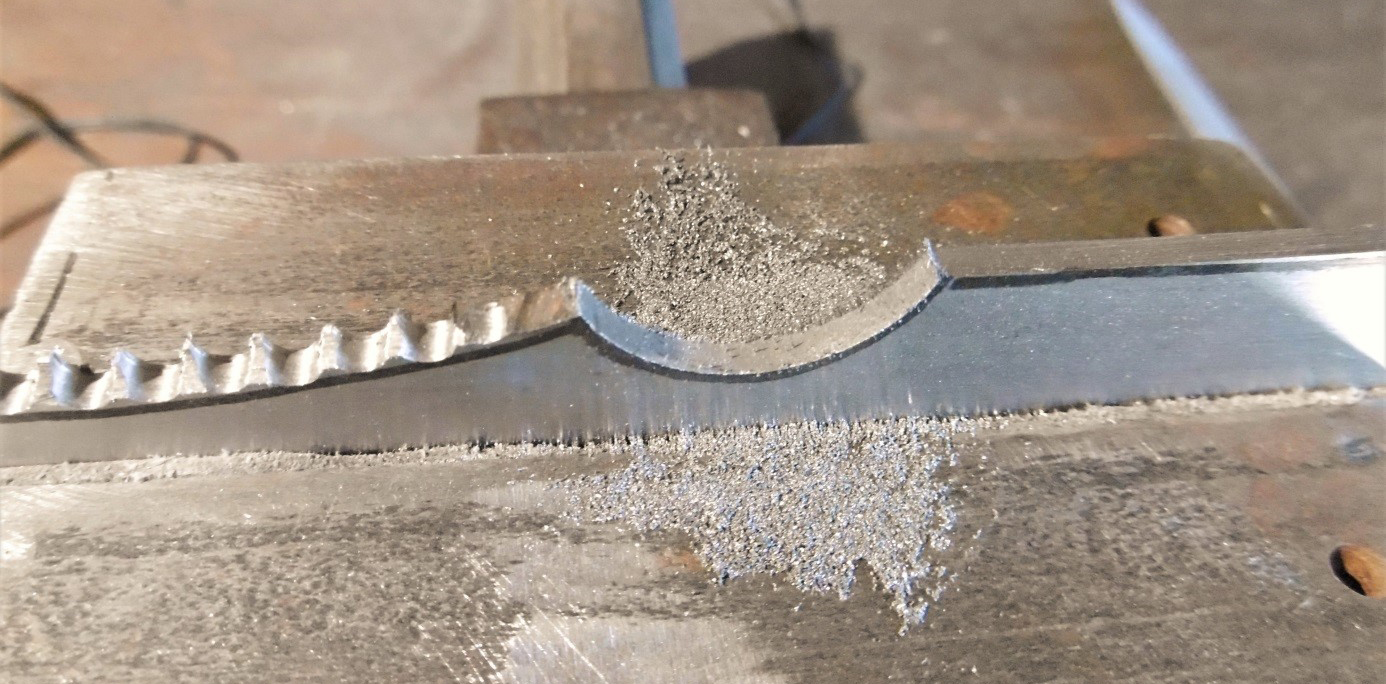
The comb: at the disc machine, thin grooves are made from the edge that come tangential to the cutting limit. Once the shape has been sketched, the teeth are cut in a bias. The finish is made with lime, then with abrasive paper.
The scoundrel: it's the jeweler's saw. It takes patience but the cuts are accurate.
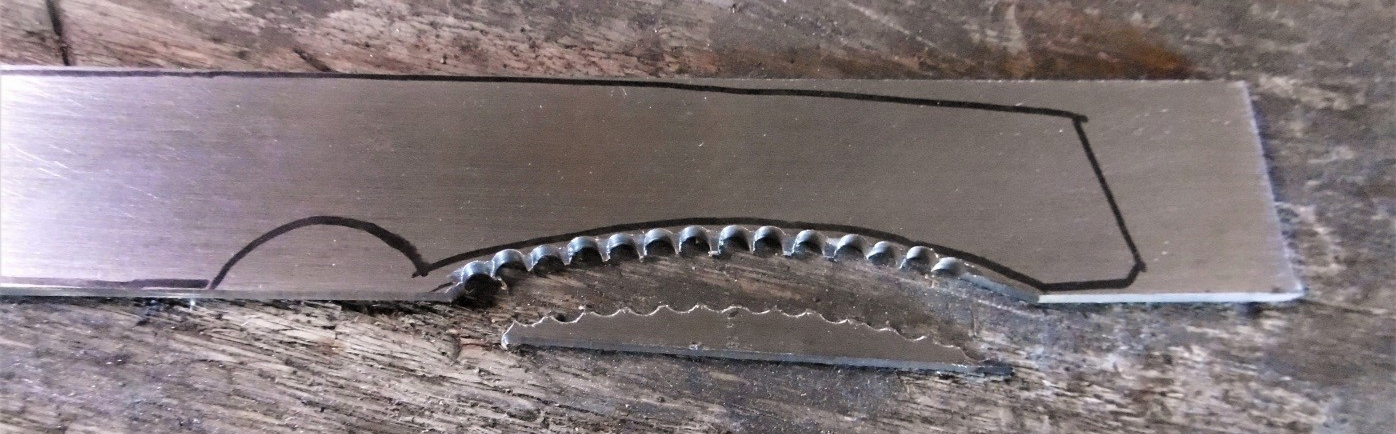
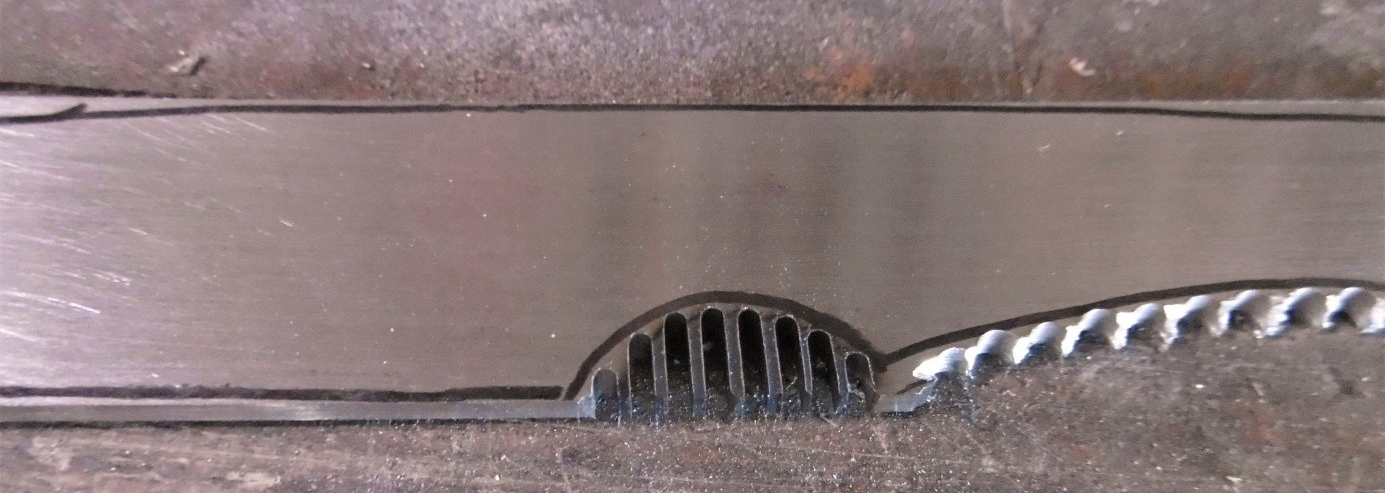
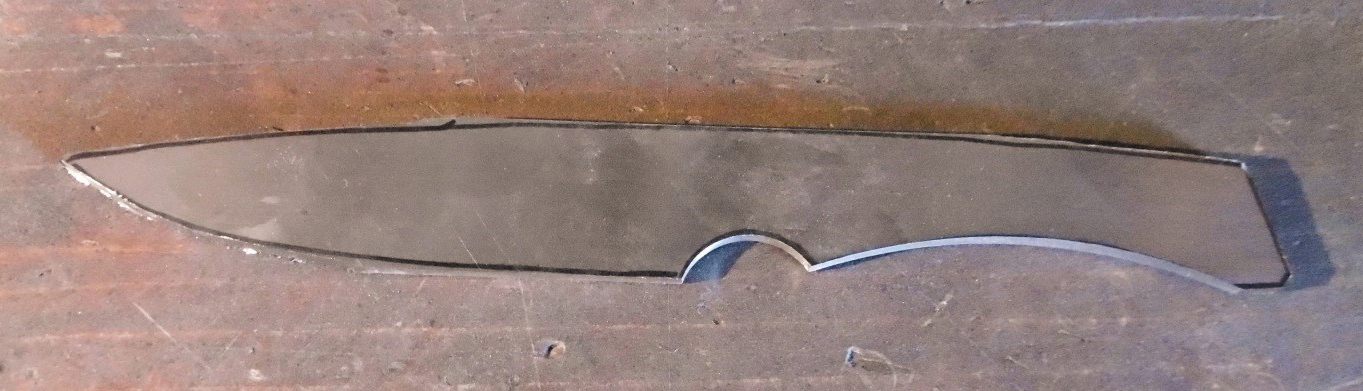
Finishing of hollows
The final shape of the hollows is made with the semi-round file. For finishing, use abrasive paper on a support.
Steel cutting: the outline
It is time to finish the general shape of the knife by cutting the excess metal. A metal saw or a disqueror can be used. The finish is done at the file, then to abrasive paper.
Be careful not to refine the tip. We must leave a little material (0.5 to 1 mm) above. This surplus will eventually be removed during finishes if the tip is not quite quickened. Indeed, the tip which has a very low section, can easily be damaged during thermal treatments or when finalizing the cutting edge.
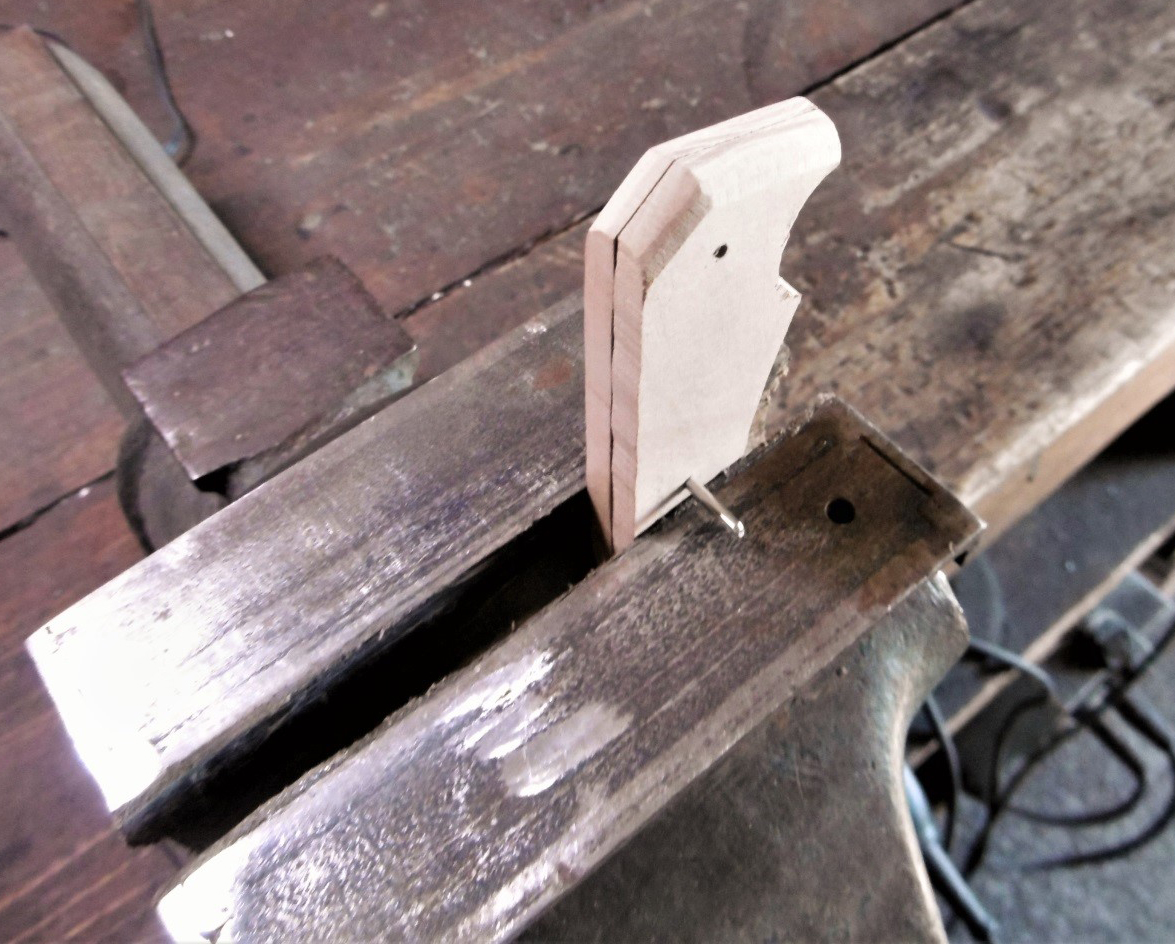
Gross clutch
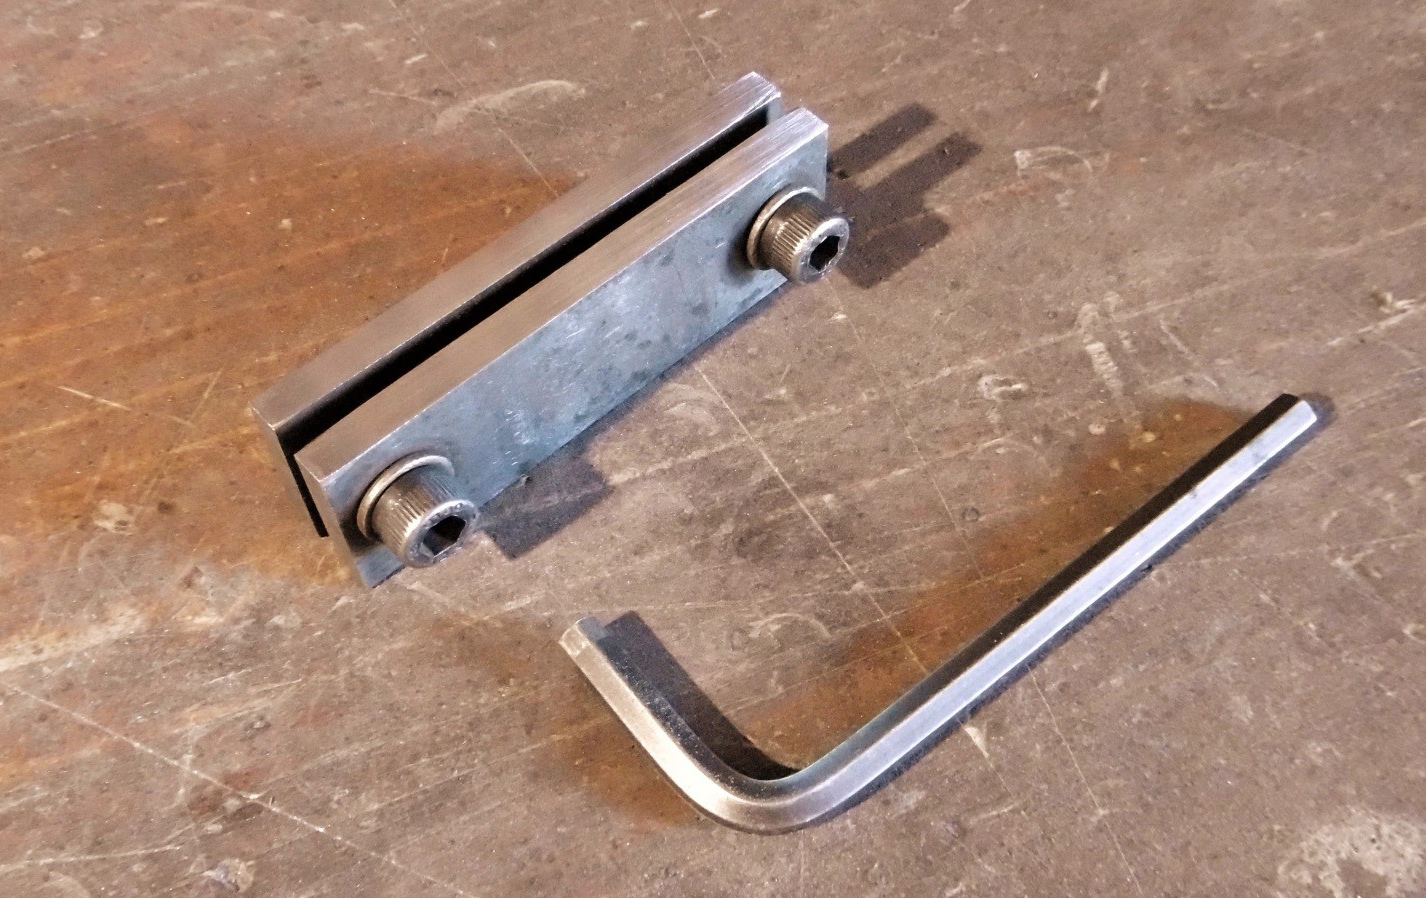
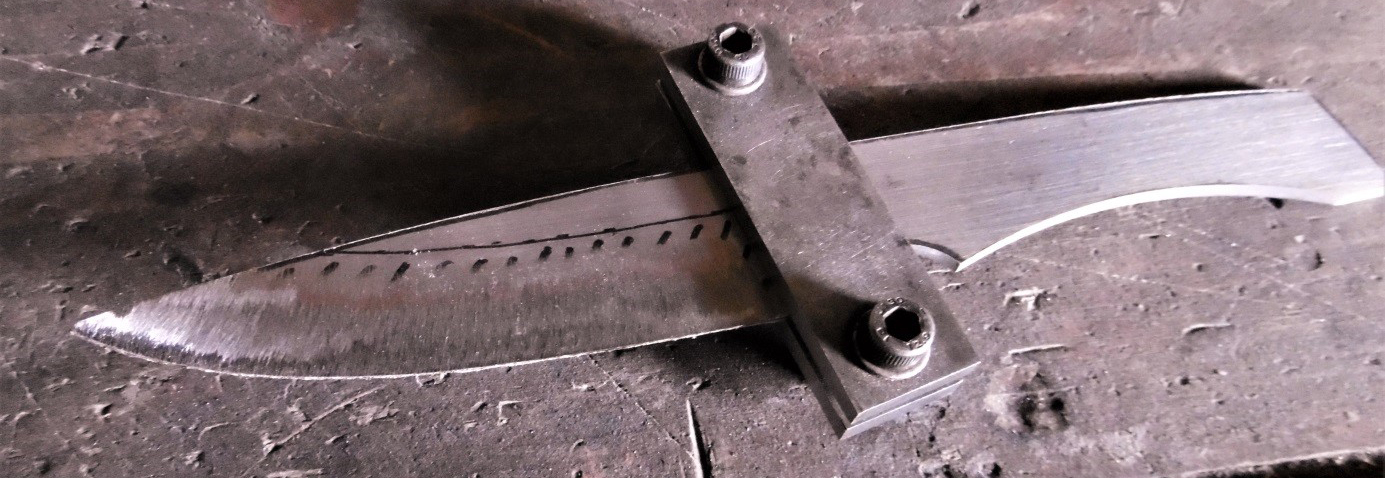
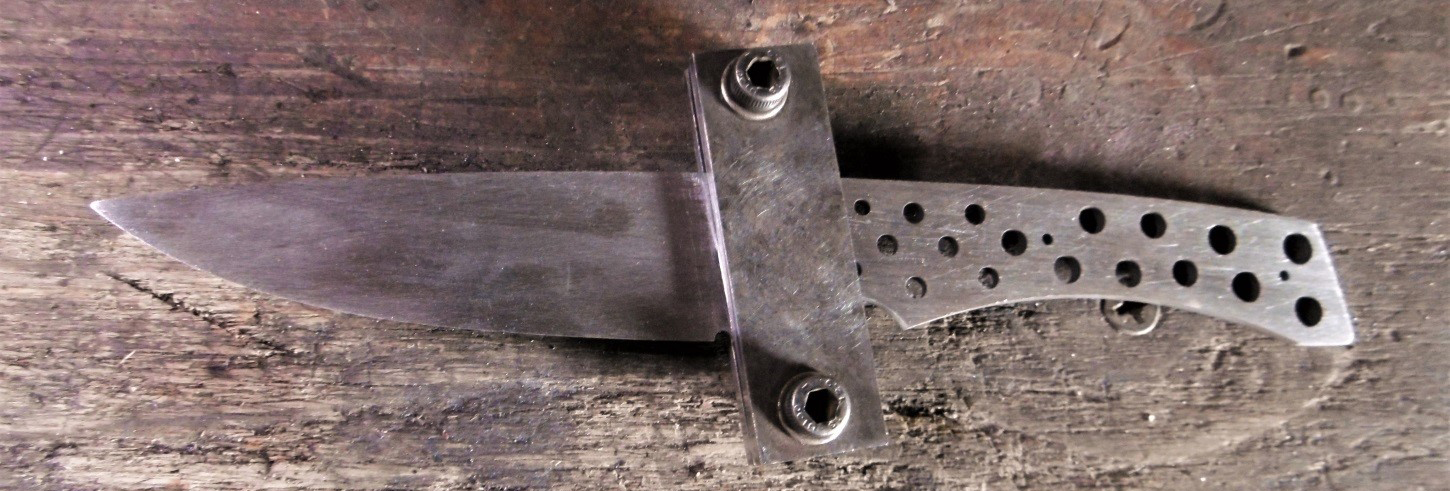
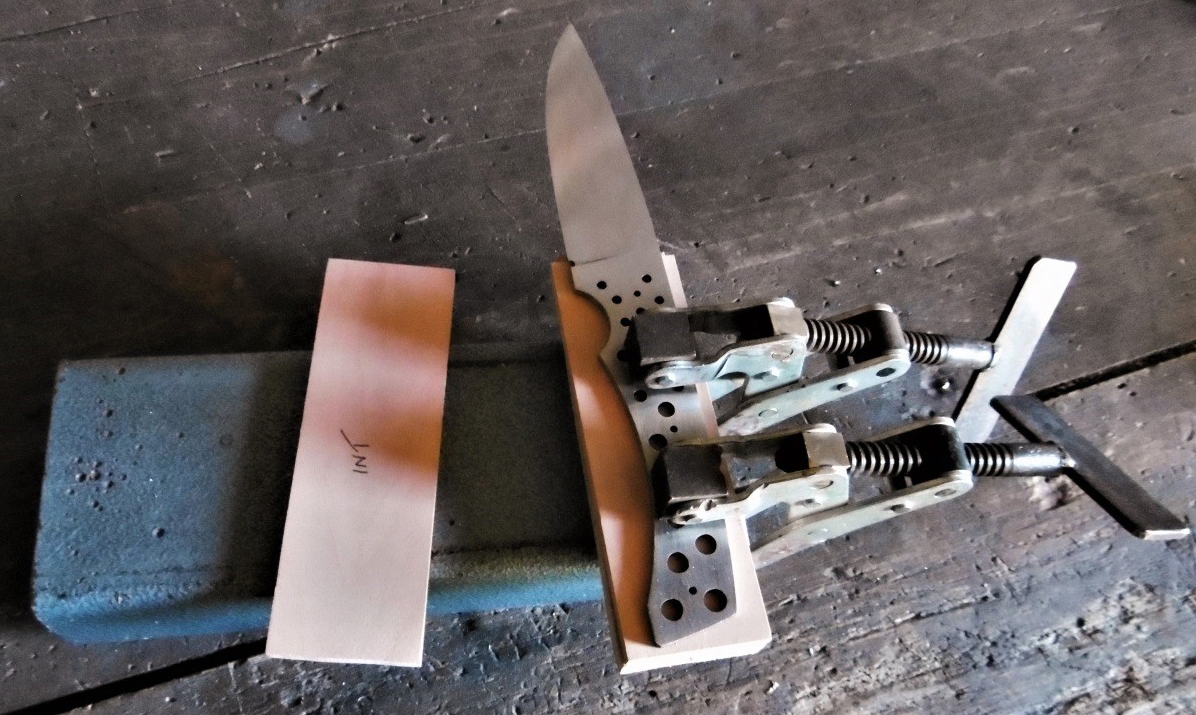
Guidance device
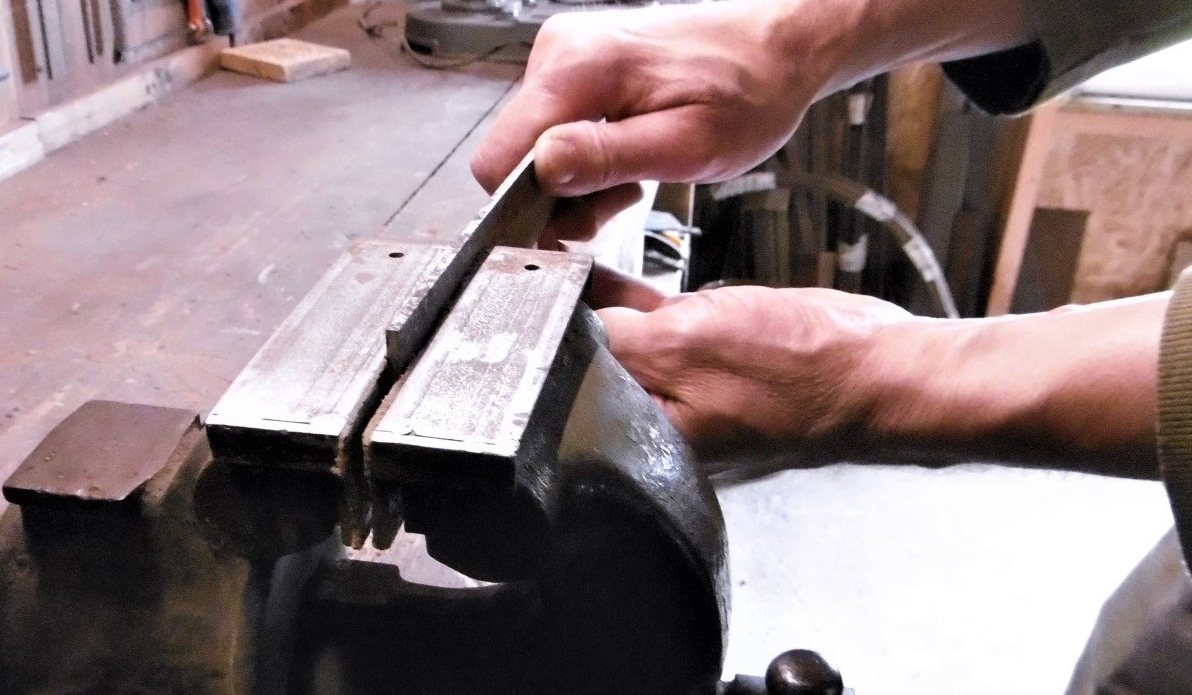
To make the clutch, it is interesting to help from a device for making a clear transition between the ricasso and the clutch. It guides the lime to ensure alignment and symmetry.
This device can easily be replaced by two metal dishes, pierced (accurately) and tight by bolts. One of the edges will be Arased and sanded to serve as a guide.
The lime virtuososum may be able to do without guide, but such a device avoids the clumsiness.
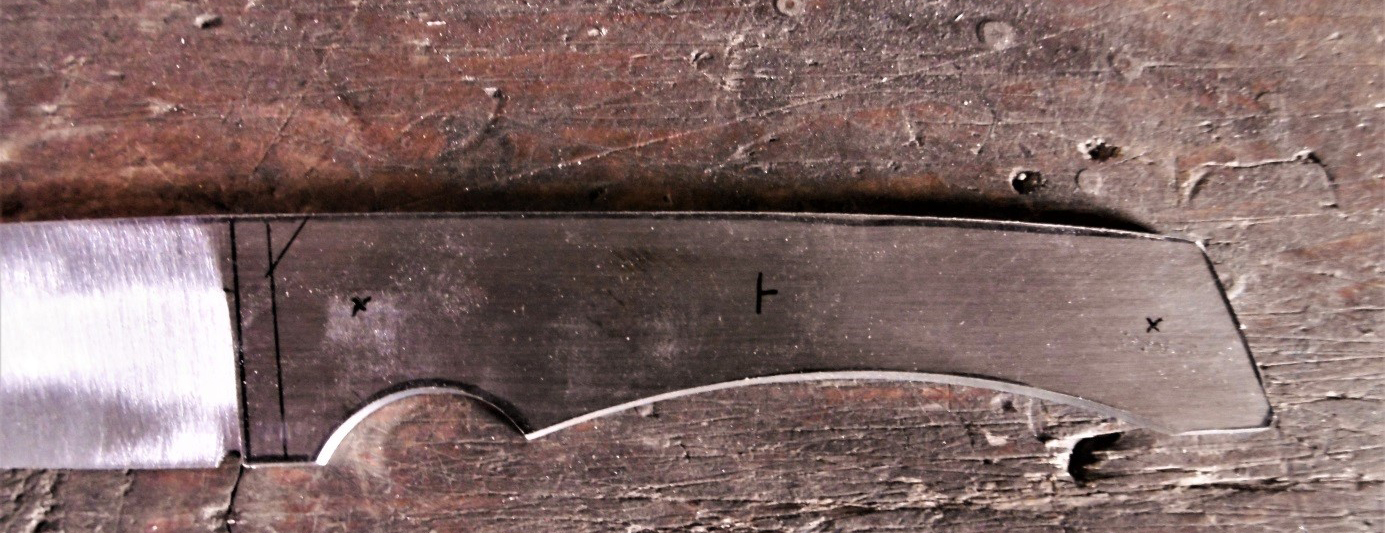
Preparation
In order to have good landmarks, you have to draw:
- The future wire of the blade, centered on the thickness. Use an indelible end marker or a plotted point (possibly with pre-tagging ink).
- The line of demarcation between the clutch and the ricasso.
- The bevel zone that will have to be removed. To do this, draw a line parallel to the cutting edge about 20 mm from the edge. To be effective in cutting, the clutch must be too low!
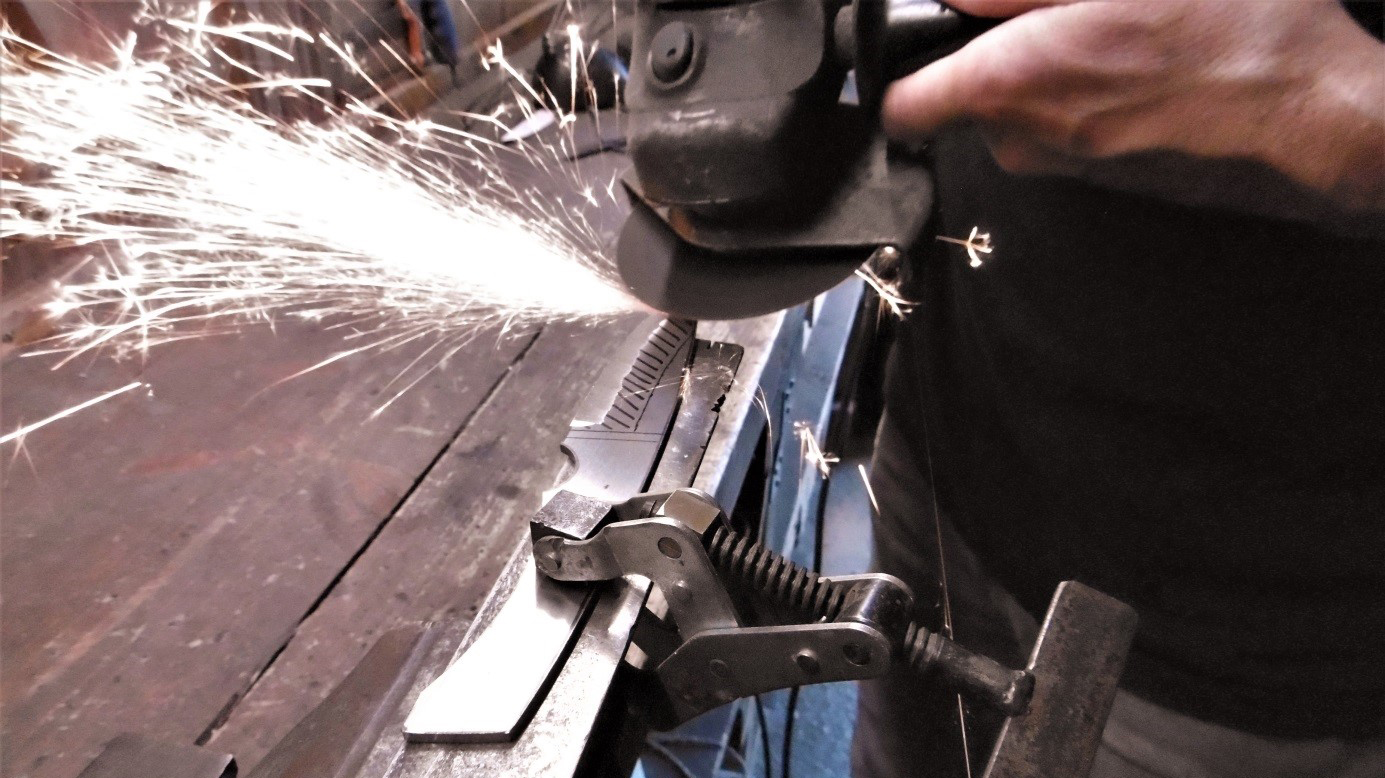
Roughing
The tightening requires removing a lot of matter. This work can be fully done to the lime but it's tedious. This work can be facilitated by removing a portion of the material to the disqueror beforehand:
- In order to be accurate, a small flashing (125 mm) is less painful to handle.
- Use an end disk instead of a disc to beat: it is not very consistent with the rules, but the work will only be better in terms of precision.
- Be careful, however, not to over-tone because this kind of fine disk (often 1.6 mm) remains fragile.
- Use the set with a weak angle so as not to create "holes".
- Never stay long at the same place (yet another way to do "holes").
- To be very careful around the point because there is little matter.
- Stay away from cautious distance (2 mm) from the future Ricasso.
- Fix the blade with a robust seal.
- Alternate work on both sides (to avoid dissymmetries).
- Leave a little less than 1 mm sharply.
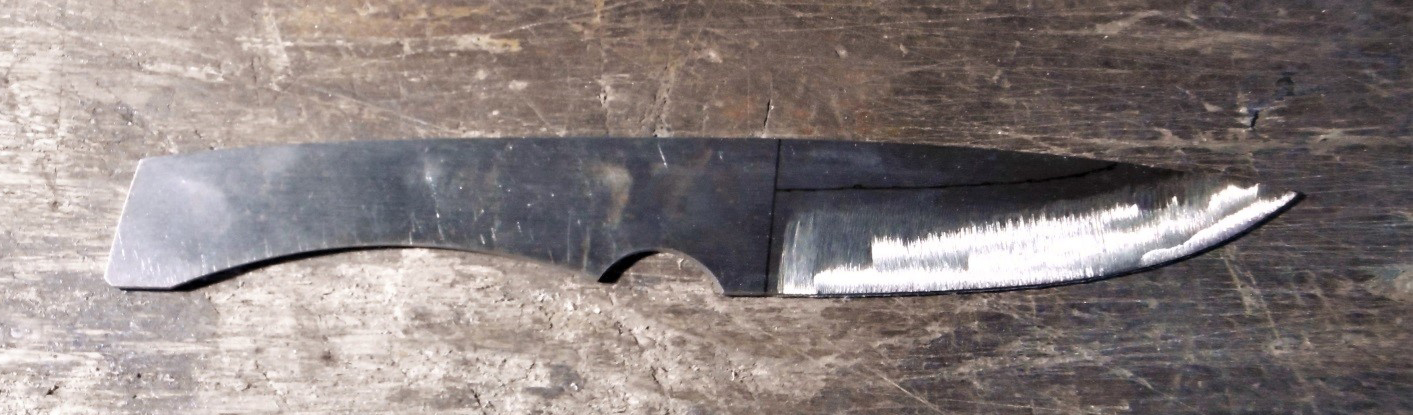
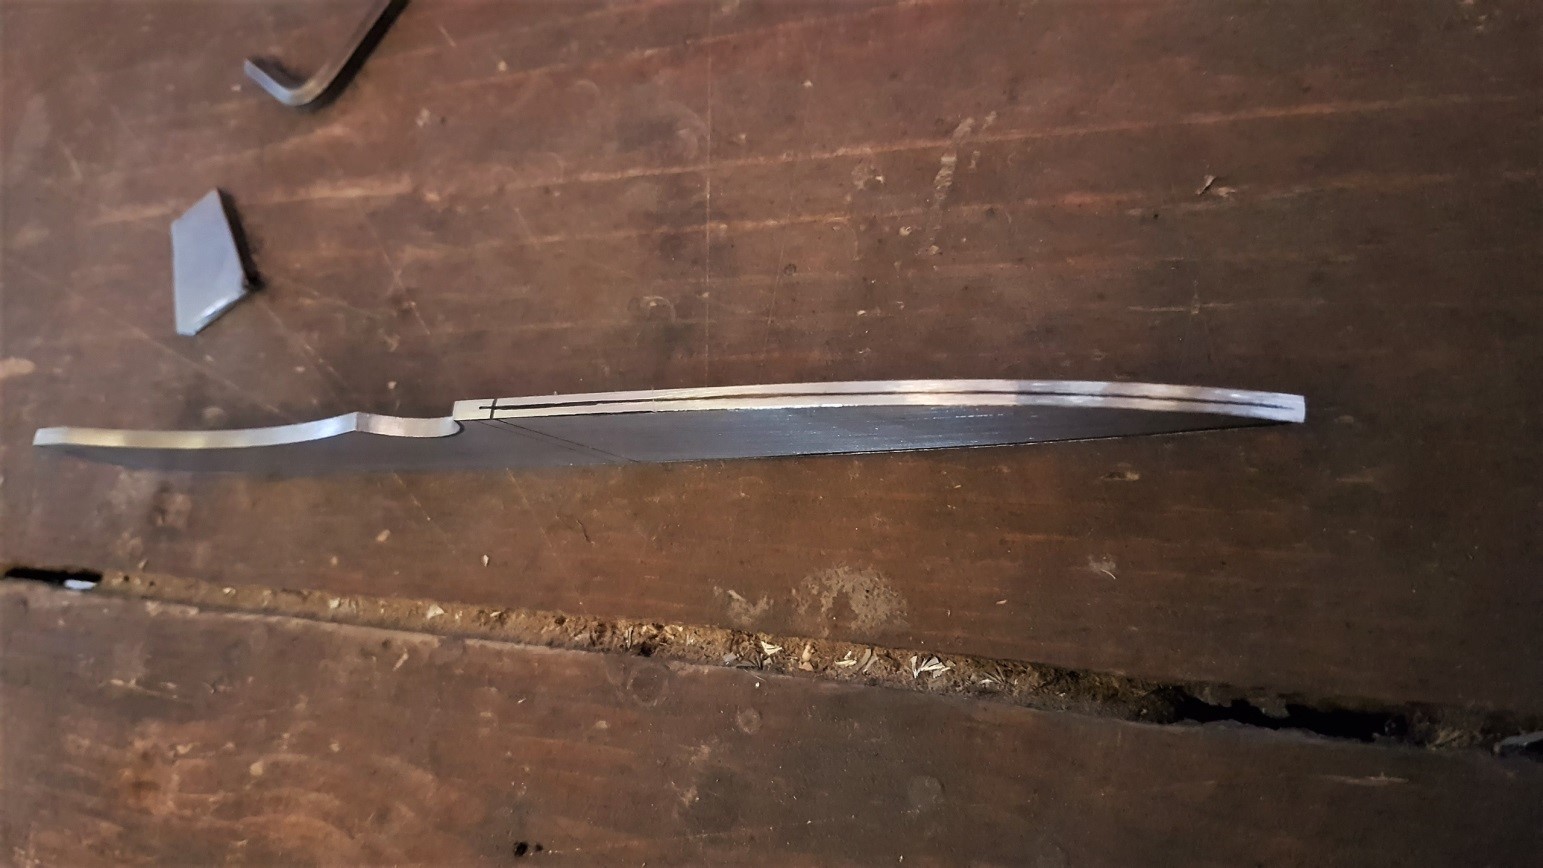
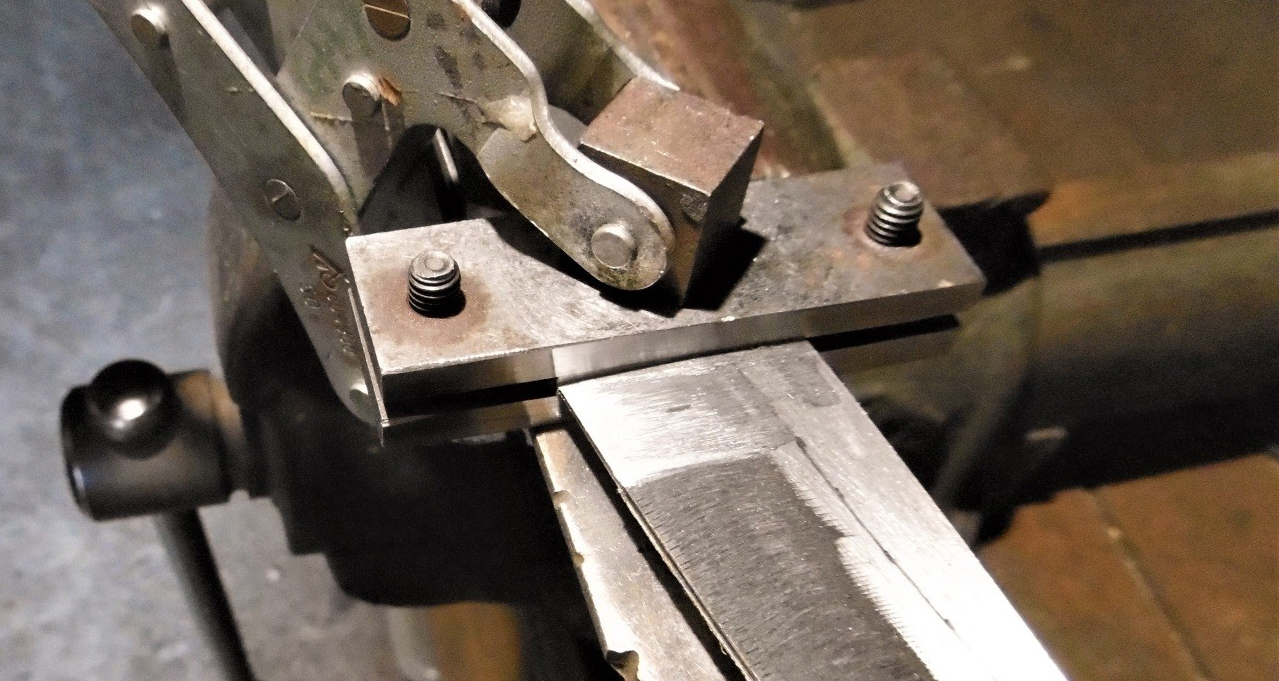
Base of the clutch
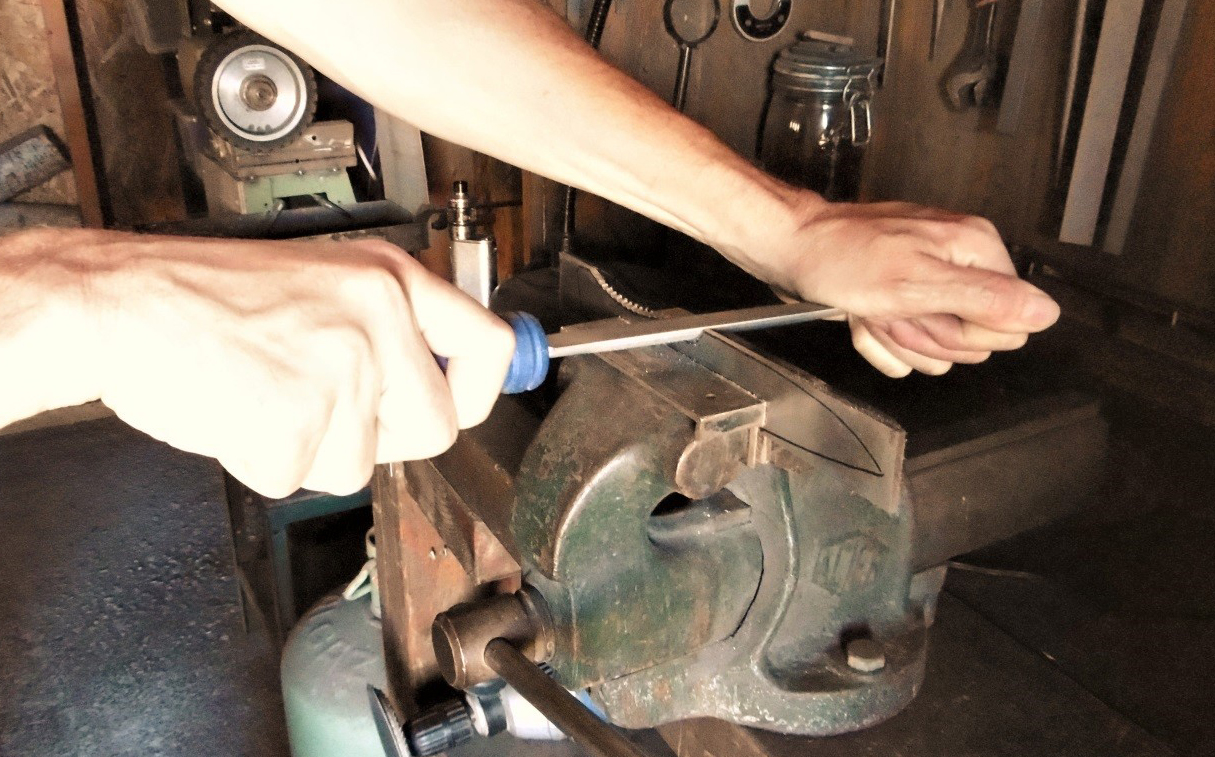
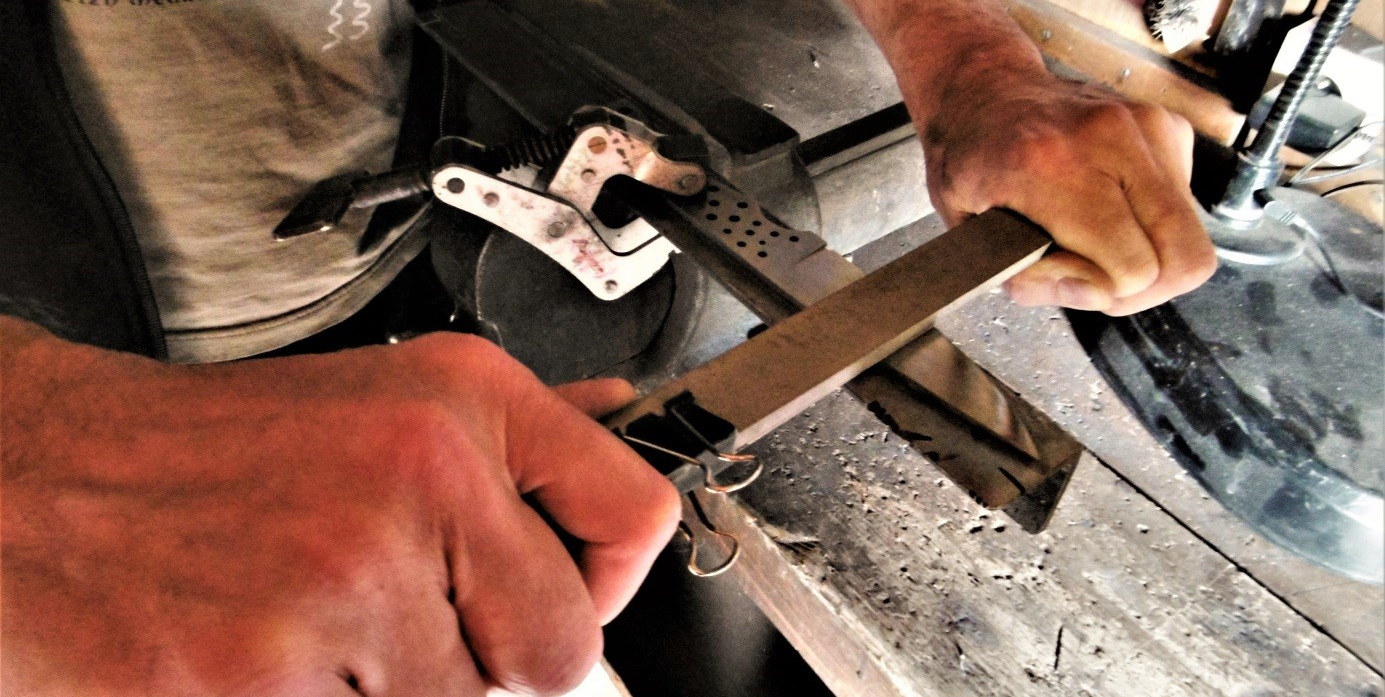
Now, you have to give the final form to the clutch. The guide device is stalled on the Ricasso and tight. We must work on the file:
- We guide laterally by pressing the smooth edge of the file against the guide.
- On the dish, we tangent the line drawn at 20mm of the thread.
- To sharp, we make sure to leave about 0.5mm.
- The faces are alternative to have a correct symmetry.
- We can help from a marker that allows to see exactly where the file removes from the material.
Unless there is a virtuoso of the file (or using a system for accurately controlling the angle of the file), the clutch thus produced will be slightly convex. This is a profile that fits much to many uses.
This closing base will serve as a starting point for the rest of the blade.
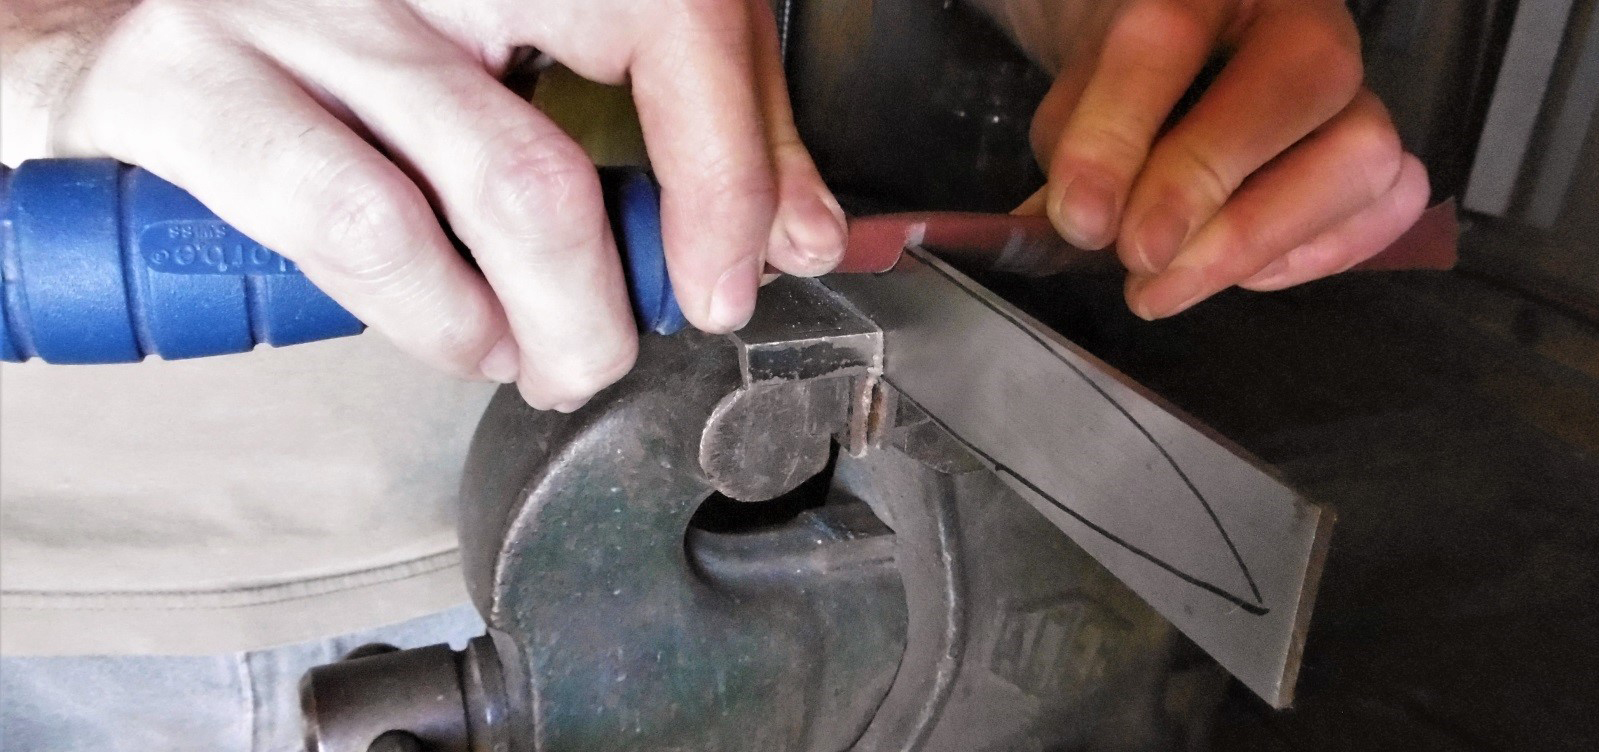
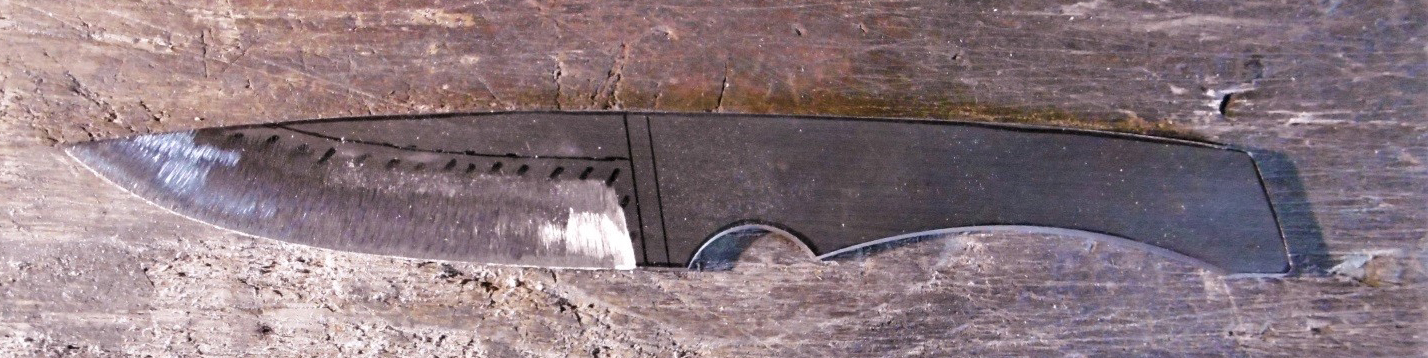
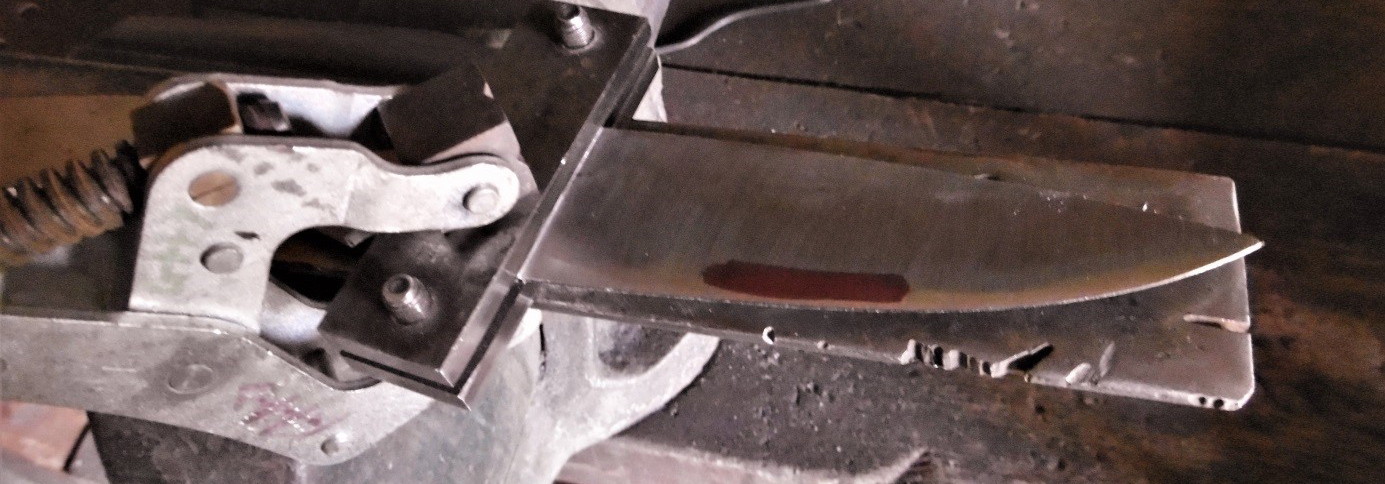
Finalization of the clutch
To finish the clutch, we can use different tools:
With the blunt base of which you use as guide and / or landmark, we continue to create the clutch to the tip:
- Flat file.
- Sanding hold with coarse paper.
- Sander with tape.
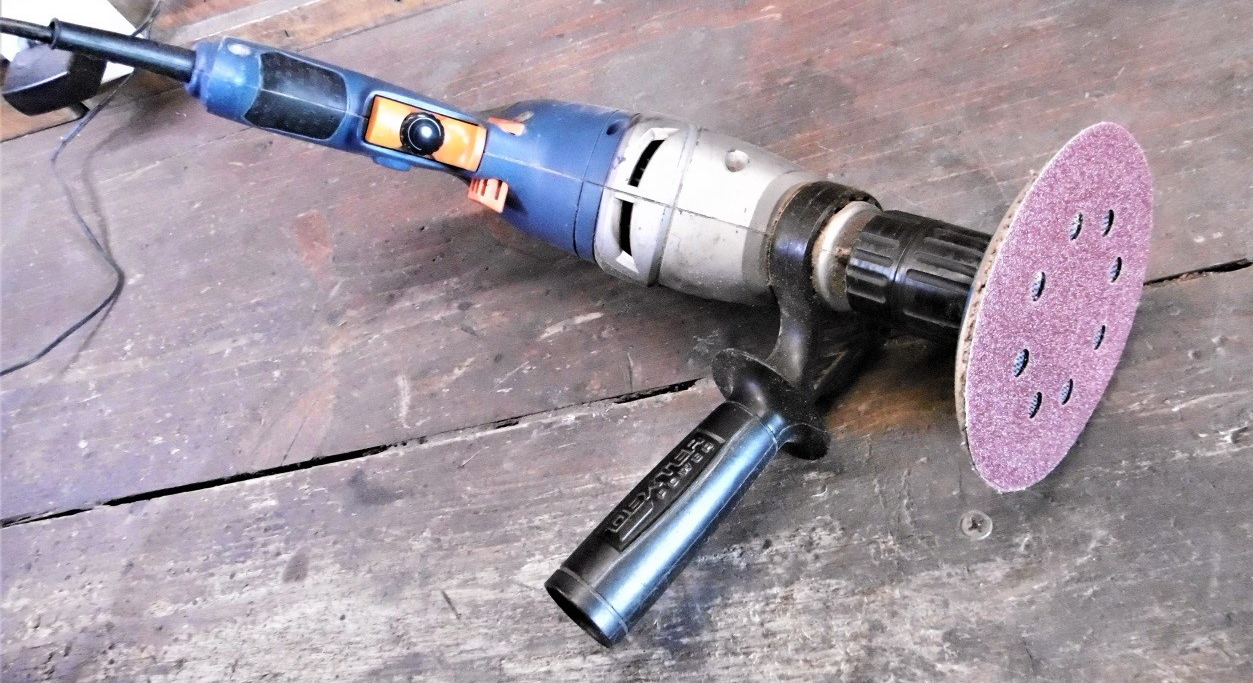
- Drill with a sanded disc.
- Bevel flat.
- Work alternately on both sides.
- We can mark the places where the thread is too thick with a marker to find out where to remove material.
- Be sure to have a constant thick thread of about 0.5 mm.
Finalization of the surface state
To refine the work, surface sanding will be sanded with medium grain paper (120) to have a correct surface state. For this, an abrasive paper (dry or water) will be used on a hard support (a file for example).
Note for all sanding : Always use a support for sanding. Indeed, if the surface is not perfect, with hollows and bumps, sanding with the abrasive held by hand will give pretty hollow and bumps! With a hold or a support, the abrasive will show the high points and we will arrive gradually to getting good places. For better visibility, we can help from an indelible marker.
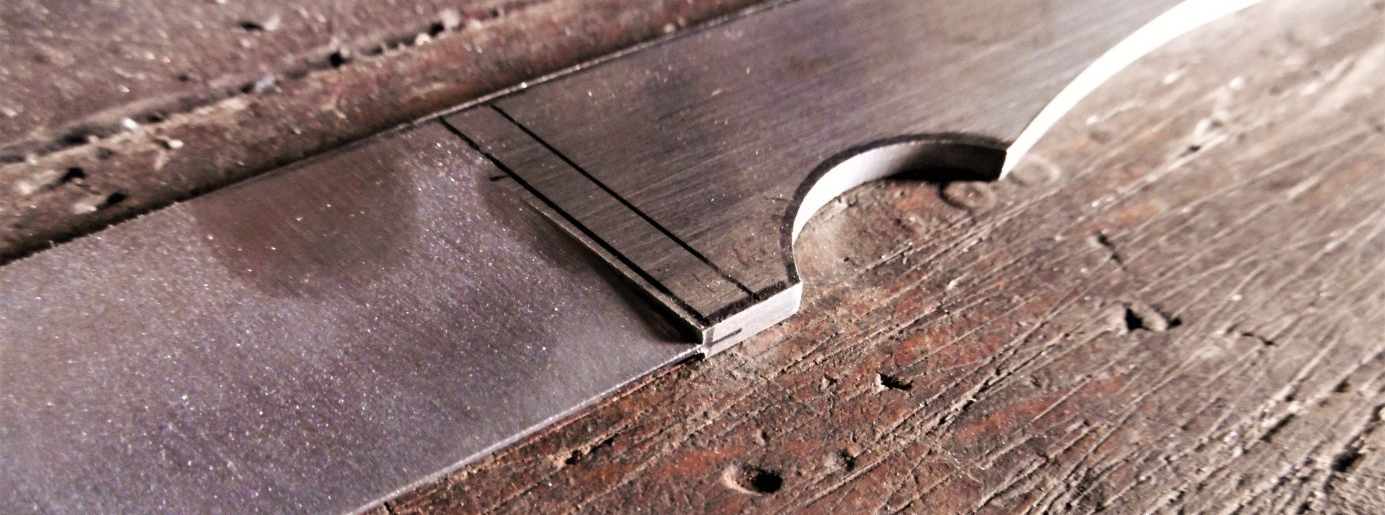
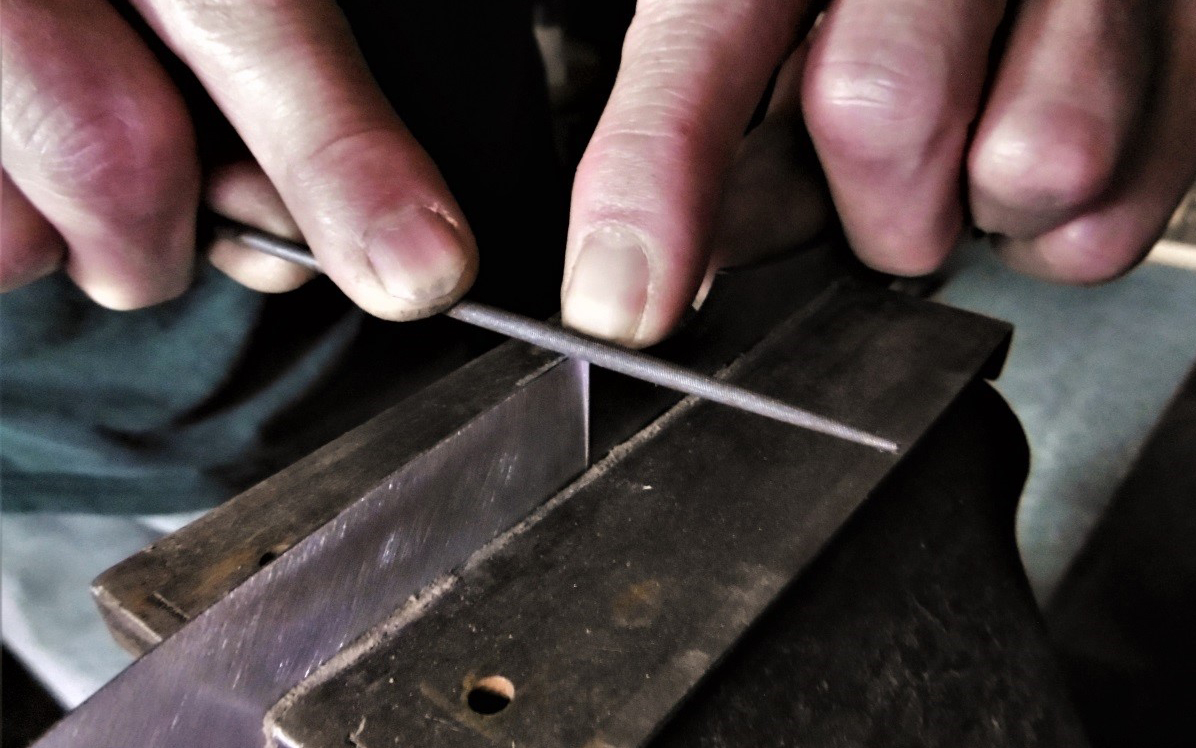
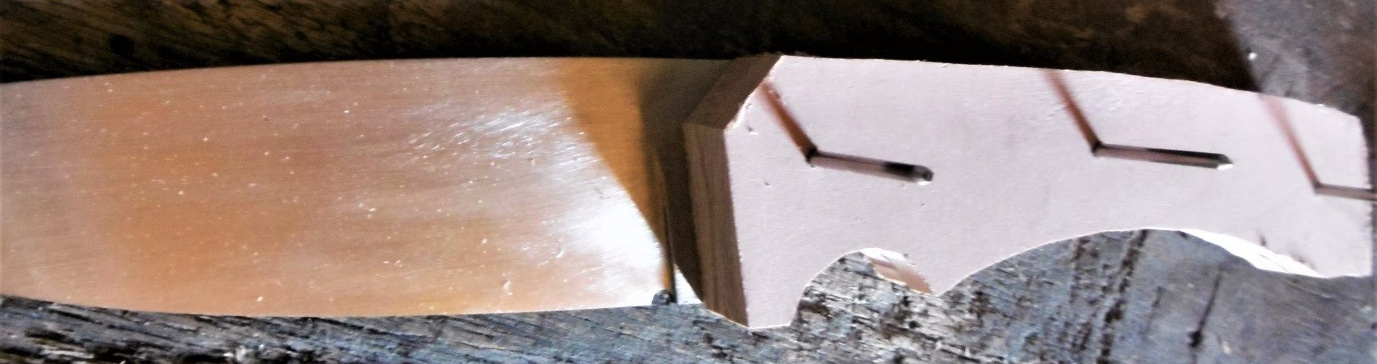
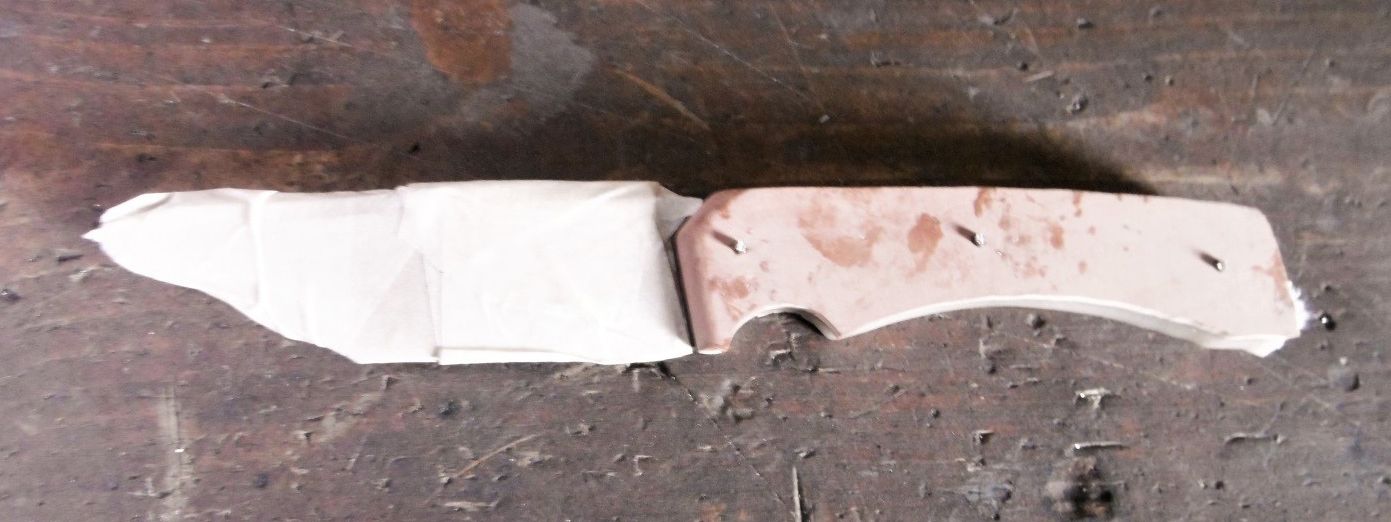
Stopper
Last little detail (optional) to finish the blade: the stop gout.
Stop-drop is a small hollow between the ricasso and the start of the wire. As the name suggests, it serves to stop a drop that would ooze along the thread. But its main utility is to facilitate sharpening by separating the ricasso thread. The start of the wire is therefore easily accessible with a stone. It is made with a round round needle. You have to look at it with the Ricasso.
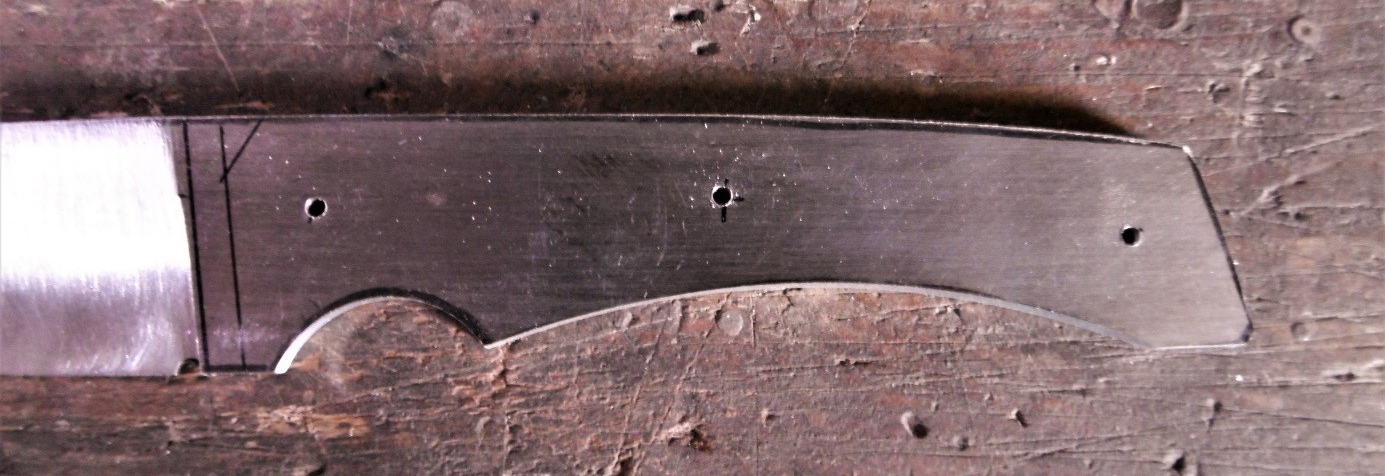
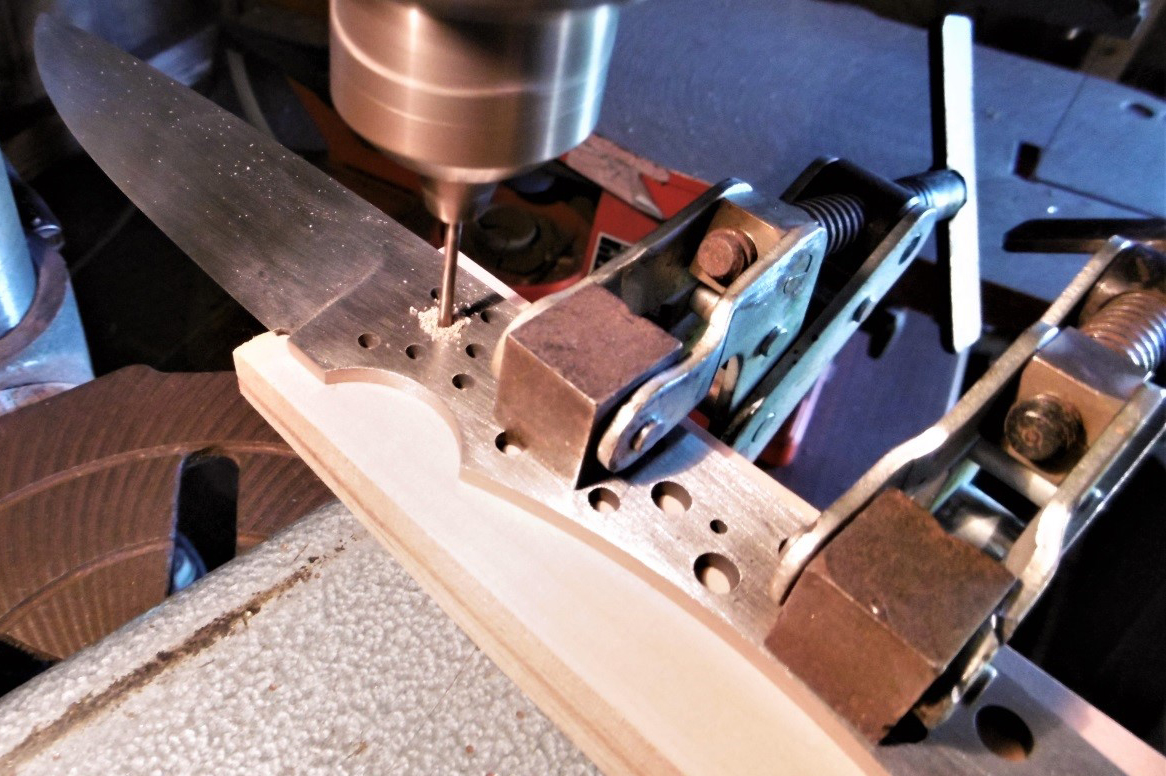
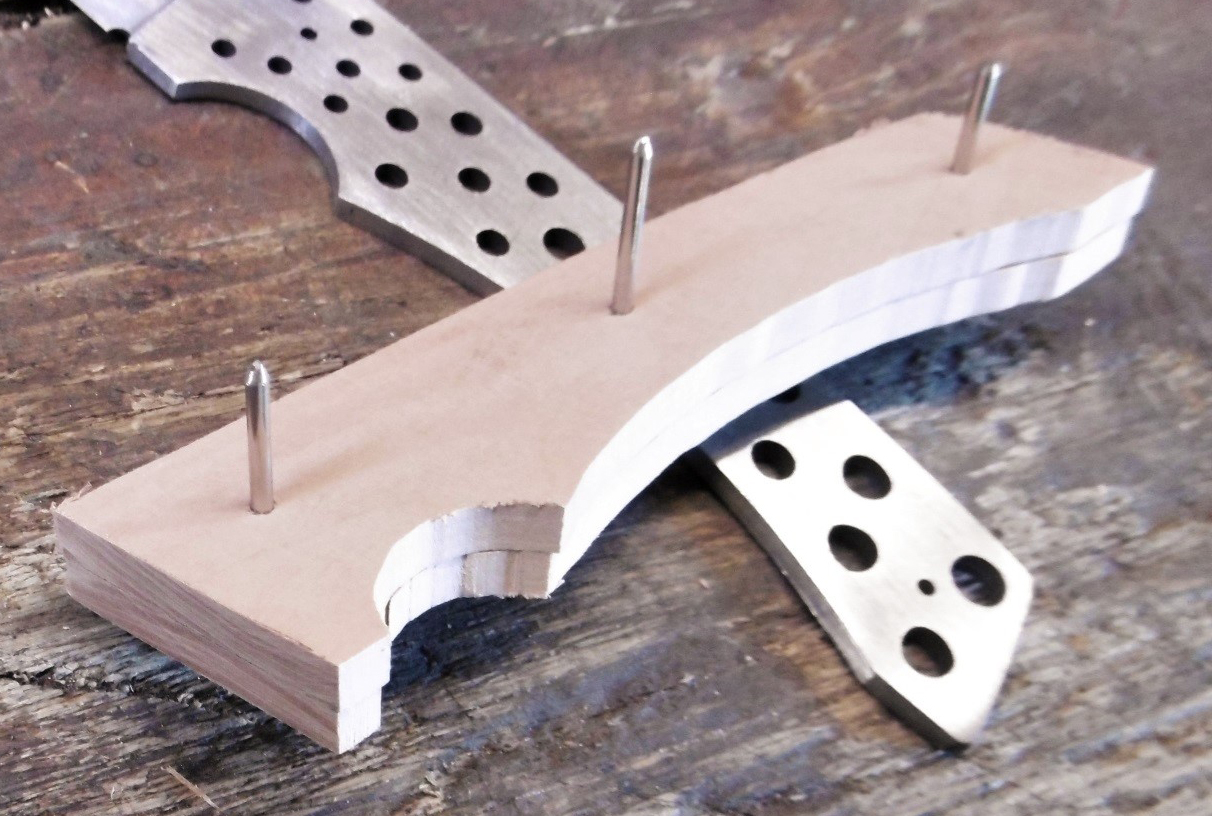
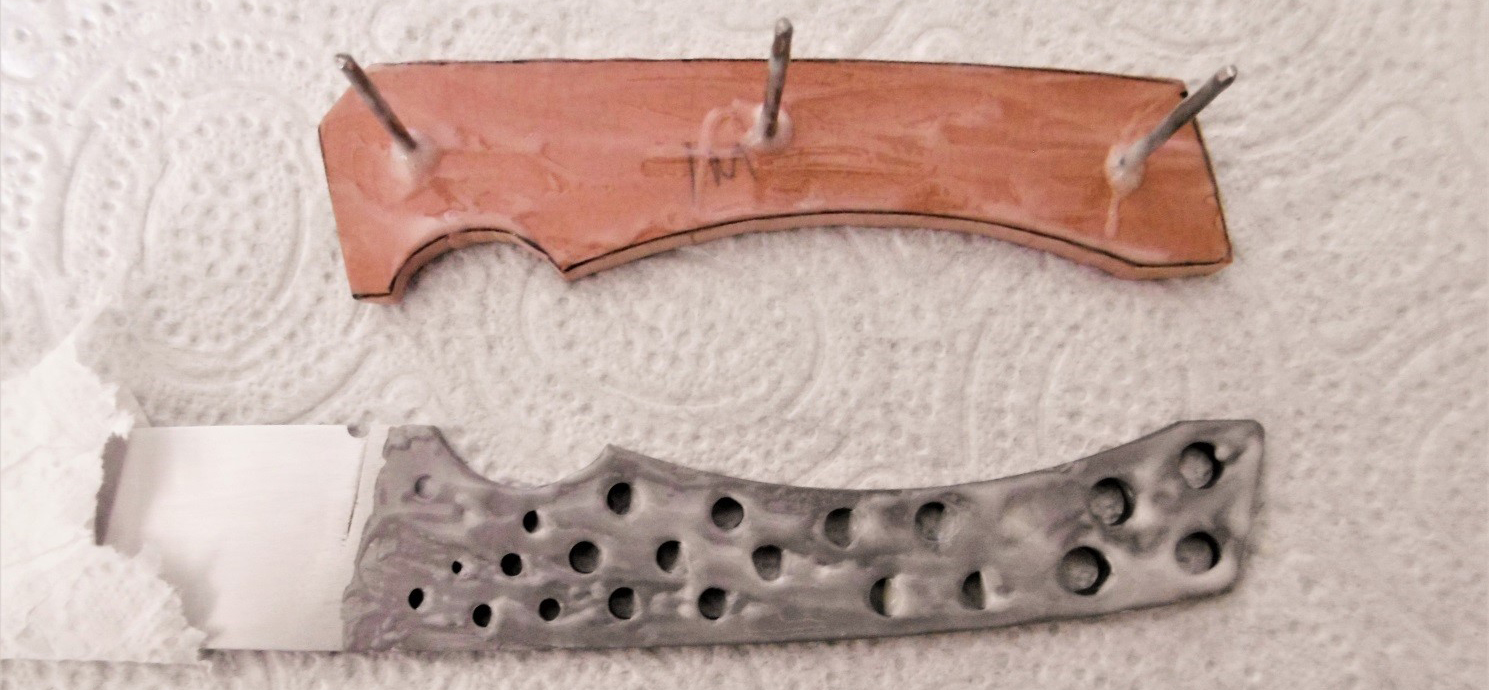
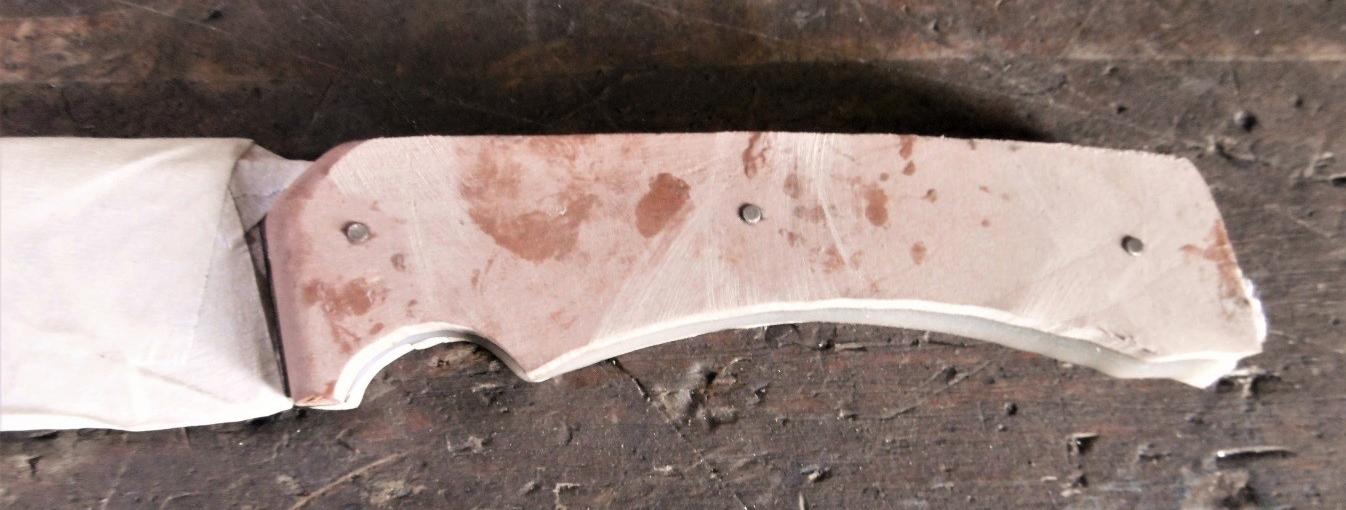
Drilling the sole of the knife
We must now pierce the sole. The location of the nails are reported on the sole, one points and drilled. Ideally, use a tenth drill of a greater millimeter than the diameter of the nails. This can prevent the wood with mounting by forcing a little to get the nails
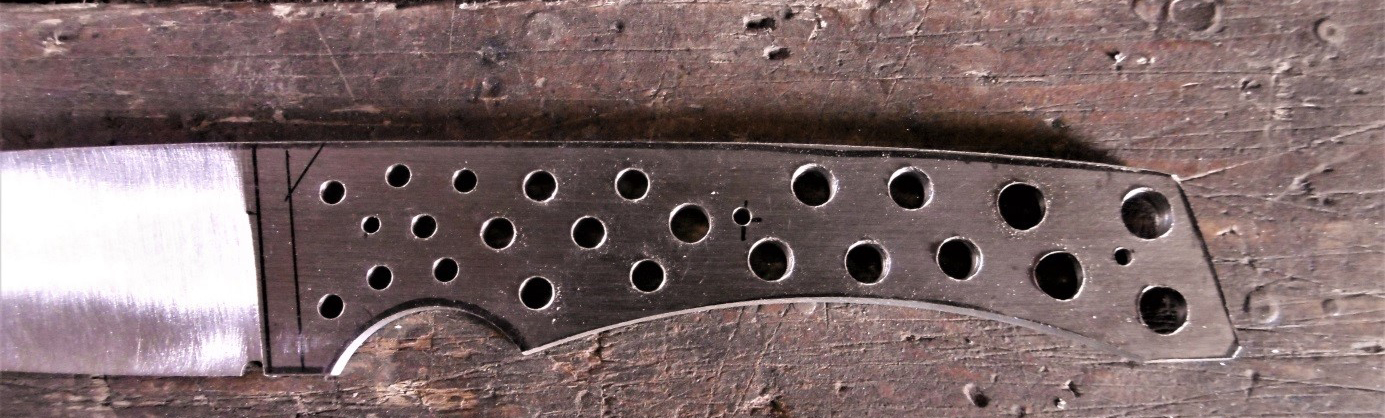
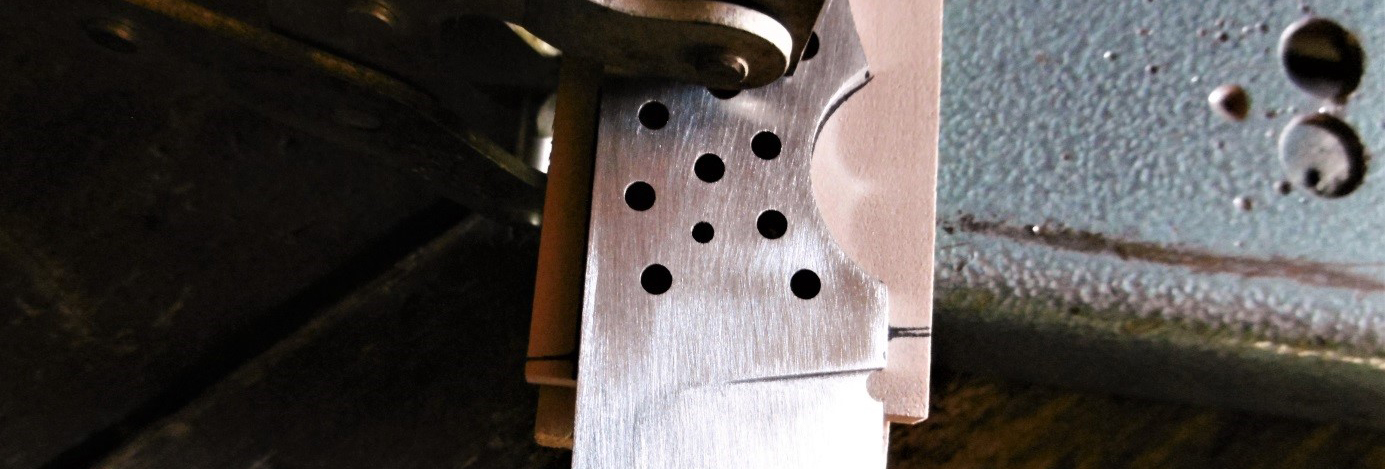
Optionally, so that the final knife is less heavy in hand, we can lighten the sole by piercing it multiple holes. Near the ricasso junction /handle, We will make small diameter holes (3 mm) so as not to weaken this area which is where the mechanical stresses are the strongest. The diameter can be increased as you get closer to the knife's heel.
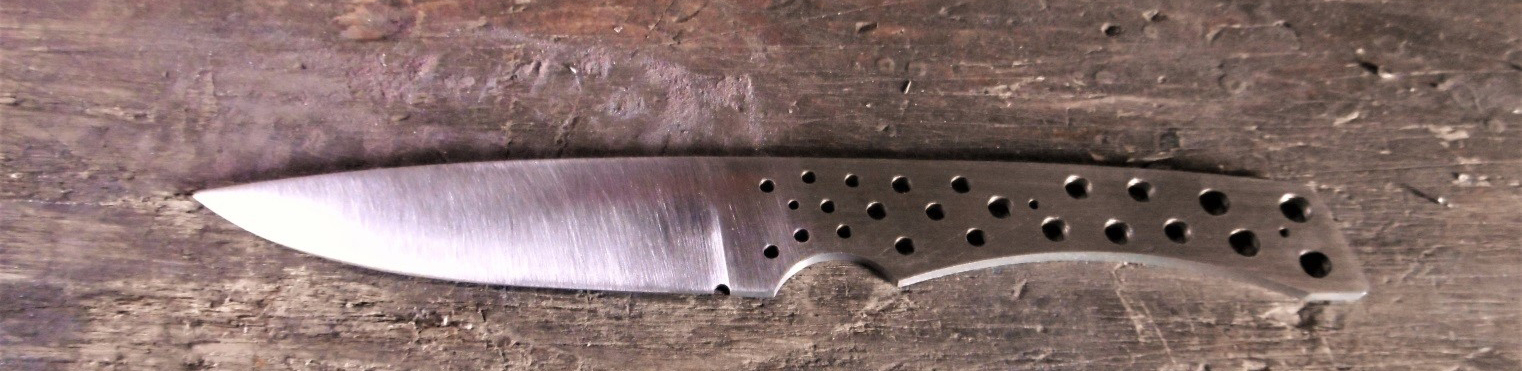
Finalization
Once the holes pierced, we do a general setting:
- The perimeter of the blade is sanded (medium grain 120).
- The sole is sanded with a coarse grain (50 or 80), we will take care of the drilling burrs.
- The blade and ricasso are sanded with an average grain (120) and then end (240).
The heat treatment
The purpose of thermal treatments are to give the blade its cutting and resilience qualities. This step is very important because most of the quality of a blade rests on thermal treatments (the rest is the design and choice of steel).
Here is the sequence of thermal treatments:
Normalizations:
The standardizations are intended to reduce the grain of steel. In general, we make three cycles of heating / cooling. With our XC75, standardizations are not required, the grain is already fine.
Quench :
It's this step that will give hardness to the blade. The blade is heated at temperature of quench (between 790 ° C and 810 ° C - see our technical sheet) and cool quickly in the oil.
Income:
At the end of the quench, the blade is very hard but brittle. This fragility is due to the internal constraints generated during the quench. Income will eliminate a large part of these constraints. The blade is maintained at 220 ° C for 1 hour. Thus, we gain strongly in resilience and we lose a little hardness.
As part of a first knife and if you do not have the required equipment, we strongly advise you to entrust us the thermal treatments of your blade.
At the end of the quench, the blade must be cleaned:
- If there is a calamine (black and very hard oxide layer), one night in a white vinegar bath enough to make it fall.
- Sanding allows you to have clean surfaces. The sole will be grossly sanded (grain 80), scratches facilitating the clogging of the glue. The blade will be sanded with an average grain (120).
- When quench, Steel can undergo slight surface decarburization. In order to have a wire with the best qualities, remove a thin layer of steel on the wire. It appears then clean and very bright.
Final clutch
With a sharp bit of 0.5 mm thick, the blade does not risk cutting! It will have to refine the cutting edge to bring it back to about 0.1 mm thick. It's a patience job because now that the cutting edge is soaked, the material is much more difficult to remove !
To finish the clutch, you can use different tools:
The points to be taken into account for this stage:
- Sand (or lime) as support with coarse paper.
- Sander with tape.
- Drill with a sanded disc.
- Guide for engagement to protect the ricasso (carefully place it with the same place as before).
- Work alternately both sides of the clutch.
- Regularly check the thickness of the wire and its rectitude.
- We can mark the places where there is too much material with a marker for precise work.
- If a sander is used, absolutely avoid overheating that smoke the blade! Proceed by small keys leaving the steel cool.
- Lower the wire up to a thickness of 0.1 mm.
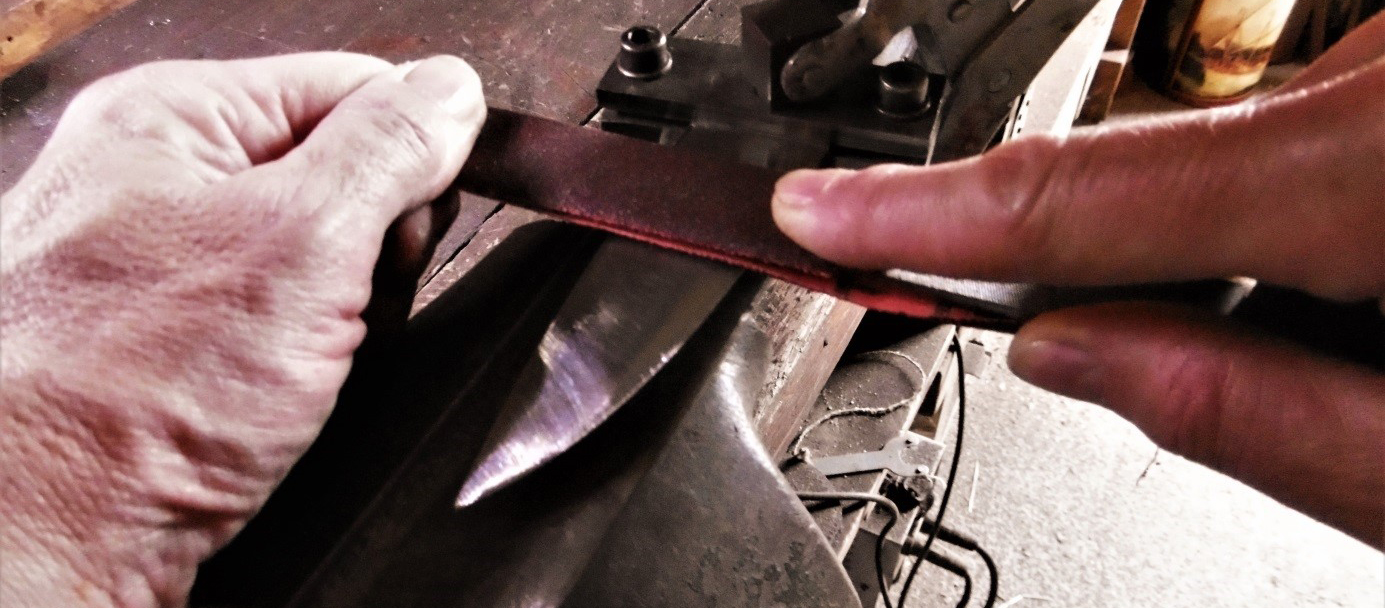
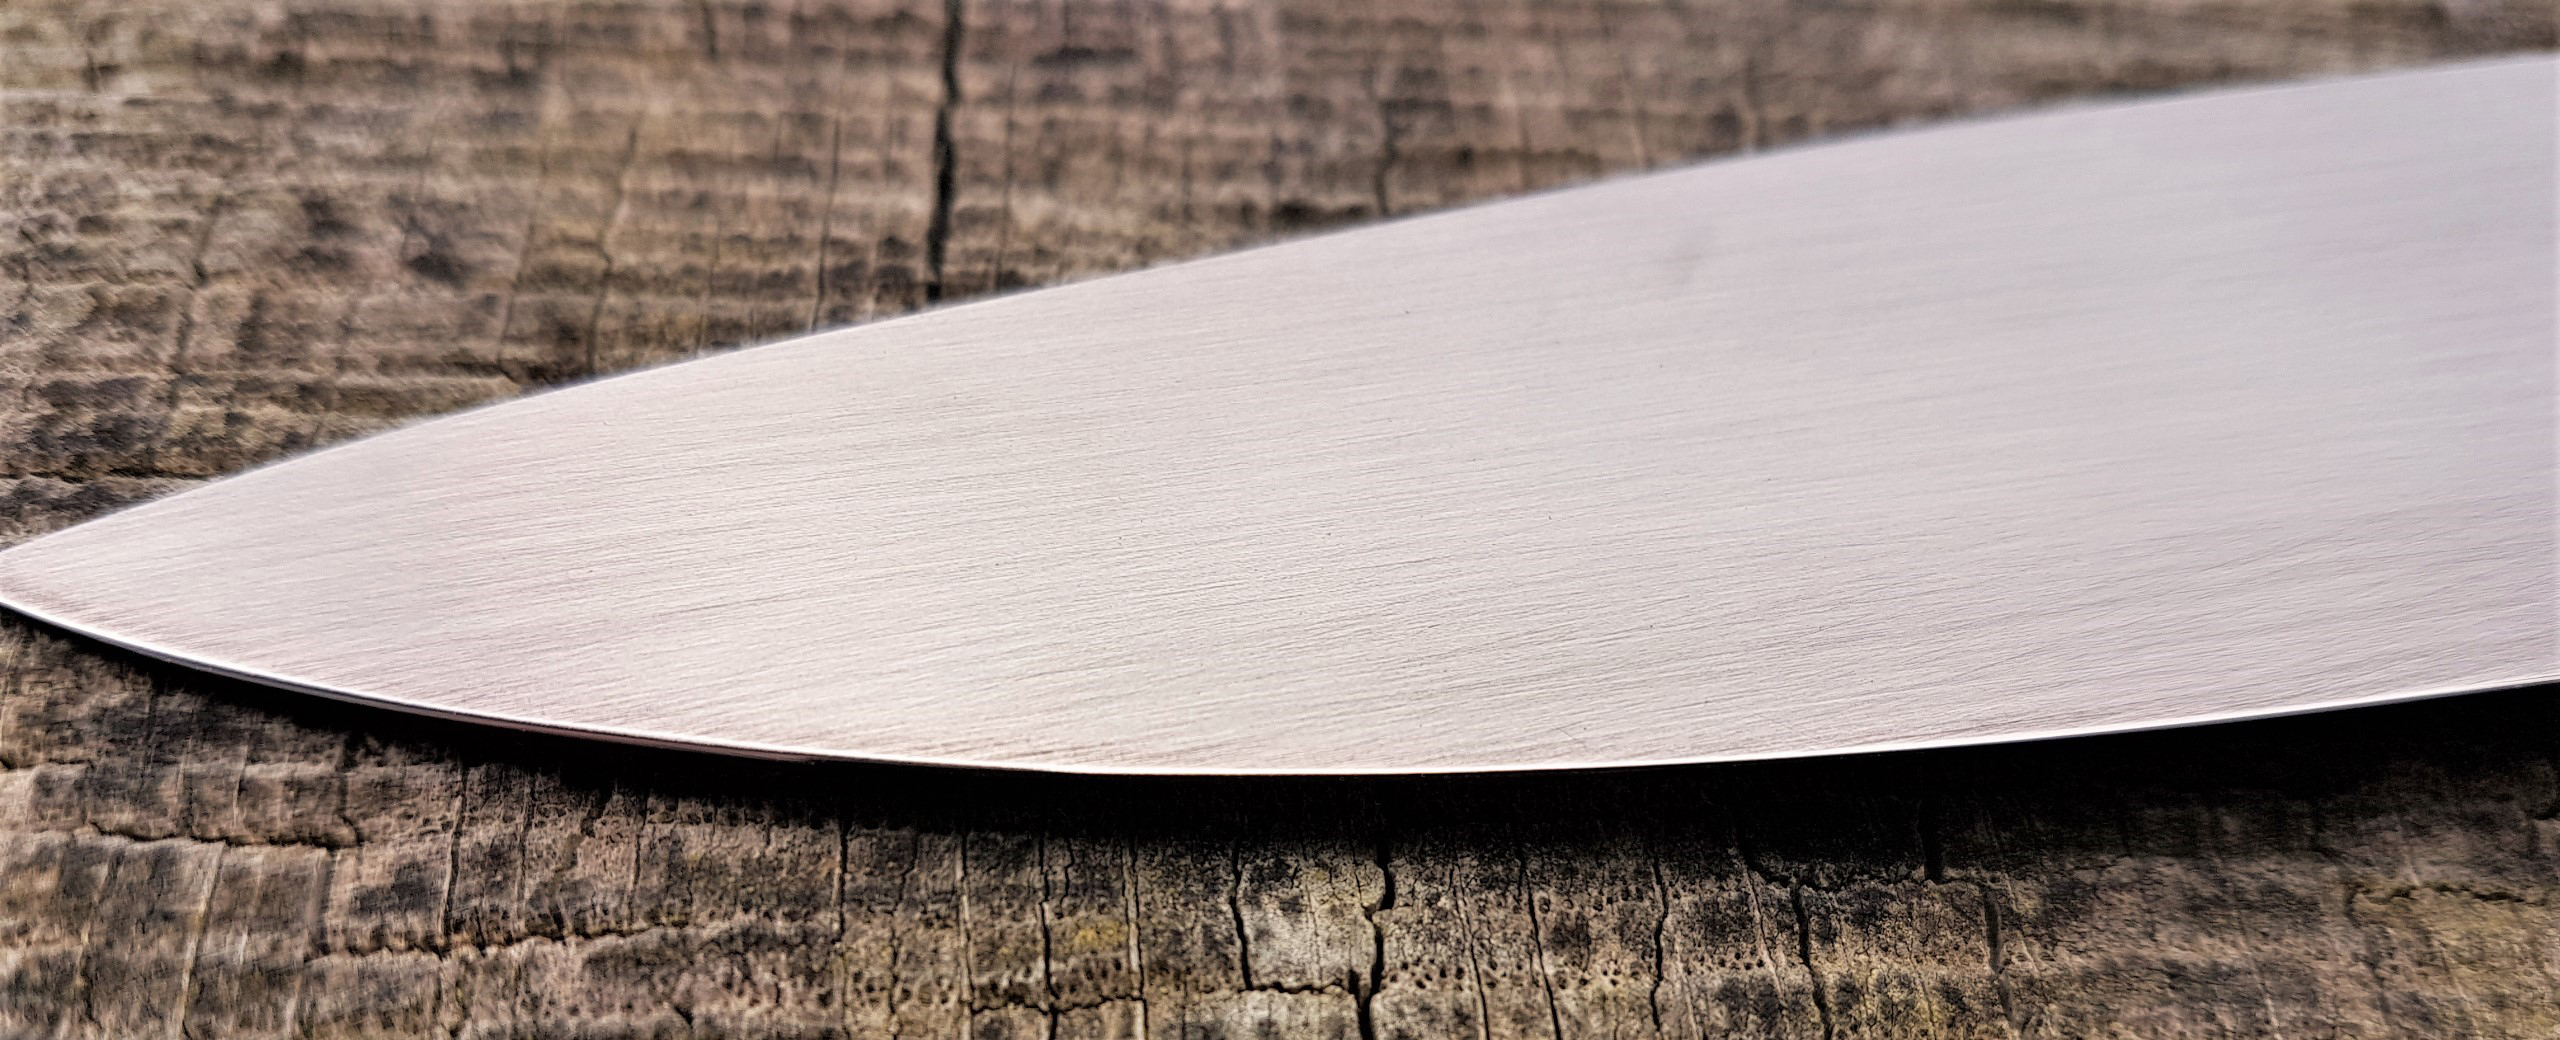
Finishes
Among the many possibilities of finishing, two are particularly accessible and easy to implement:
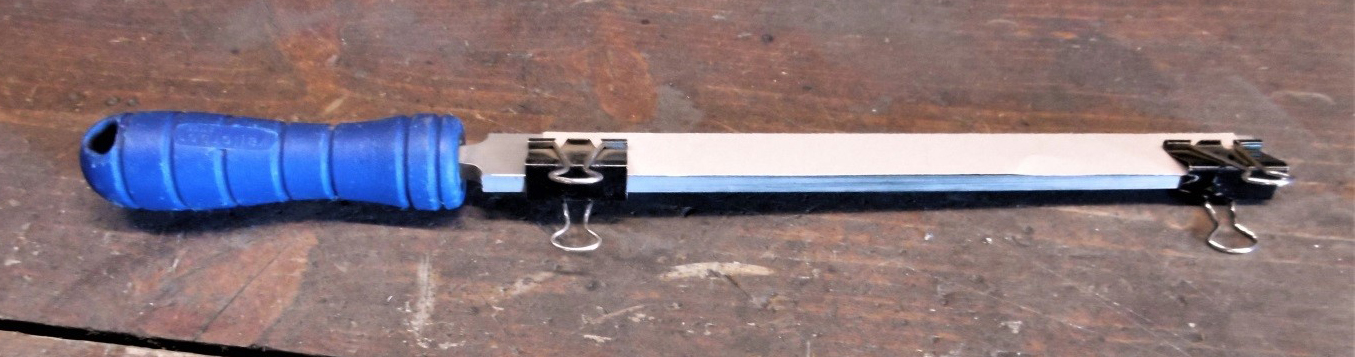
Lent long: the blade is pounded in the direction of length. We first pound the Ricasso, then the blade. It can be done with an average grain (120) at the end (320 or 400).
Mat:Mat: The blade is sanded up to a fine grain (400) and one leaves it one night in the white vinegar. She will come out matte gray.
For drawing long, we can fix bands of abrasives on a file with tongs.
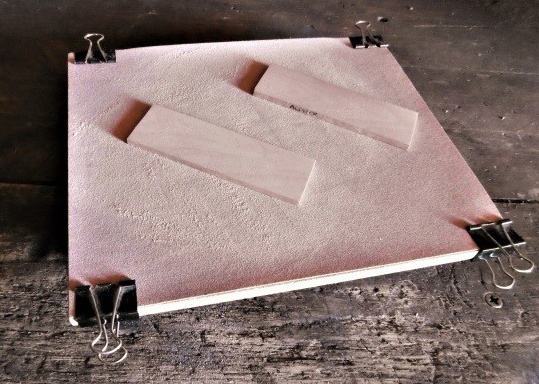
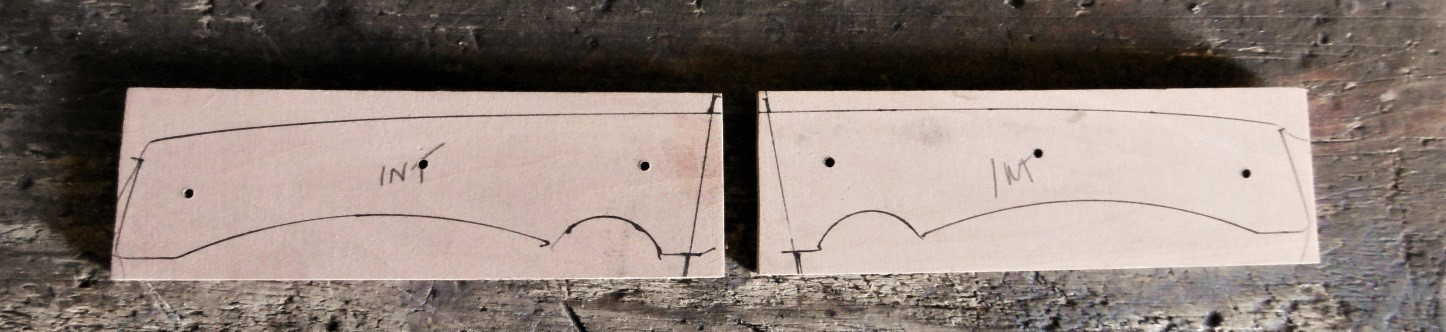
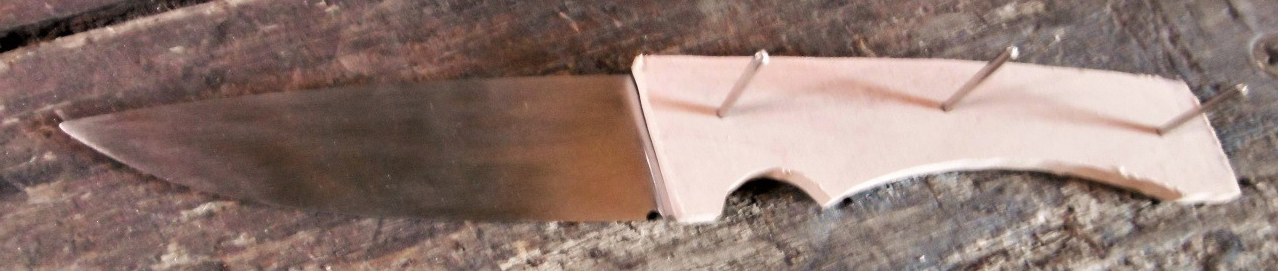
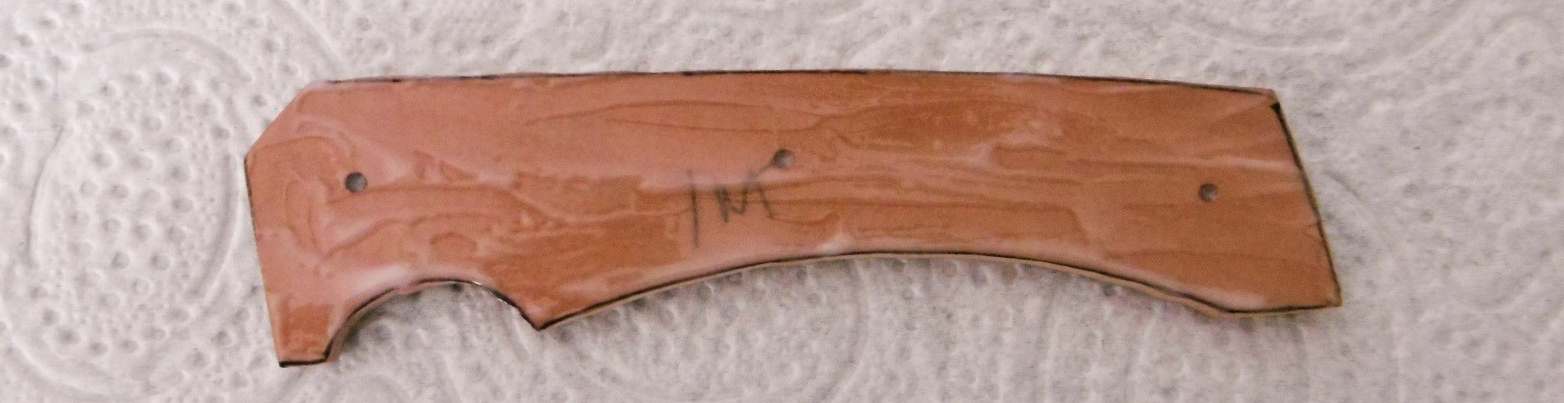
Platelet preparation
It is now time to take care of the pads. We will keep the most beautiful faces for the visible part. A brand inside will serve as a benchmark.
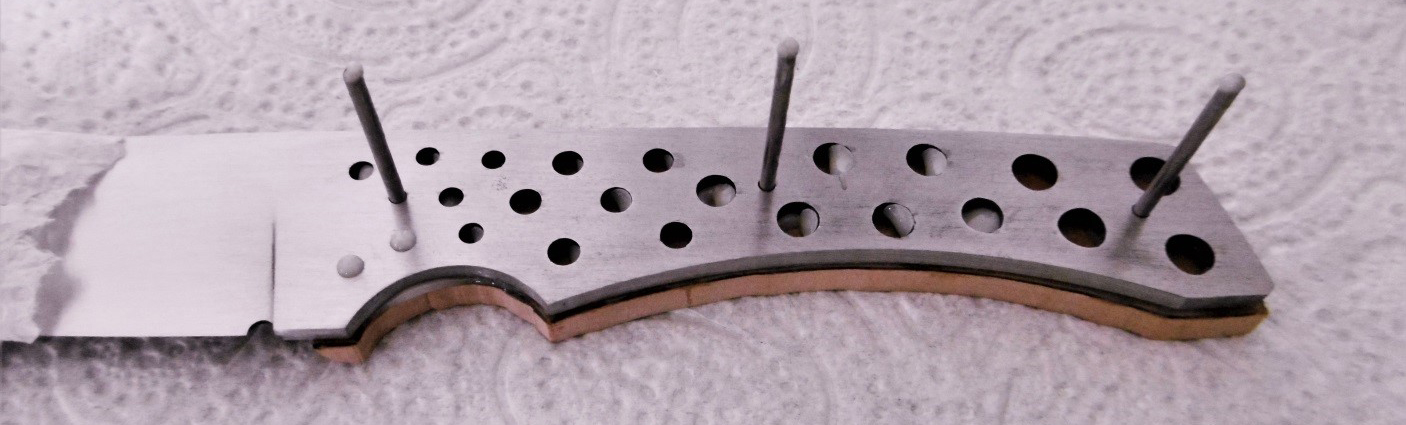
Drilling
Position on a drilling support is positioned:
- A martyr (which avoids bursting the wood of the scale when the drill leads).
- One of the pads.
- The blade.
Everything is securely secured by seal. We can then pierce the holes of the transverse nails.
Before disassembling, we will post the outline of the sole on the scale to guide cutting. Draw a parallel line at the edge of the ricasso for the formatting of the front of the handle.
Coarse cut
By guiding contours previously drawn, roughly cut the pads keeping a small margin. All the cutting means can be used, for example:
- Small wood saw.
- Bocfil.
- Sawing saw.

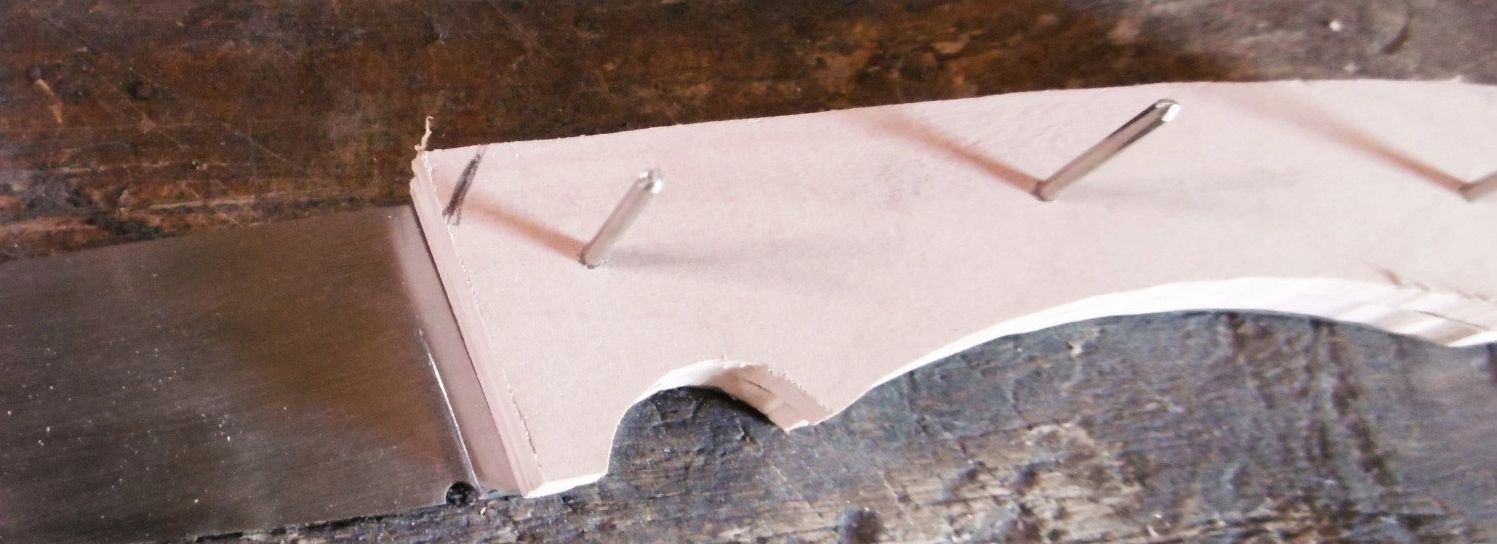
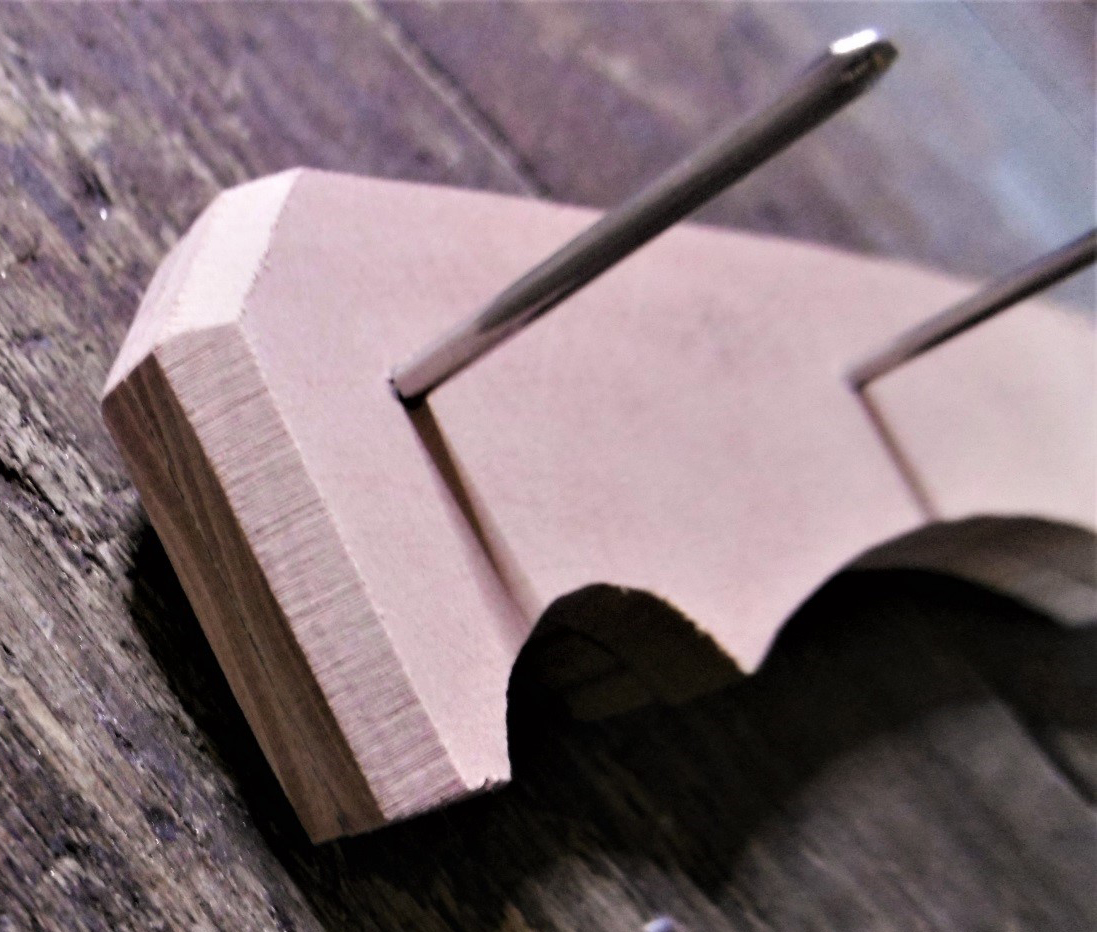
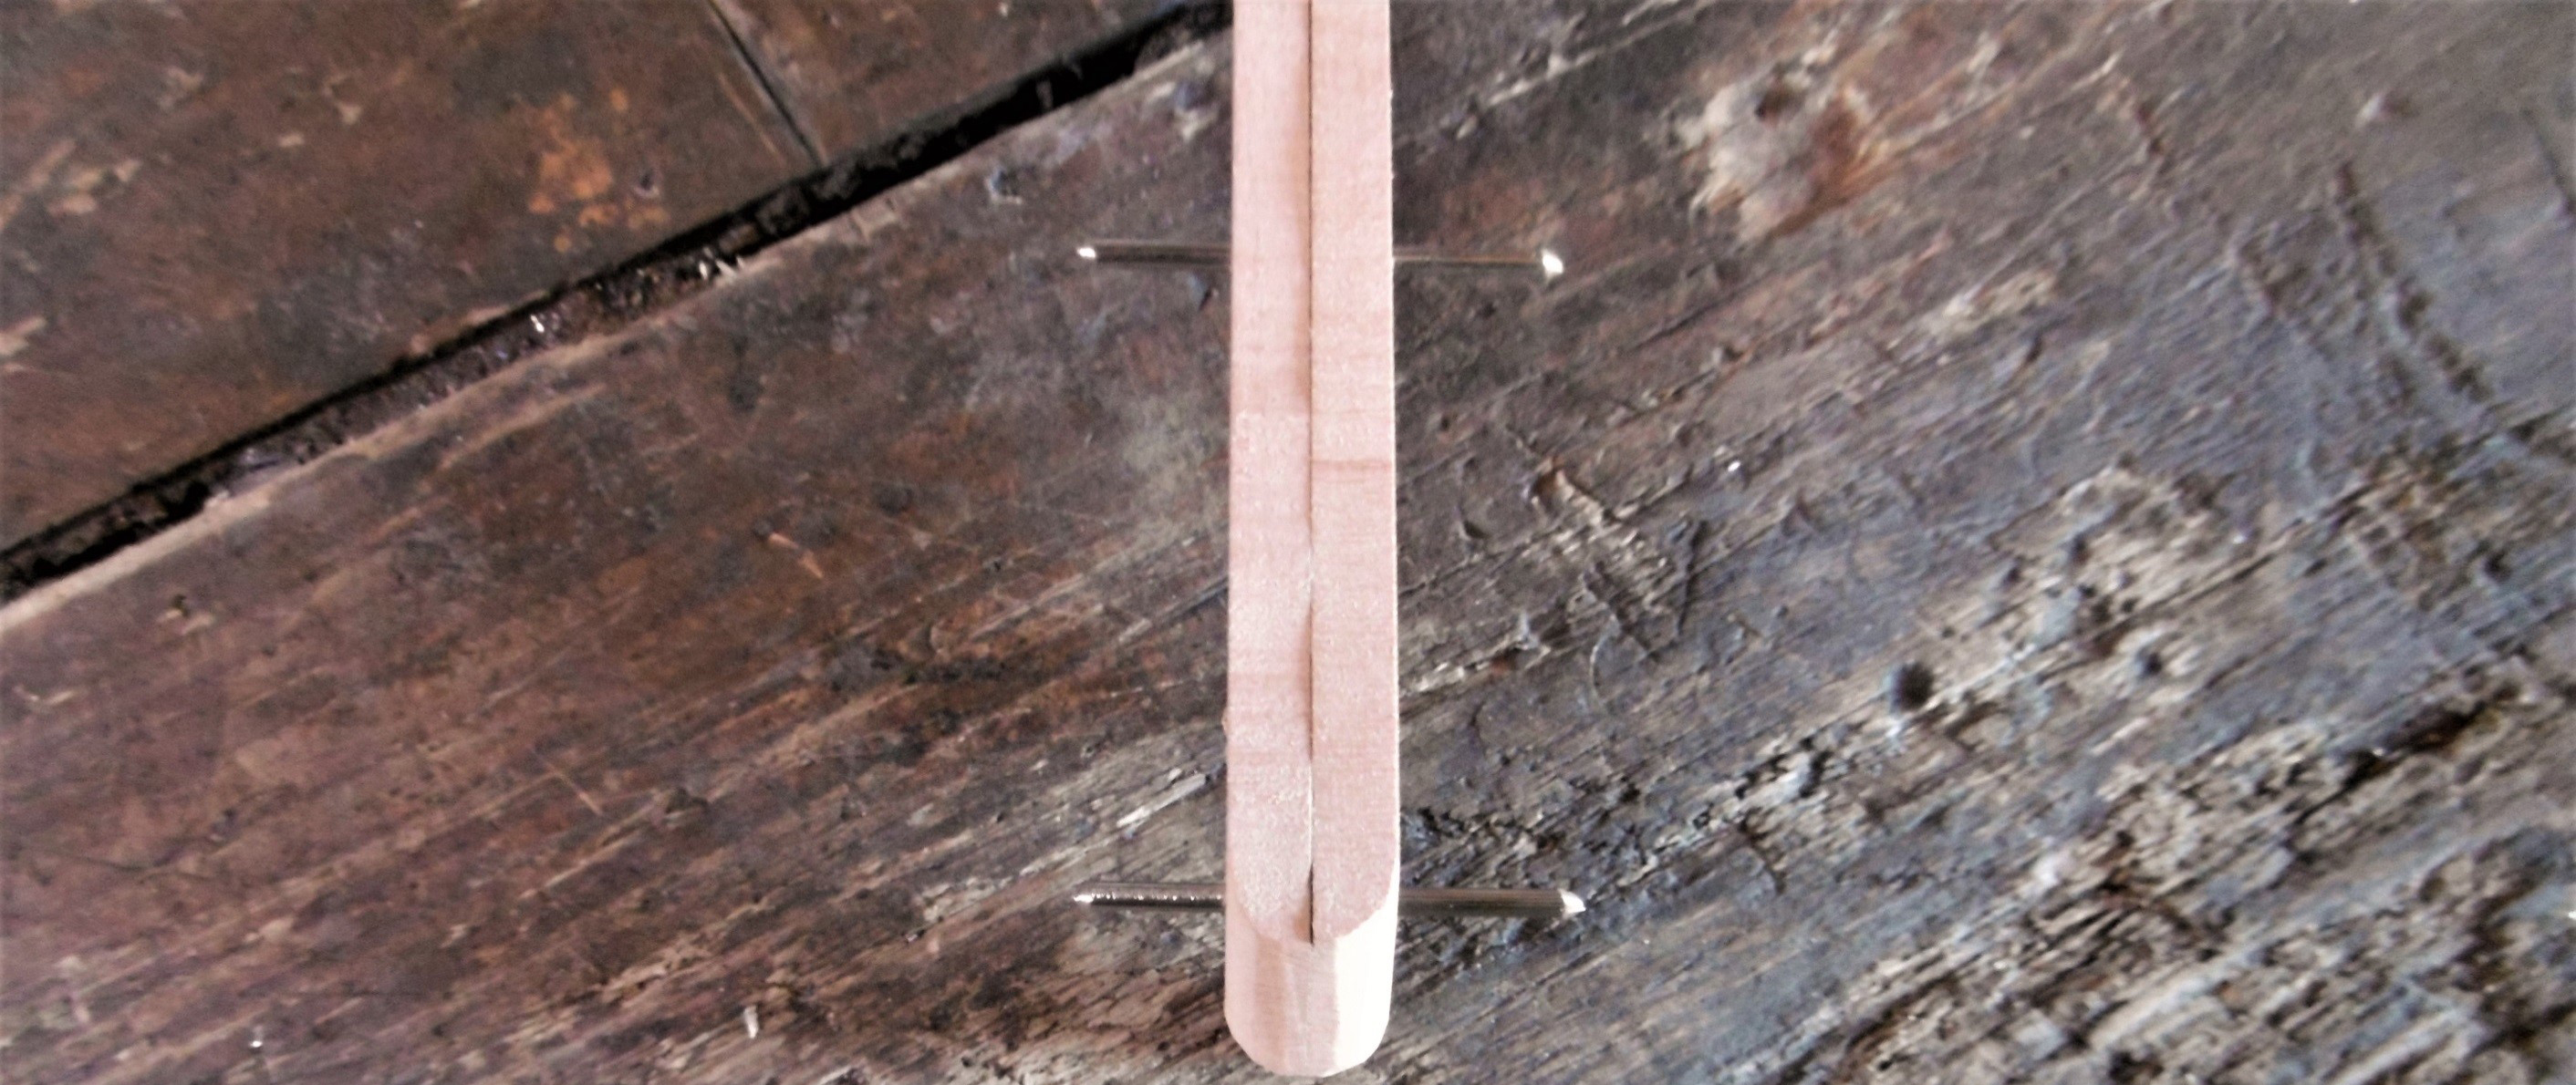
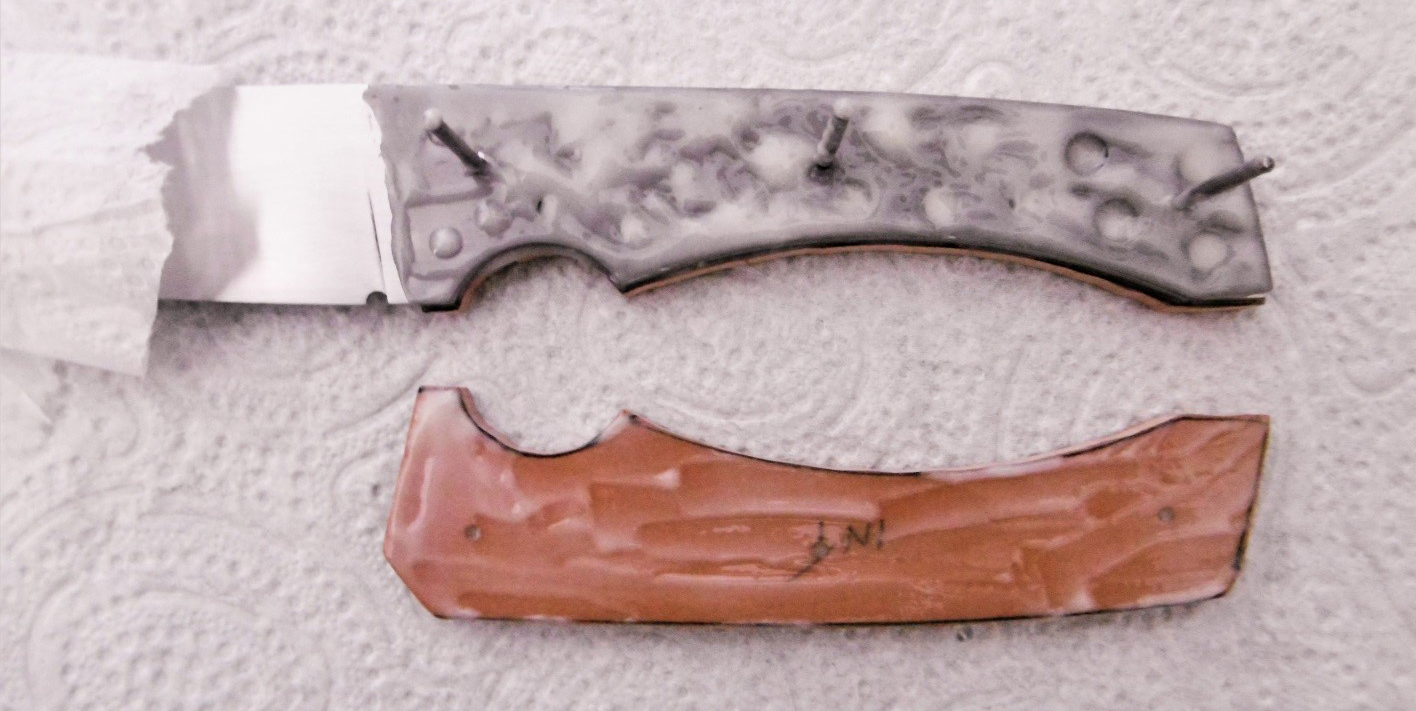
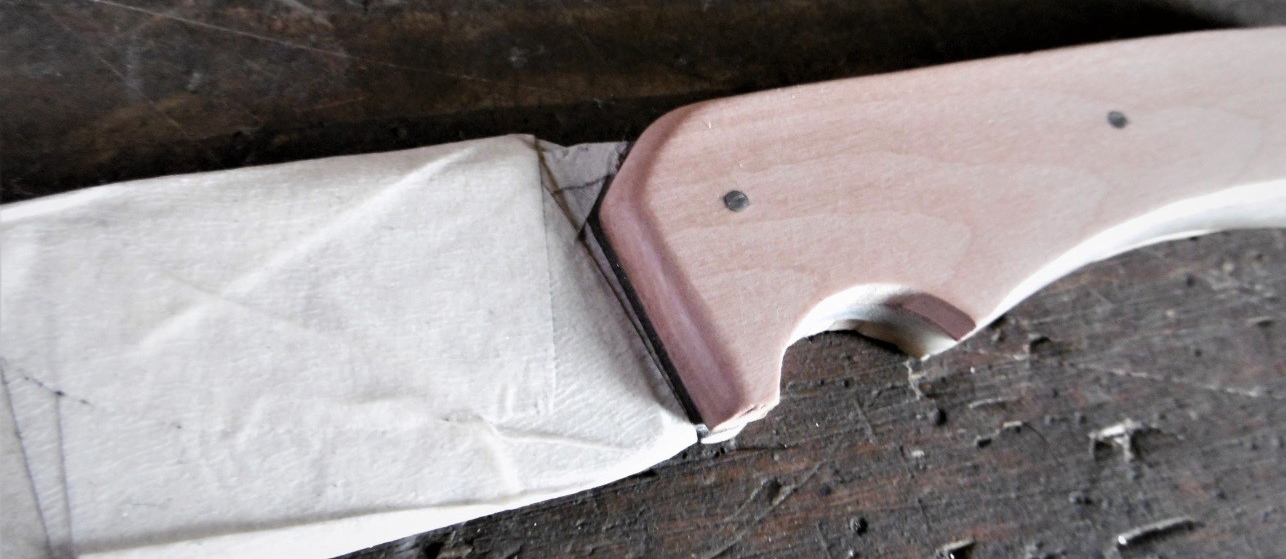
Formatting the front of the pads
Before the final assembly of the knife, you have to work the front of the handle because once the platelets are pasted, this area will not be accessible!
Check with a white mounting that the front of the pads is parallel to the ricon's edge and the distance between this edge and the front of the handle is not too small.
In order to have a good symmetry of the pads, they are solidarized by the passing nails. We start by sanding the front of the pads according to a parallel line at the edge of the ricasso. In a second step, the release at 45 ° at the top of the handle. Be sure to be perpendicular to the platelet face. This makes it possible to establish the final outline of the front of the handle.
Go back to white to draw the small bevel at 45 °. Then sand to remove the excess material.
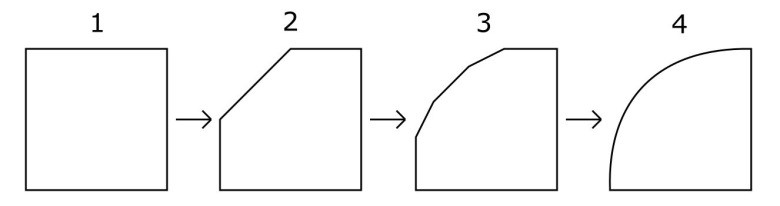
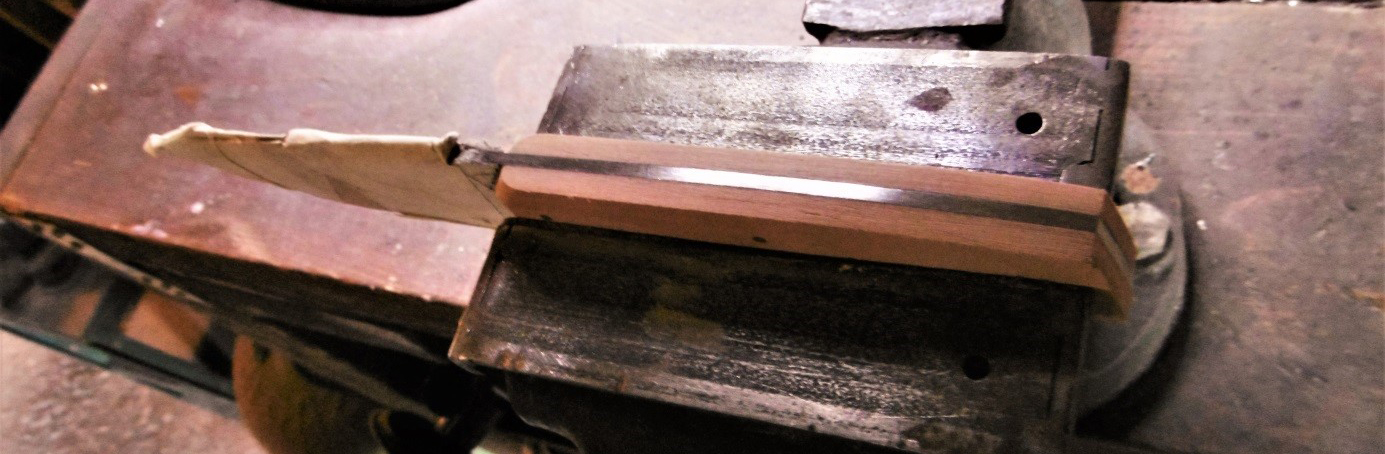
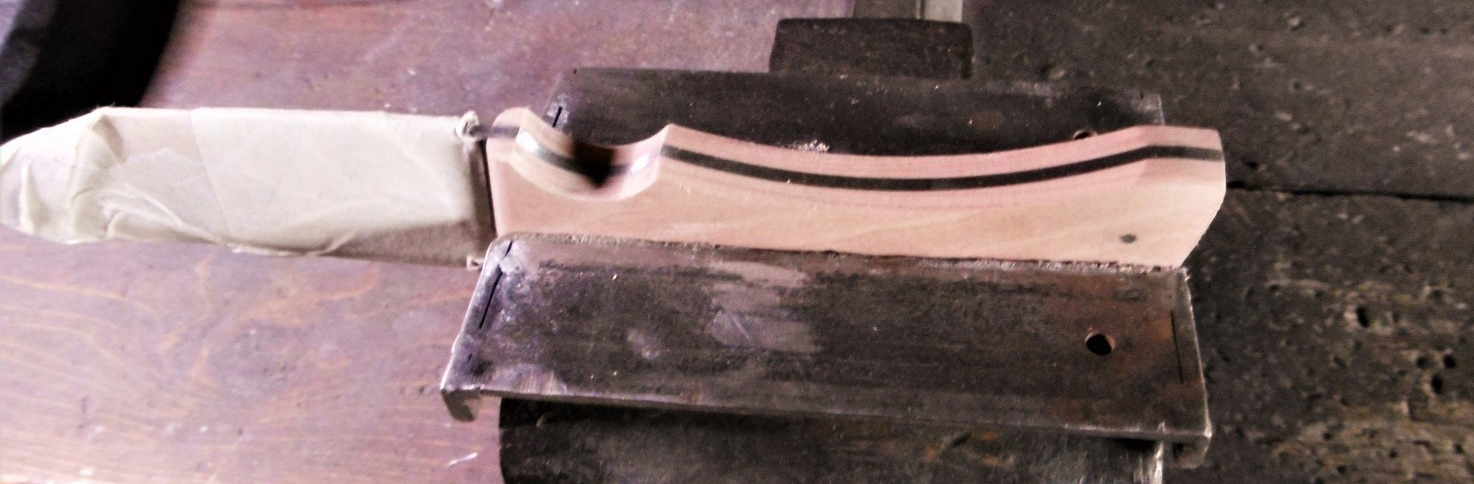
We must now round this part of the handle. For this:
- The angle is broken by creating a bevel (chamfer) at 45 ° (sanding hold or sander with a grain 80).
- Then we break the two angles thus created again.
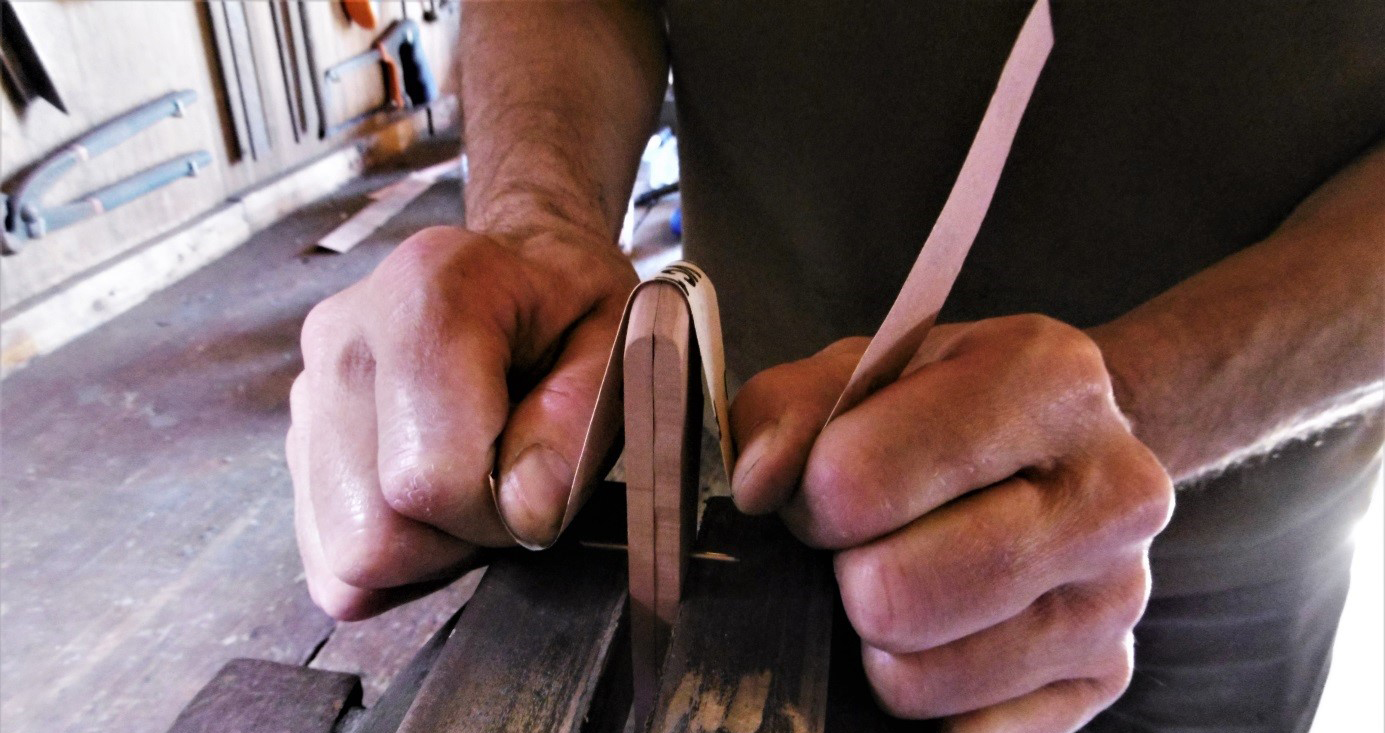
- The two platelets are fixed in a vice (with mordaches to not mark the wood).
- Then we round the whole with alternative movements with a strip of abrasive paper (grain 120).
- We then refine with a grain 240, then 320.
- Finally, we pass the steel wool 5/0.
Platelet Collage
Equipment for collage
The bonding of the platelets on the sole is the simplest assembly method. The epoxy glue is ideal for this collage. There are several types or brands. The Araldite has proven itself. A slow jack glue allows (in addition to its strength) to assemble the knife without the stress related to the time factor.
For this operation, it will be necessary to gather some material:
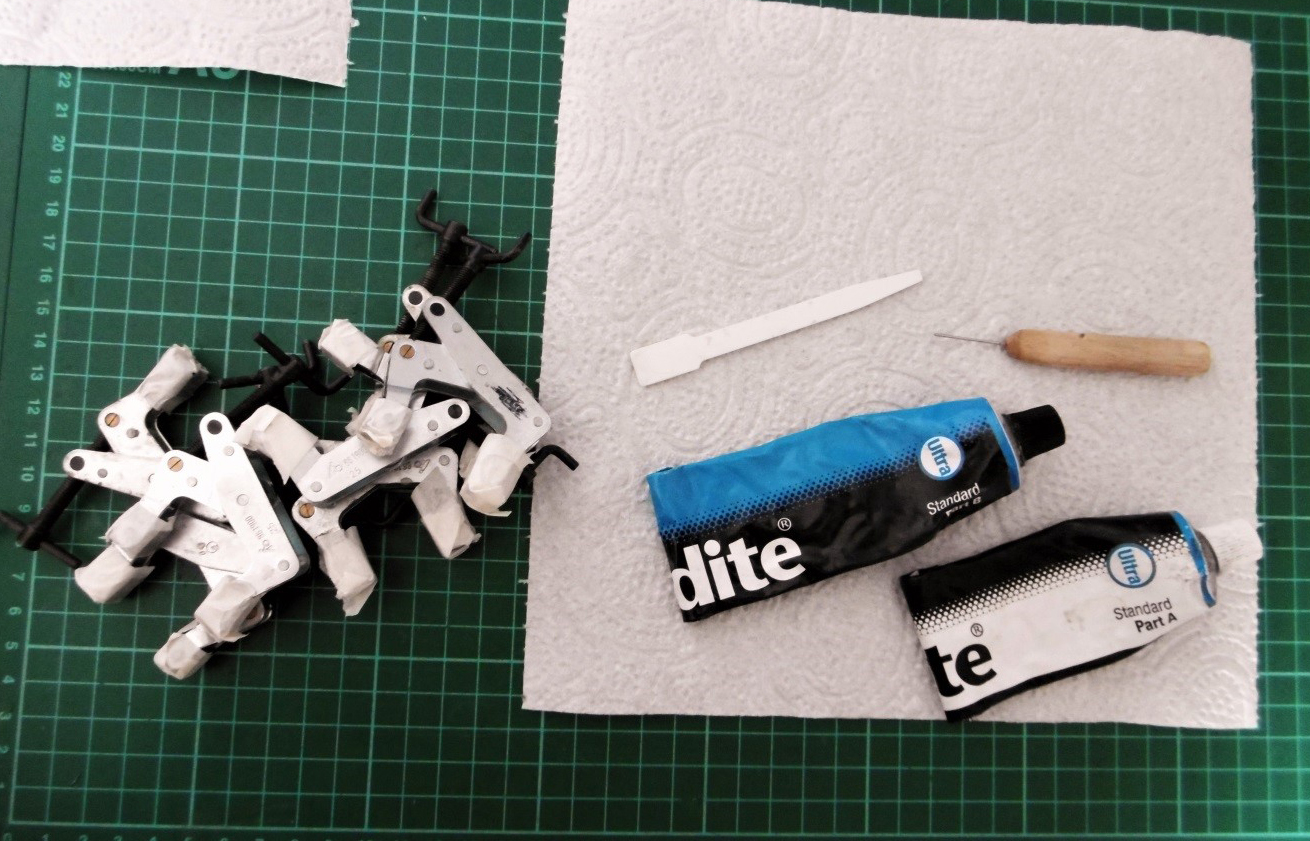
- The glue (two tubes or a double syringe).
- Alcohol is the solvent for cleaning (before taking).
- A spatula to spread the glue.
- A needle or a small paper club to put glue in the holes of the nails.
- Disposable gloves for manipulations.
- Seal or tongs spring for maintaining the whole during the hardening phase of the glue.
- From the paper towel for cleaning ..
Warning: the Araldite does not like it too much! The specifications give a limit of use of + 80 ° C. Beyond, the glue begins to soften! It is therefore necessary mandatory be sure to limit the heating when using mechanical sanding. Do the operations by small keys with rest times to allow the material to cool.
Preparation
You have to make sure that the faces to stick plates are clean, dustless. They can be passed to alcohol to make sure. Wait for complete evaporation of alcohol before collage. The sole must be degreased. Also go to alcohol.
The degreased or cleaned parts should no longer be affected with the fingers.
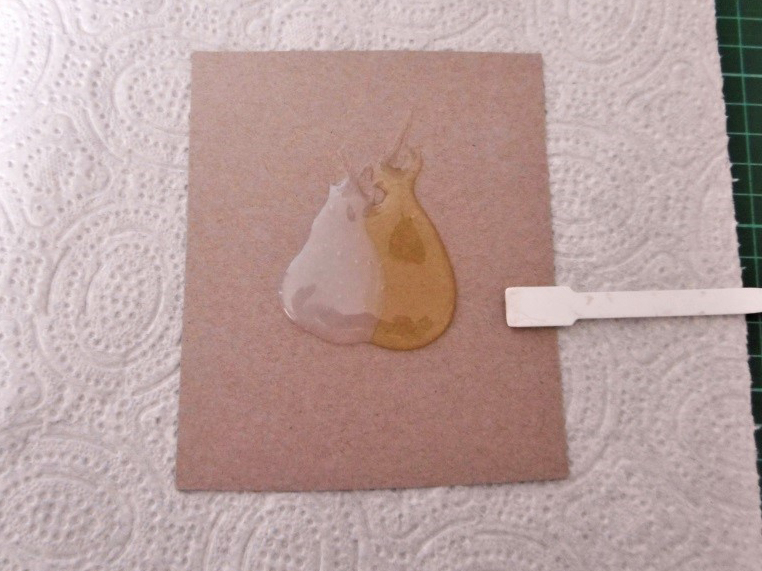
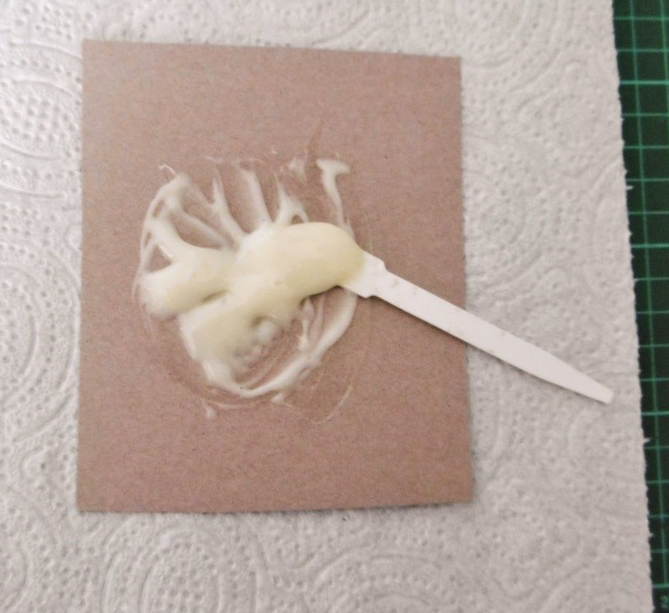
Prepare the glue by depositing on a cardboard or a scale of wood The two components of the glue in equal parts by volume. Mix thoroughly with the help of the spatula for at least 30 seconds.
The quantity is to be evaluated to allow the sizing of the two faces of the pads, both sides of the sole and filling the holes of the sole. In this example, count about 6 grams of glue.
Assembly
Here is the sequence of the different operations:
- ENGINE ONE scale, including holes.
- Locker one end of the nails.
- Insert it into the holes of the scale.

- Locker the corresponding side of the sole.
- Thread on the nails.
- Get off at the level of the scale.
- Snap the remaining side of the sole, including holes.
- Locker the second scale.
- Thread on the nails.
- Get off at the sole.
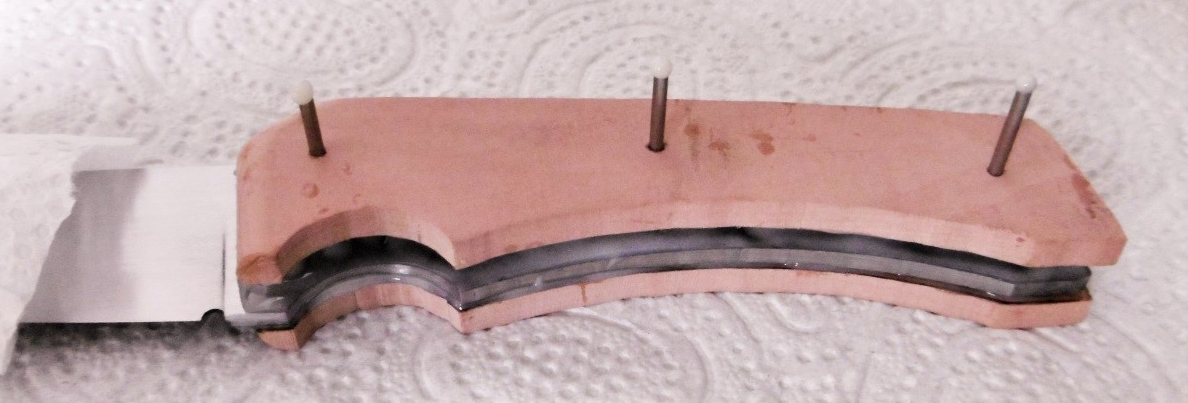
- Push the nails into the holes to refocus them.
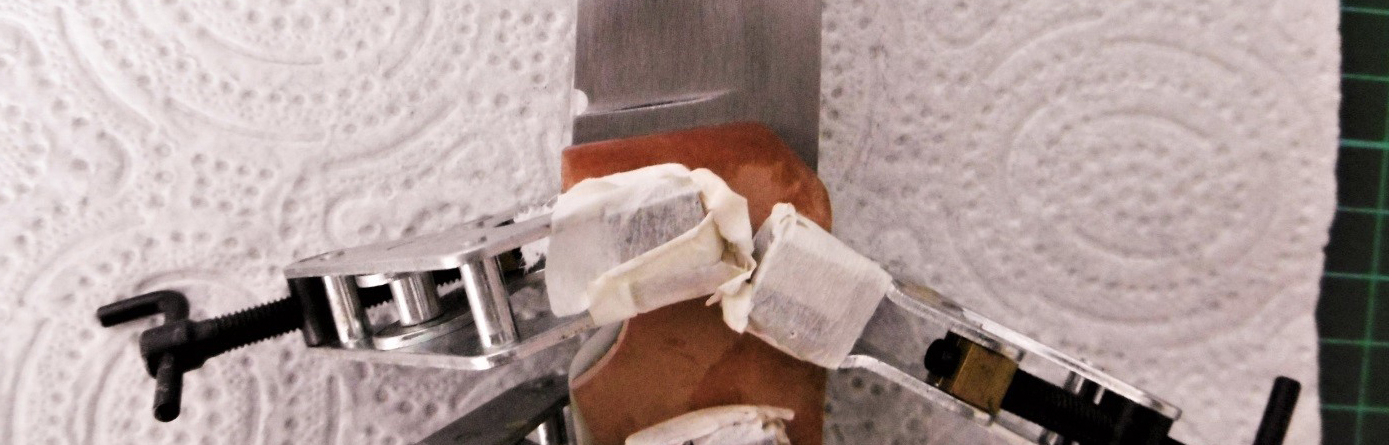
- Compress the whole with the seal.
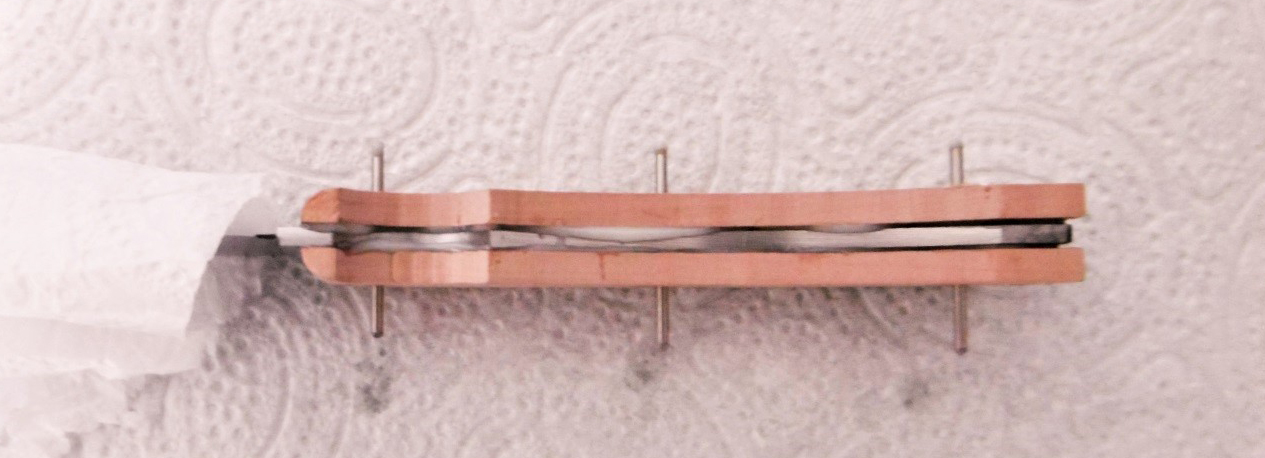
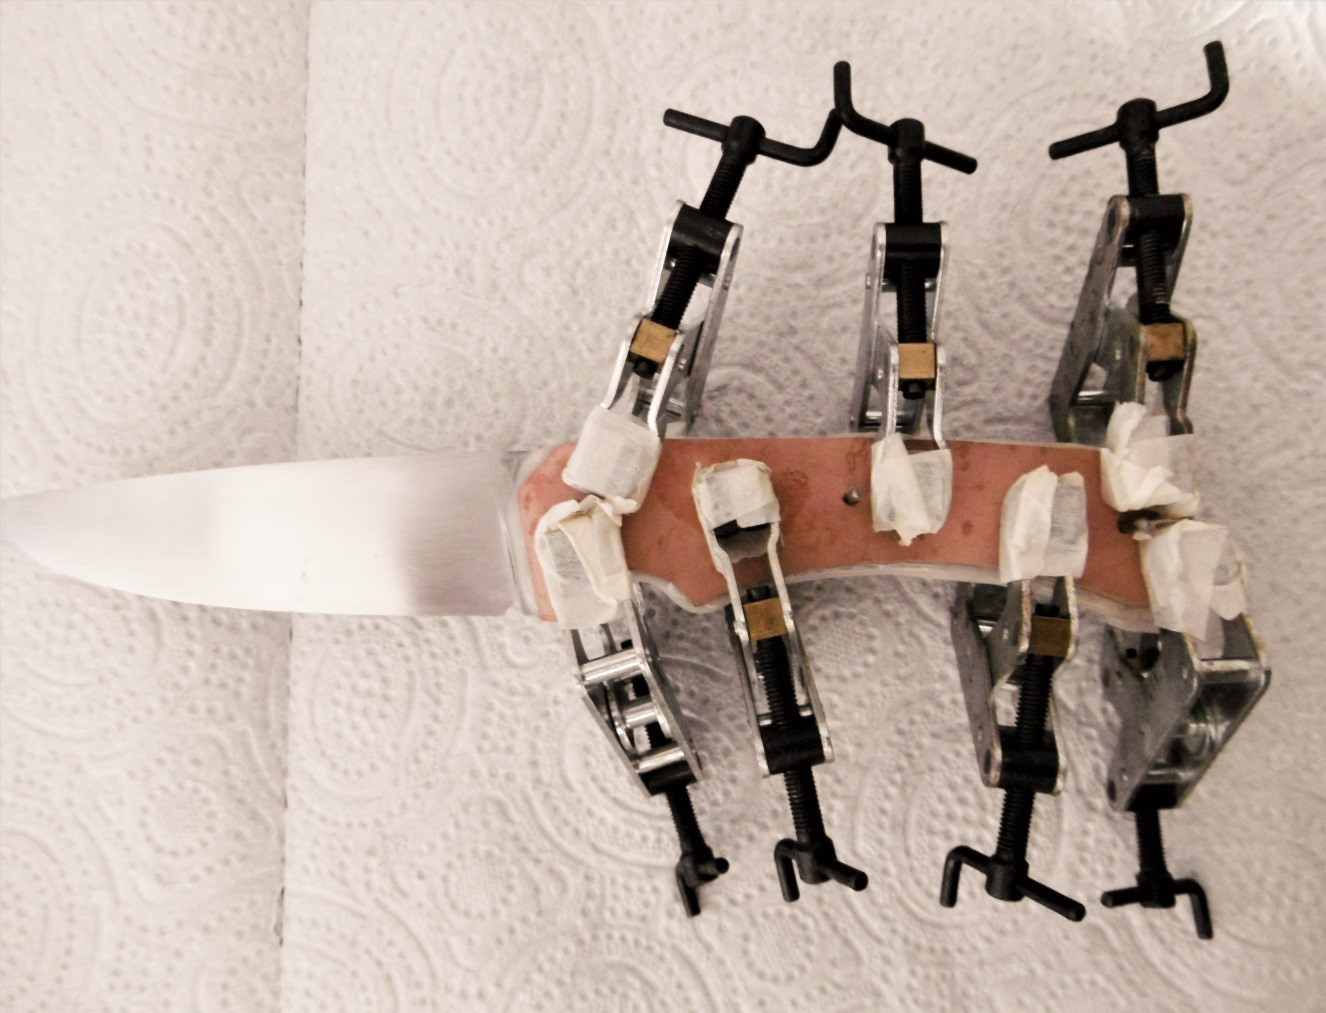
- Clean the junction handle / Blade, before the glue solidifies. Spend a paper towel several times with alcohol. Changing each time towel to avoid leaving marks on the blade.
- Put the set in the vertical position (blade at the top) for a minimum duration of 14 hours so that the glue solidifies. The vertical position blade at the top avoids that any glue burr flows on the blade.

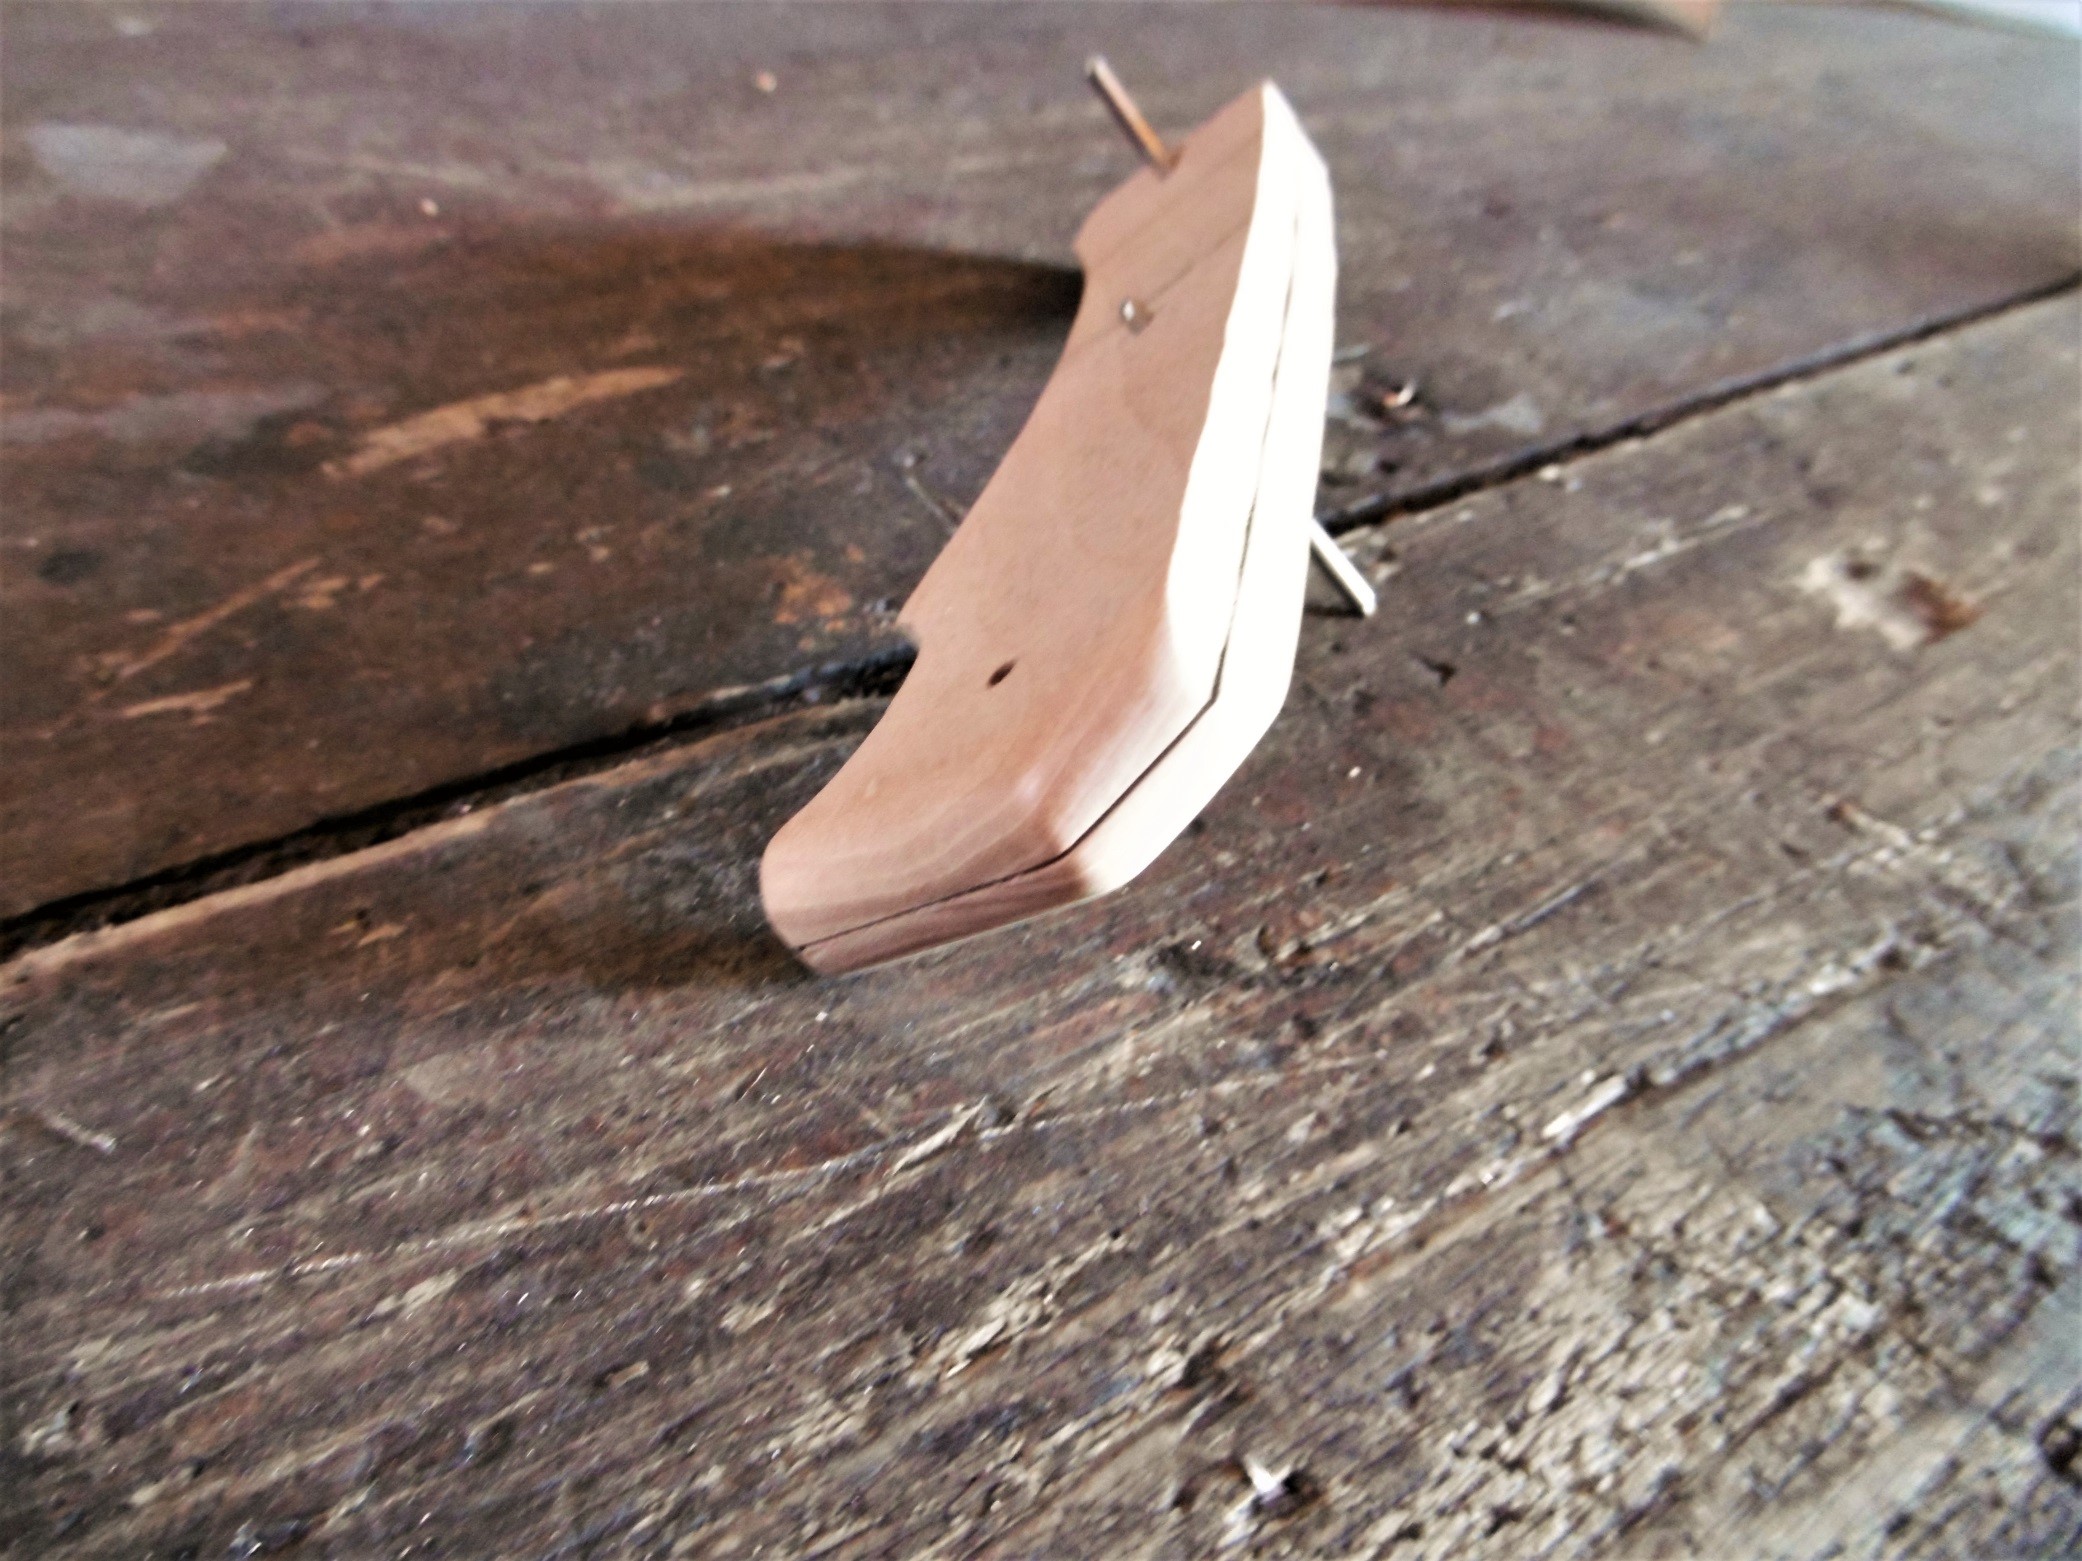
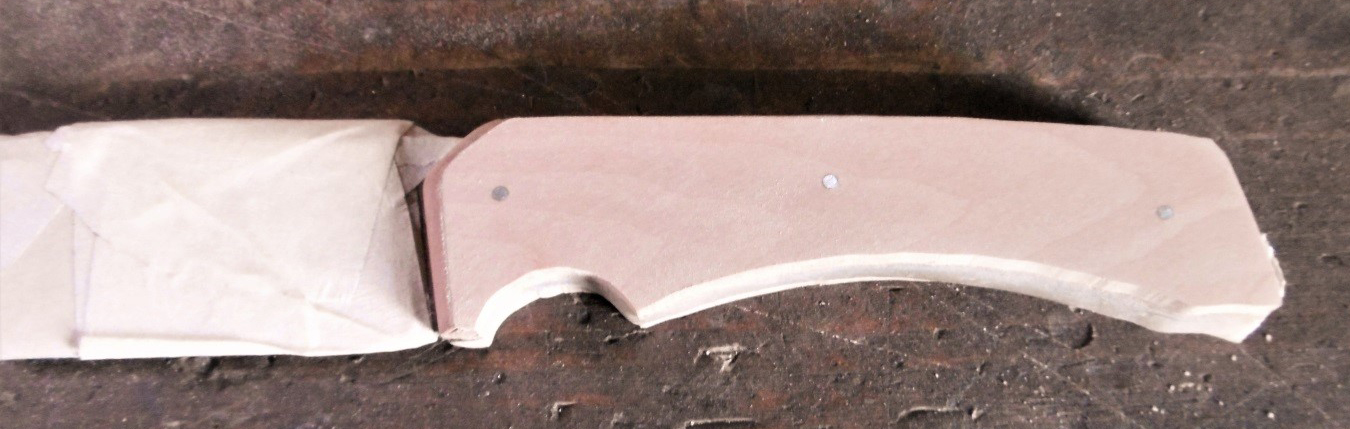
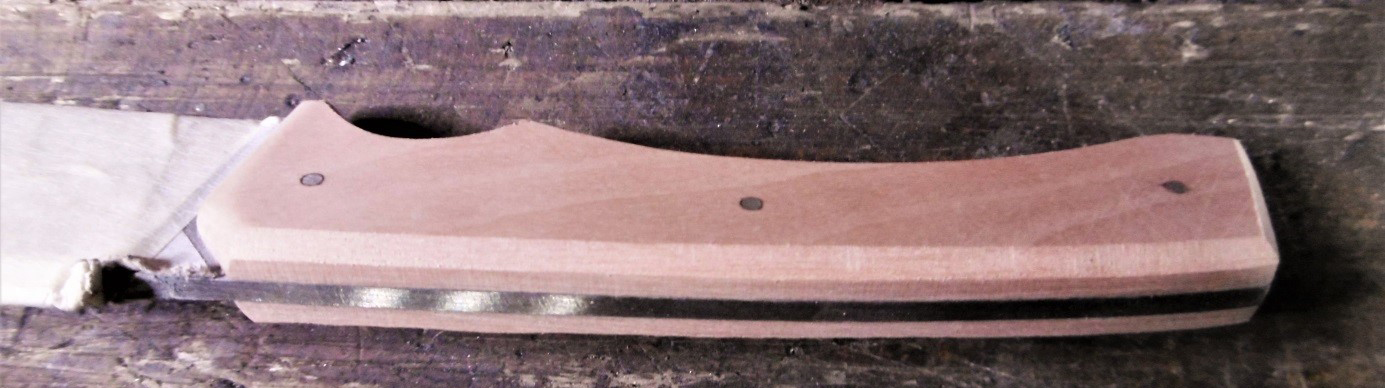
Finishing handle
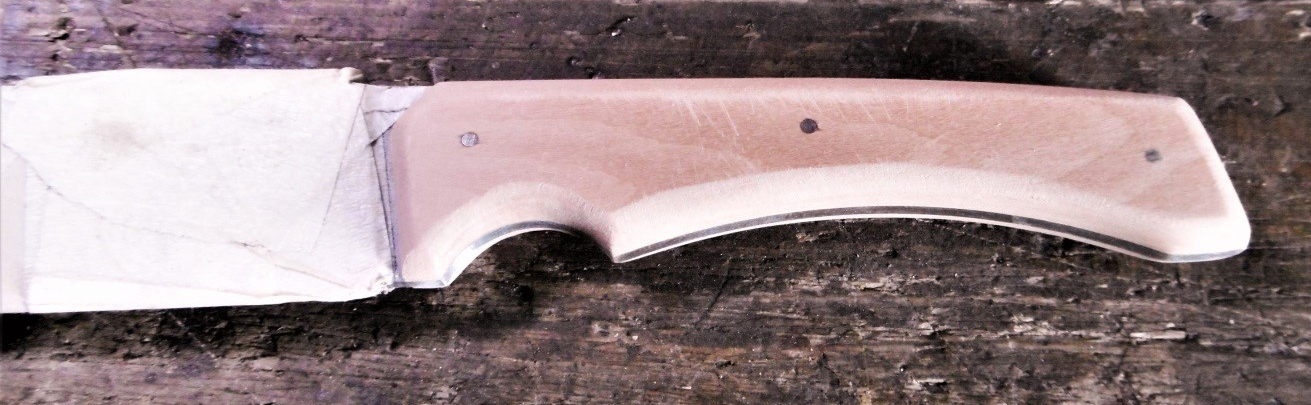
Here is the assembled knife, but not very presentable or functional: nails that exceed, adhesive residues, glue burrs ..
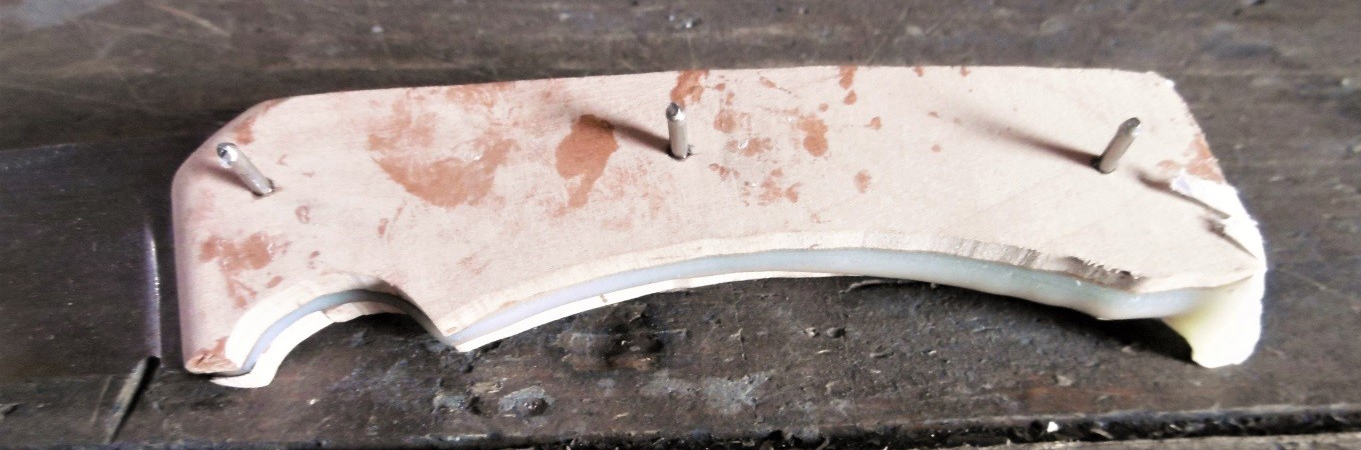
For subsequent operations, it is wise to protect the blade, scratch when sanding the handle soon arrived. A coarse cardboard and adhesive casing will do the trick. The adhesive will arrive at 1 or 2 mm from the junction handle / Ricasso.
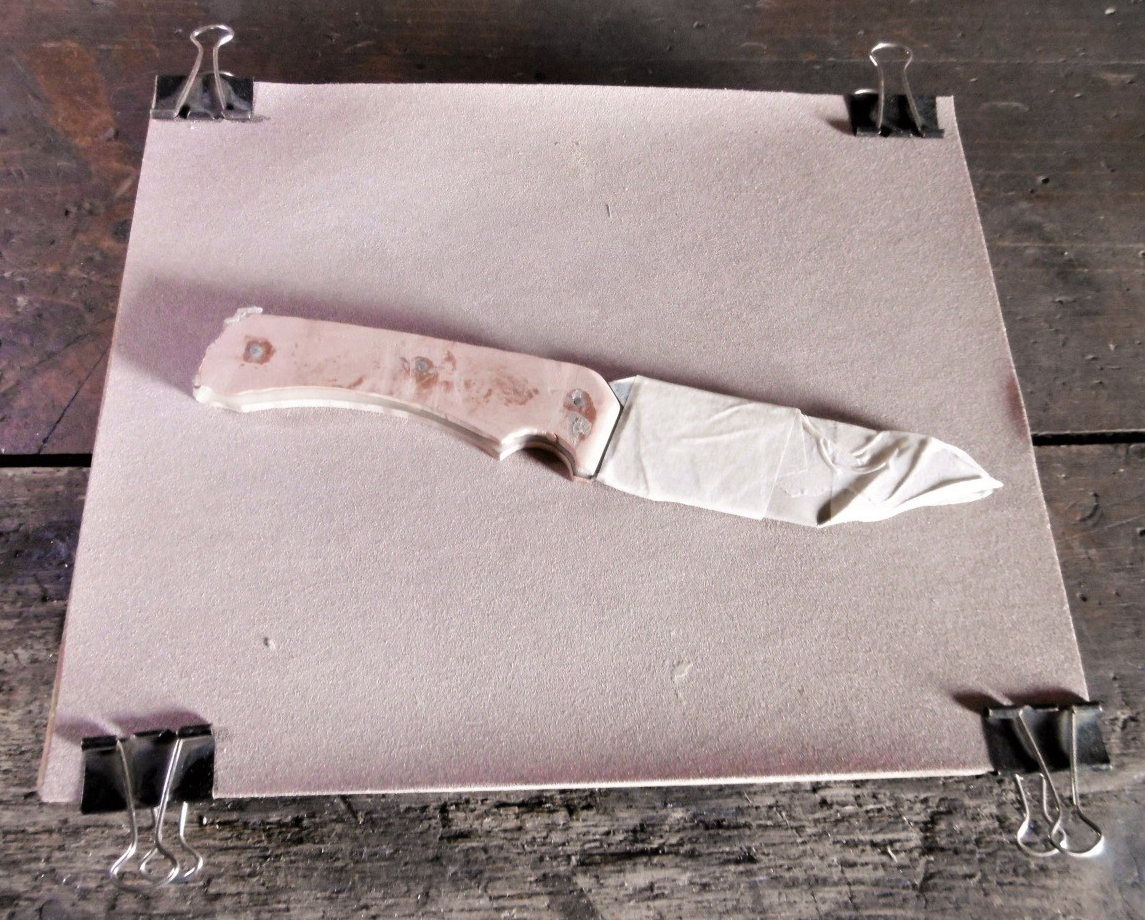
Sanding flanks
It is necessary to start by cutting the nails, then the arraser closer to the platelet surface. Then we pass the flanks to the "marble", grain 120, then 240 and 320 ..
The area at the front of the handle will be taken up with the finest abrasive to remove glue residues.
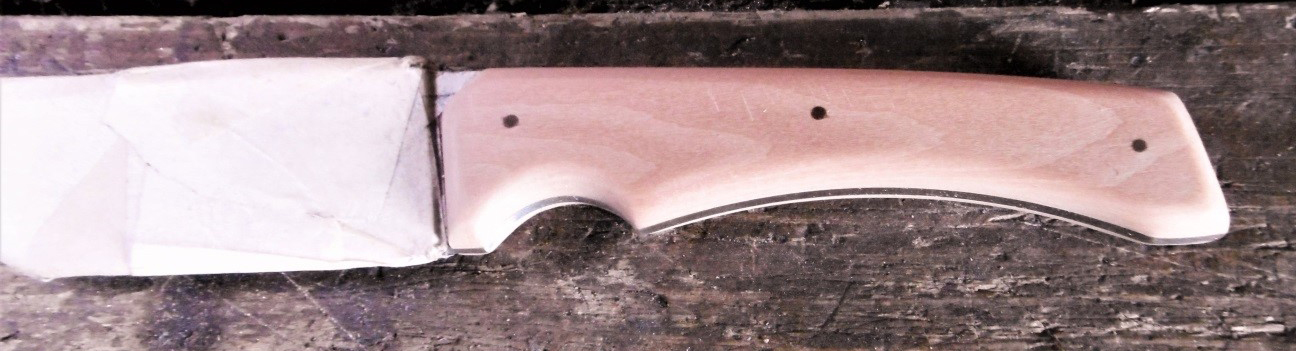
Sanding of the detour
Now we will turn off the handle to bring it back to the soleplate. Before sanding, crooked glue burrs can be removed from the cutter or knife, be careful not to damage the pads. Then we will use sanding to finish.
BRAZAGE OF ANGLES
In order to have a handle allowing a pleasant grip, we will break all the angles again and round up all the edges, identically to what has been done for the front of the handle.
To round off the angles of the concavities, it is easier to use a fine cloth band on fabric bracket (much more flexible and expandable than paper).

Finally, a fine paper (grain 320) will be ironed and then the 5/0 steel straw on the entire knife for a flawless finish.
Protection handle
To improve the rendering of the handle and protect it, we can brush with a mixture of Linen oil / Terebenthin essence (50/50). Wipe the surplus, let it dry for a few hours and go to the 5/0 steel wool.
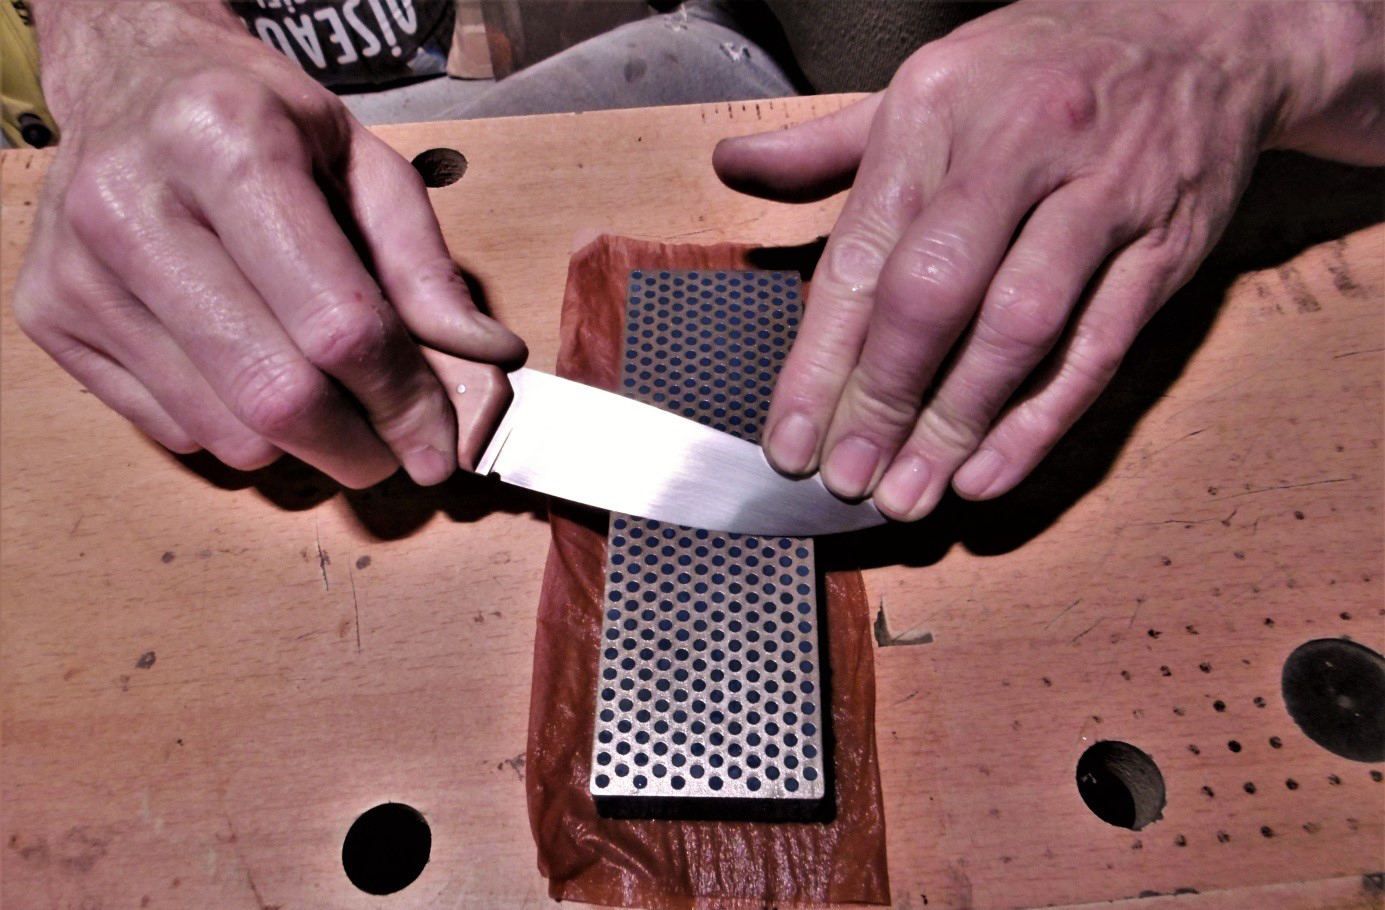
Sharpening
To finalize this knife, it remains the sharpening. The ideal is to have a game of three stones: coarse, fine and extra-fine. Natural, synthetic or diamond stones can be used.
We start with a coarse stone to create the thread. We will give more biting to the blade with the fine stone and extra fine.
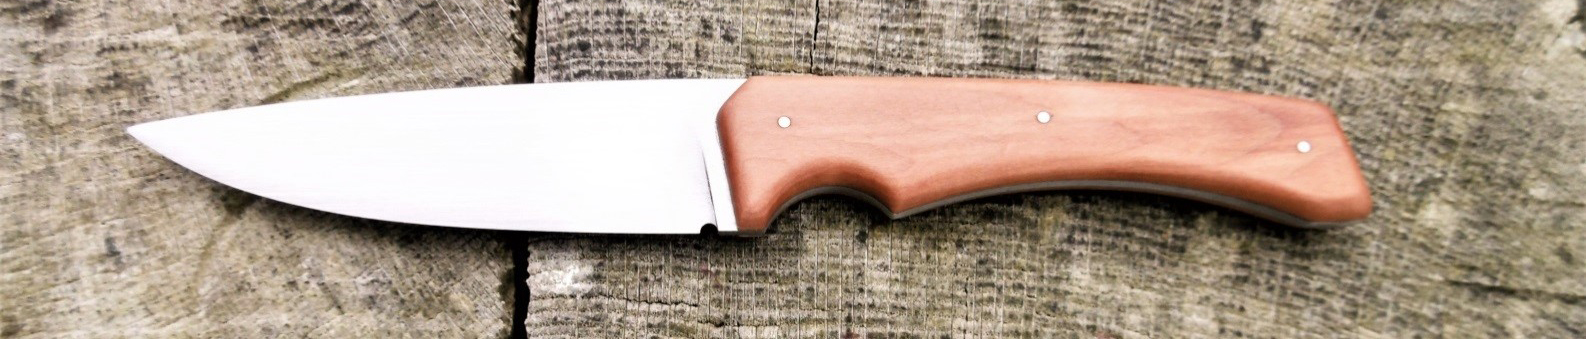
It's over
This is a quality utility knife, simply realized.
